Samsung has long been at the forefront, delivering cutting-edge devices. One of the many customizable features that enhance the overall user journey is the ability to adjust screen resolution.
Whether you’re seeking crisper visuals, better performance, or a balance between the two, changing the screen resolution on your Samsung phone or tablet opens up a realm of possibilities.
In this guide, we’ll walk you through the comprehensive step-by-step process on how to change the screen resolution on your Samsung phone and tablet.
Also Read: How To Access The Sound Equalizer On Samsung Phone & Tablet
How To Change Screen Resolution In Samsung Phone & Tablet
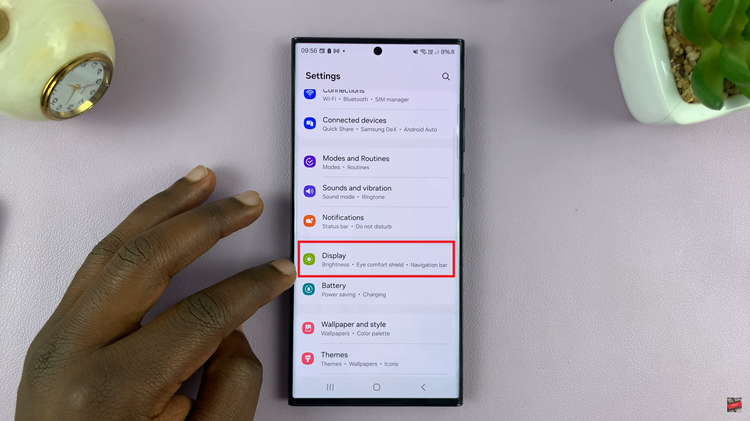
The first step is to locate the Settings app on your Samsung device. Within the Settings menu, scroll down to find the Display option. The Display settings house various features related to your device’s screen, including brightness, font size, and, of course, screen resolution.
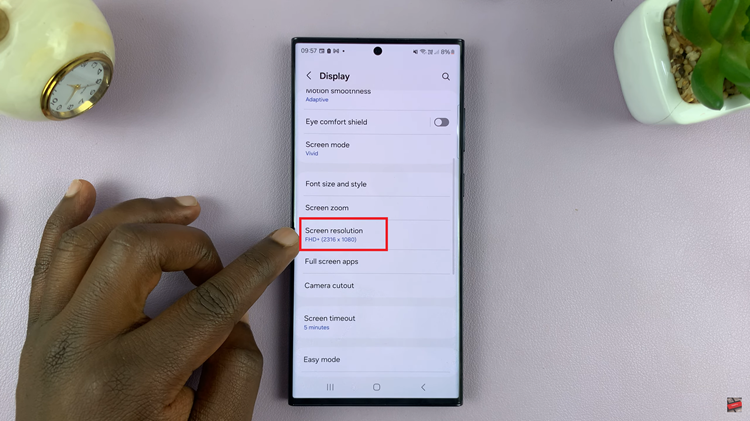
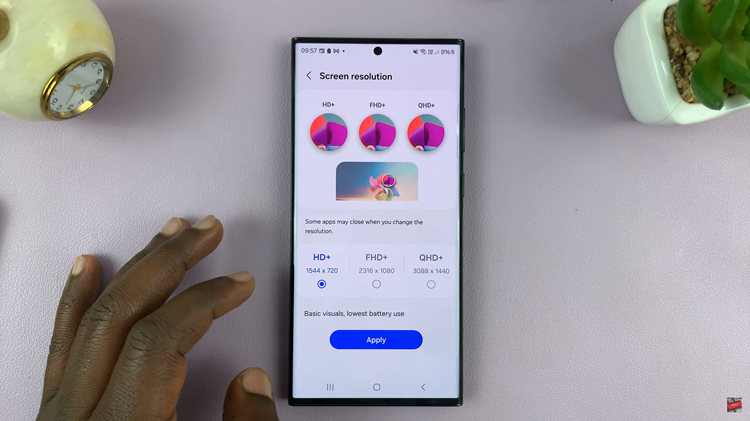
After entering the Display settings, continue scrolling until you find the Screen Resolution option. This is the gateway to adjusting the clarity and sharpness of your device’s display. Once located, tap on it to move to the next step.
Upon entering the Screen Resolution menu, you’ll be presented with a list of available resolution options. Each option represents a different level of clarity, with higher resolutions offering sharper visuals. Select the resolution that best suits your preferences and needs.
After choosing your desired resolution, the final step is to apply the changes to your device. Tap on the “Apply” button to implement the new resolution settings.
Learning how you can customize your screen resolution is an easy and straightforward process. Whether you opted for a higher resolution for crisp visuals or a lower one for better performance, customizing your device’s display settings allows you to tailor your user experience to your liking.
