Our devices have become an extension of ourselves, seamlessly integrating into our daily lives. Among the myriad of features and settings, the screen timeout period plays a crucial role in balancing functionality and power efficiency.
The screen timeout period determines how long your device’s display remains active when not in use, affecting both battery life and convenience.
In this guide, we’ll walk you through the comprehensive step-by-step process on how to change the screen timeout period on your Android (Google Pixel).
Also Read: How To Change Screen Timeout Period On Android (Samsung Galaxy)
How To Change Screen Timeout Period On Android (Google Pixel)
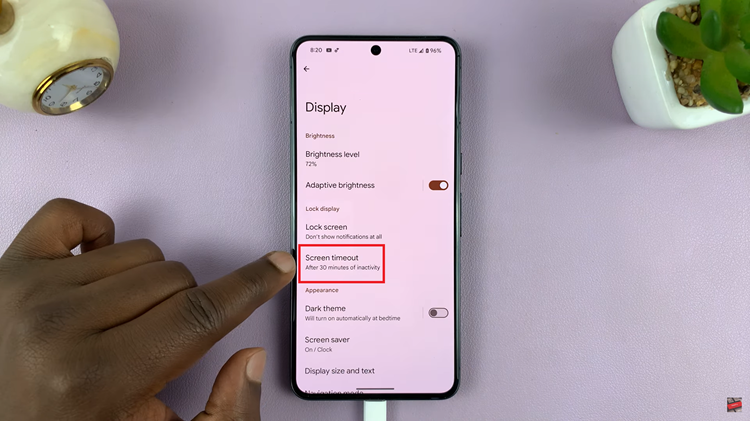
The first step is to access the Settings app. Within the Settings app, scroll down or navigate to find the “Display” option. This is where you’ll find various settings related to your device’s screen and appearance. Now that you’re in the Display settings, look for the “Screen Timeout” option.

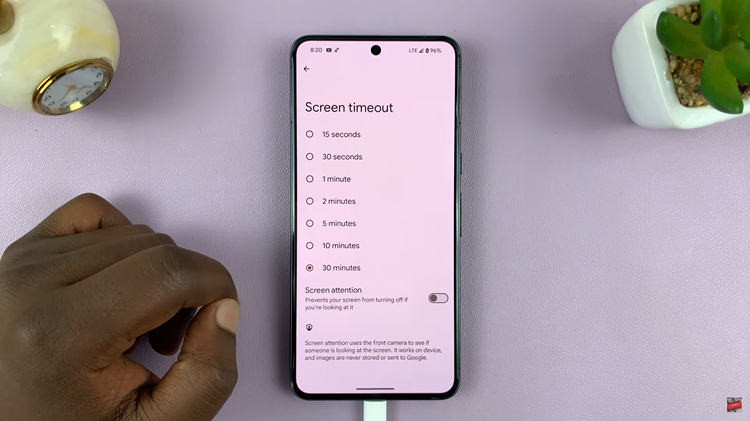
A list of timeout options will appear on your screen, ranging from a few seconds to several minutes. Choose the duration that best suits your preferences and usage patterns. If you want your screen to stay active for a longer duration, select a higher value. If you prefer a quicker screen timeout for power-saving reasons, choose a lower value.

After selecting your preferred screen timeout duration, the changes will be applied automatically. You can now navigate back to the home screen or any other app, knowing that your Google Pixel’s display will stay active for the chosen period before entering sleep mode.
Watch: How To Turn ON Mobile Hotspot On Android (Google Pixel)

