Among the myriad of features and settings that modern smartphones offer, the ability to customize and tailor our device experience to suit individual preferences stands out.
One such customization that users often seek is adjusting the screen timeout period on their Android devices. The screen timeout period is useful when you want to decrease battery usage on your device.
In this guide, we’ll walk you through the comprehensive step-by-step process on how to change the screen timeout period on your Android (Samsung Galaxy).
Also Read: How To Add Language On Android Phone (Samsung Galaxy)
How To Change Screen Timeout Period On Android (Samsung Galaxy)
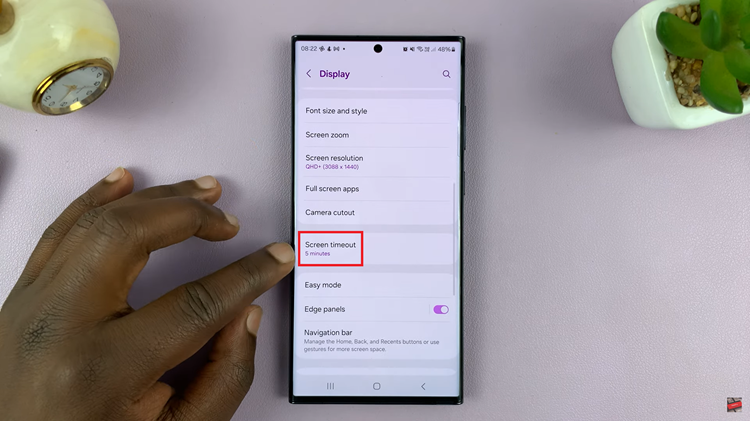
To begin, navigate to the Settings app; it usually has a gear-shaped icon. Within the Settings menu, scroll down until you find the “Display” option. Once you’re in the Display settings, scroll through the options until you find “Screen Timeout.”

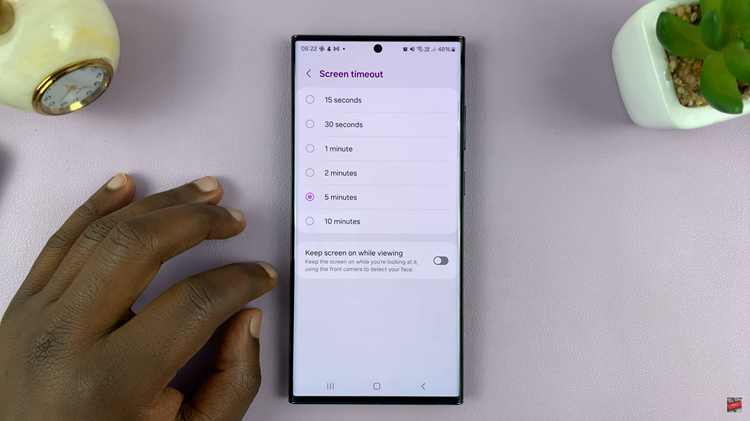
Upon selecting “Screen Timeout,” a list of timeout duration options will appear. These options typically include durations like 15 seconds, 30 seconds, 1 minute, and so on. Choose the duration that best suits your preferences by tapping on it.

After selecting your preferred timeout duration, the changes will be applied automatically. There’s no need to save or confirm separately; your Samsung Galaxy device will now use the chosen screen timeout period.
Watch: How To Change Screen Timeout Period On Android (Google Pixel)

