The screen timeout setting on your Samsung Galaxy A24 can be a game-changer when it comes to managing your device’s display and battery life.
It allows you to specify how long your phone’s screen stays active when not in use, offering a balance between convenience and energy efficiency.
In this guide, we’ll walk you through the comprehensive step-by-step process on how change the screen timeout period on your Samsung Galaxy A24.
Also Read: How To Bypass Forgotten PIN, Password & Pattern On Samsung Galaxy A24
How To Change Screen Timeout Period On Samsung Galaxy A24
To get started, locate the “Settings“ app. Once you’ve opened the Settings app, you’ll be greeted with various options. Look for “Display” on the left panel and tap on it. This will lead you to the display settings for your device.
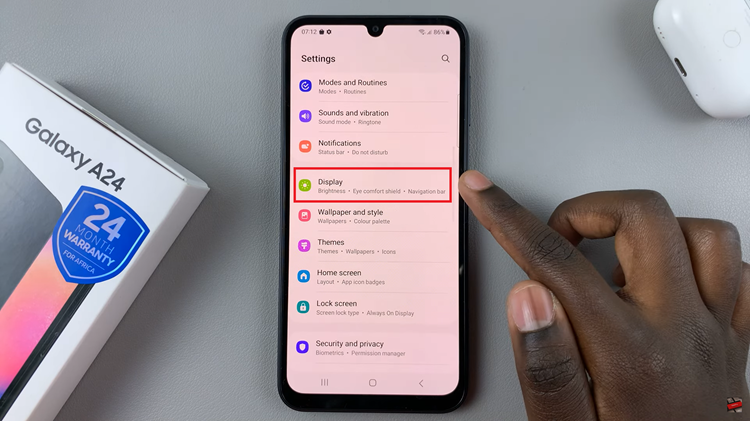
Within the Display settings, scroll down until you find the “Screen Timeout” option. Tap on “Screen Timeout” to access the screen timeout settings.
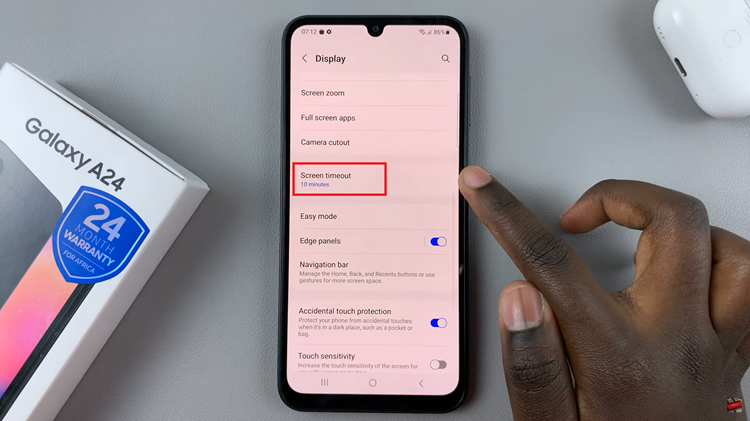
Upon tapping “Screen Timeout,” you’ll be presented with a list of timeout options. These options are represented in seconds or minutes. Select the one that best suits your preferences. Common options include 15 seconds, 30 seconds, 1 minute, and so on.
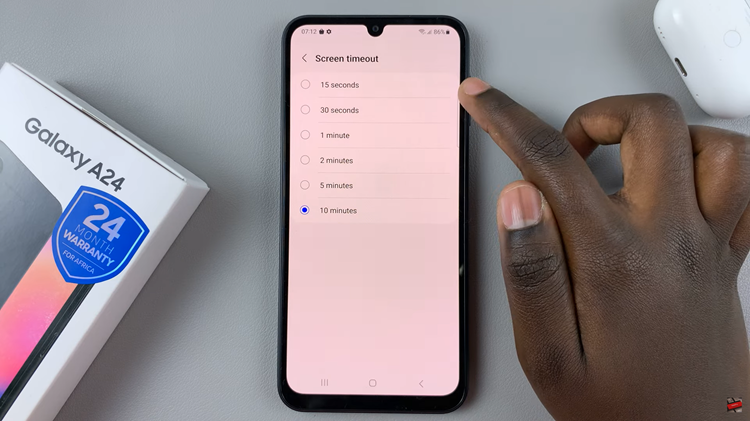
Once you’ve chosen your desired screen timeout period, the changes will be applied automatically. Your Samsung Galaxy A24 will now follow the selected timeout setting, and the screen will turn off after the specified period of inactivity.
