The Samsung Galaxy Tab S9 is a powerful and versatile tablet that offers a range of features to enhance your digital experience. One such feature that can be customized to suit your preferences is the screen timeout period.
The screen timeout determines how long your device’s display stays active when not in use, and adjusting this setting can help conserve battery life and cater to your unique usage habits.
In this article, we’ll guide you through a step-by-step process on how to change the screen timeout period on your Samsung Galaxy Tab S9.
Also Read: How To Connect Xbox Controller To Samsung Galaxy Tab S9
How To Change Screen Timeout Period On Samsung Galaxy Tab S9
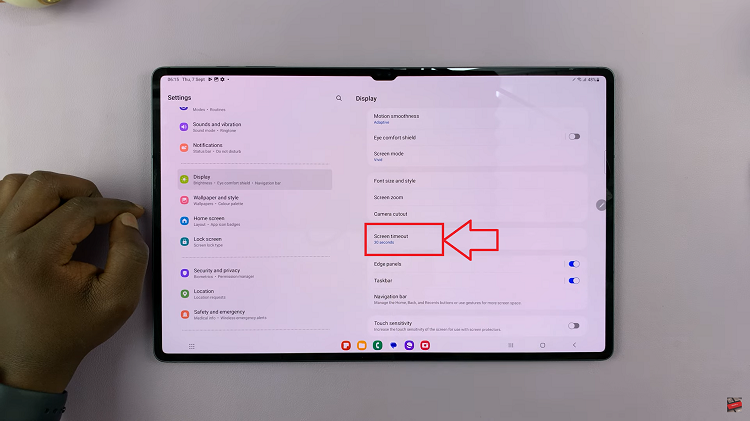
To begin, locate and tap on the “Settings” app. Once you’re in the Settings app, you’ll be presented with various options. On the left panel, scroll down until you find the “Display” option. Tap on it to proceed.
Within the Display settings, you’ll find a range of customization options for your device’s screen. Scroll through these settings until you locate the “Screen Timeout” option. This is where you can adjust the period before your screen turns off when not in use.

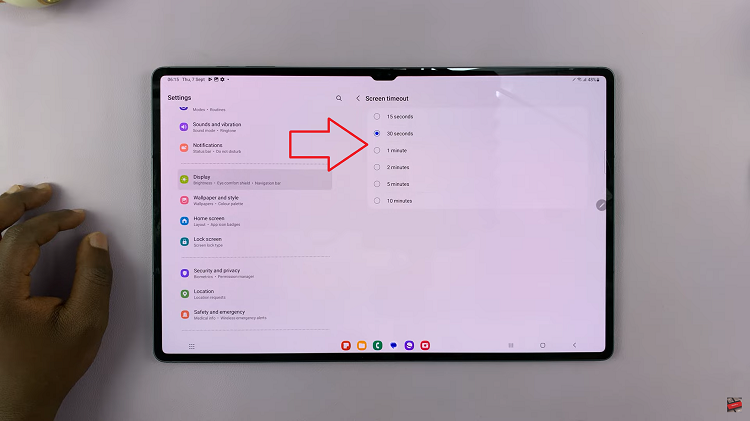
Tap on the “Screen Timeout” option to access a list of timeout duration choices. These options typically include values like 15 seconds, 30 seconds, 1 minute, 2 minutes, etc. Choose the duration that best suits your needs and preferences by tapping on it.

Customizing the screen timeout can help you save battery life and tailor your device to your usage habits. Whether you prefer a shorter or longer screen timeout, the process is straightforward and can be adjusted at any time to accommodate your preferences.
Watch: How To Set Up Lock Screen PIN On Samsung Galaxy Tab S9 S9+ S9 Ultra

