With the macOS Ventura operating system, Apple has introduced a diverse array of captivating built-in screensavers that range from breathtaking aerial views to mesmerizing photo montages.
Whether you’re looking to add a touch of personalization or simply want to enjoy the visual delights of these screensavers, changing and customizing them is a straightforward process.
In this article, we’ll take you through the step-by-step process on how to change the screensaver on your Mac / MacBook running macOS Ventura.
Also Read: How To Disable Screen Saver On Mac / MacBook
How To Change Screensaver On Mac / MacBook
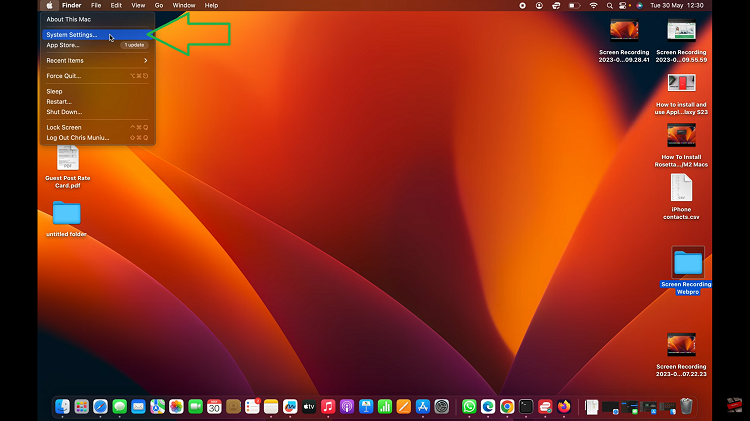
Click on the Apple logo located in the top-left corner of your screen. From the drop-down menu, select “System Settings.” Within the System Preferences window, locate and click on the “Screen Saver” option on the left-hand side panel.
You’ll now find yourself in the Screen Saver preferences window. To preview a screensaver, simply click on each option. The main window will display a preview of the selected screensaver. Once you’ve found a screensaver that captivates you, select it from the list.
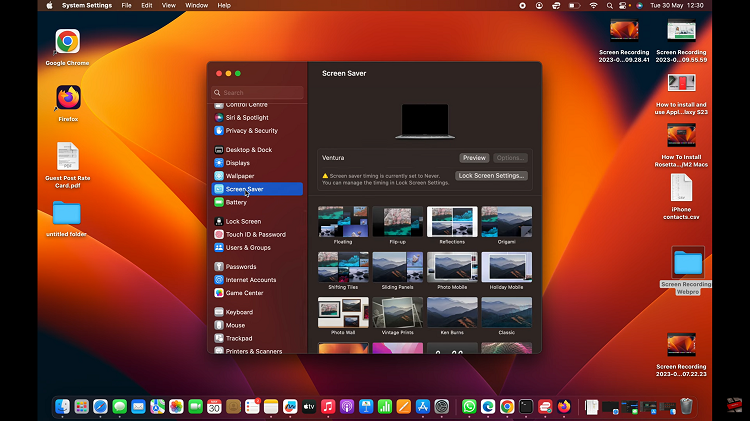
If you want to view your selected screensaver in full-screen mode, click on the “Preview” button at the top of the window. You can also adjust the slideshow settings to your preference. This includes setting the display duration for each photo and selecting transition effects.
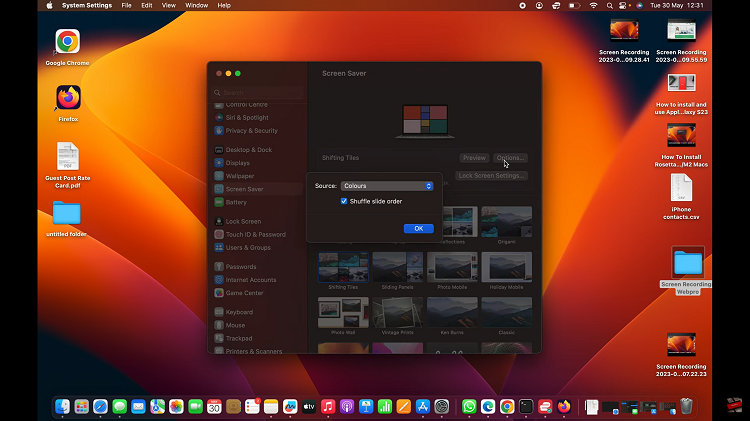
To add a personal touch to your screensaver experience, macOS Ventura offers customization options. In the Screen Saver preferences window, click on the “Options” button located at the top.
