Changing the streaming quality in Spotify Music can improve your listening experience or help manage data usage. Whether you want better sound quality or need to save on data, adjusting the streaming quality settings is straightforward. You can easily find these options in the app’s settings menu.
By selecting the streaming quality that suits your needs, you can enjoy your music in the best possible way. Higher quality settings offer better sound, while lower settings use less data. Knowing how to change streaming quality in Spotify Music lets you customize your experience to fit your preferences and data plan.
Watch:How To Block Comments On Pins On Pinterest
Change Streaming Quality In Spotify Music
Launch Spotify: Open the Spotify app on your device.
Go to Profile Settings: Tap on your profile icon, then select Settings.

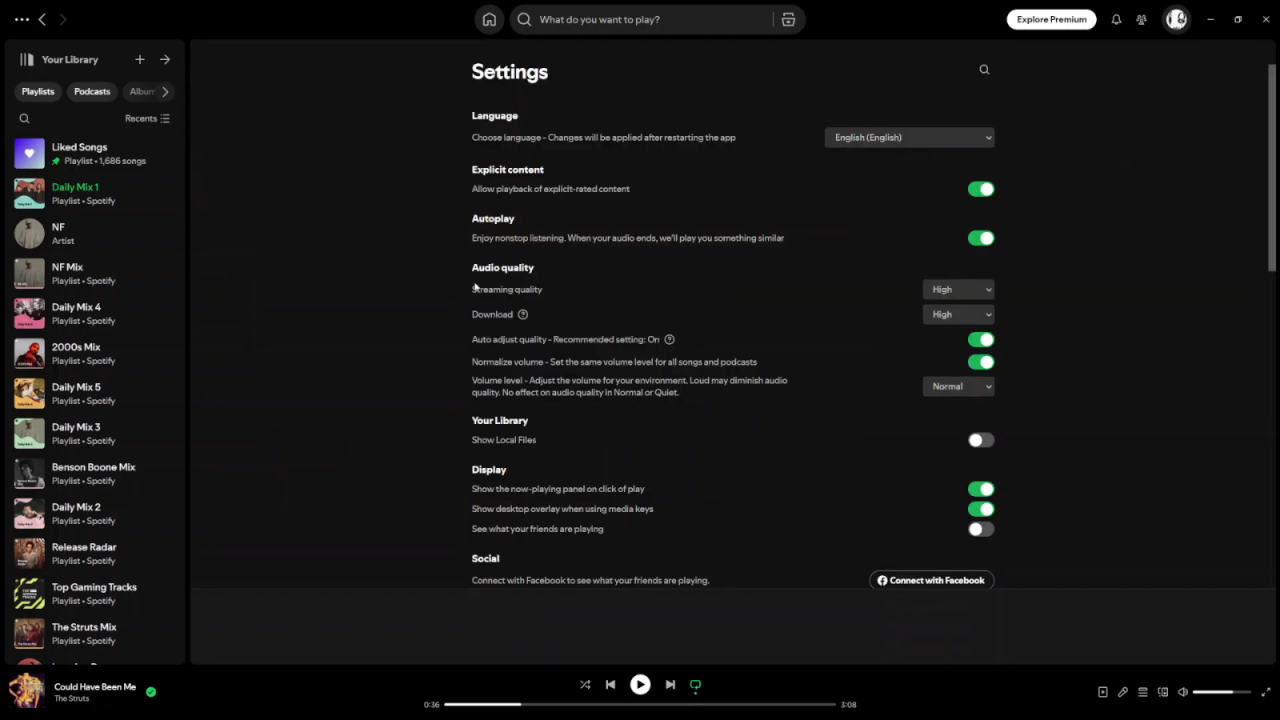
Navigate to Audio Quality: Scroll down to the section labeled Audio Quality.

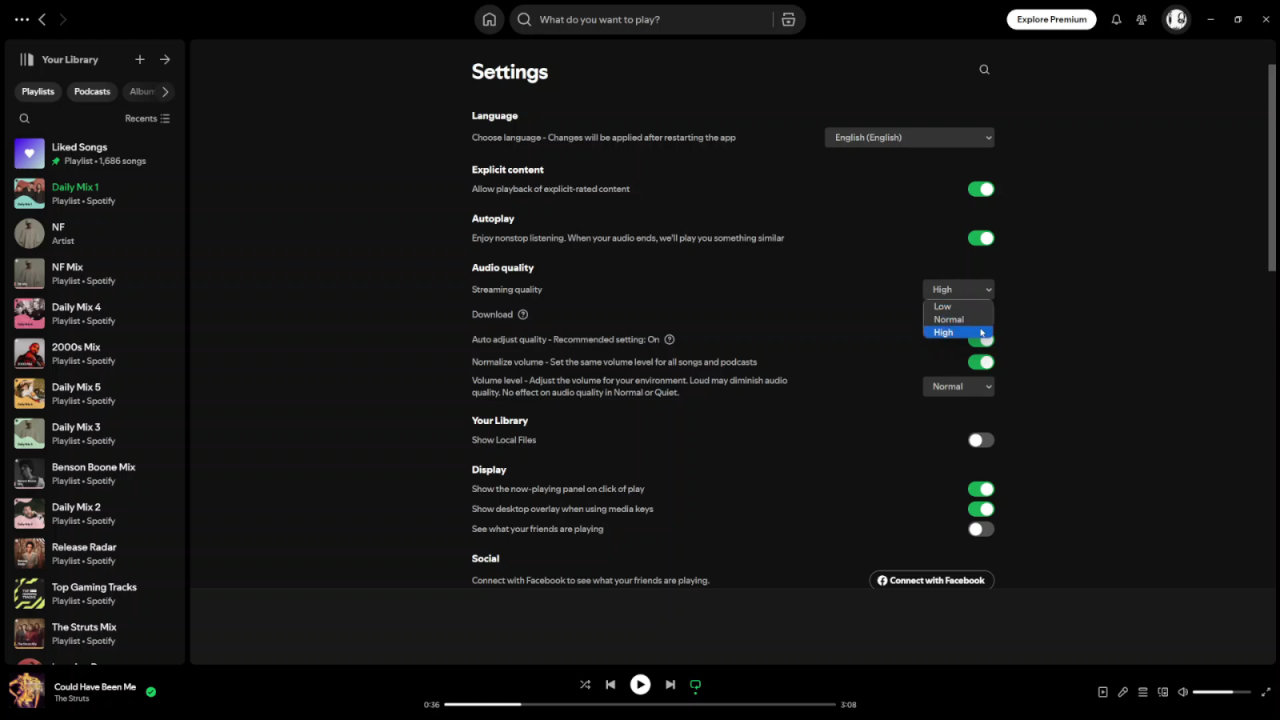
Change Streaming Quality: Under the Streaming Quality section, you’ll see a drop-down menu with three options: Low, Normal, and High. Select the option that best suits your needs—whether you’re looking to save mobile data or want higher quality for better sound.

Once you select your preferred streaming quality, Spotify will automatically adjust the audio accordingly.

