Among its many functions, the Roaming Clock stands out as a handy tool for those who frequently travel or simply want to keep track of time in different parts of the world.
Whether you’re a globetrotter or someone who values staying connected with loved ones in distant time zones, learning how to adjust the Roaming Clock time zone at you own convenience is a useful skill.
In this article, we’ll guide you through a step-by-step process on how to change the time zone of the Roaming Clock on your Samsung Galaxy S23.
Also Read: How To Manually Change Region and Time Zone On Samsung Galaxy S23
How To Change Time Zone Of Roaming Clock On Samsung Galaxy S23
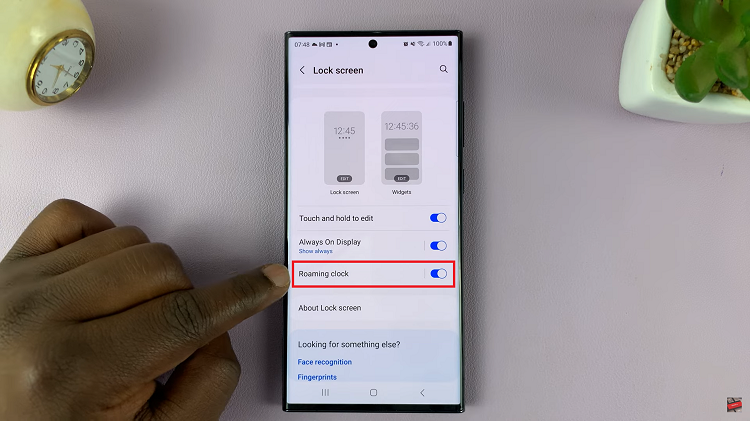
To begin, find the “Settings” app on your home screen or in your app drawer. In the Settings menu, scroll down or search for the “Lock Screen” option and tap on it. Scroll down the Lock Screen settings until you find the “Roaming Clock” option. Tap on it to access the Roaming Clock settings.

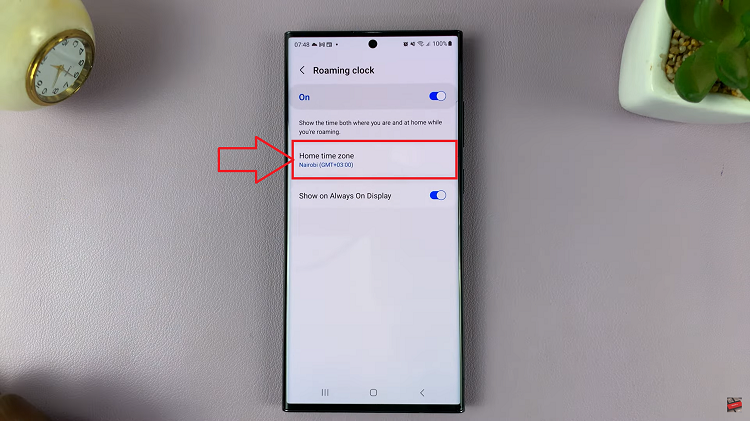
Before you can change the time zone of your Roaming Clock, make sure that the feature is turned on. Look for a toggle switch next to “Roaming Clock.” If it’s not already enabled, tap the toggle switch to turn it on. When Roaming Clock is enabled, the toggle switch should be blue. Now that Roaming Clock is enabled, tap on the “Home Time Zone” option. This is where you can set your default time zone.

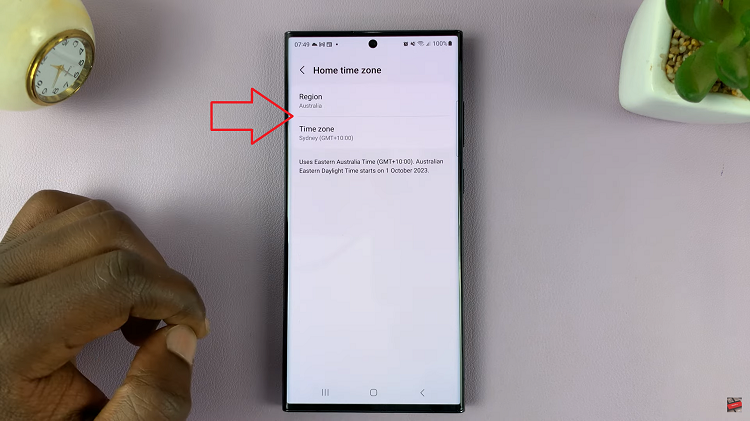
A list of regions and time zones will appear on your screen. Scroll through the options and select the region that matches your current location or the location you want to set as your home time zone. For example, if you’re in Australia, you can select Australia and then choose from its numerous time zone options.

Once you’ve selected the appropriate region and time zone, your Roaming Clock will be updated to reflect the new settings. This means that when traveling or checking the time in different regions, your Roaming Clock will display the correct local time.
Watch: How To Enable / Disable Spotify Music On Keyboard Of Samsung Galaxy S23, S23+ and S23 Ultra

