In the dynamic world of computing, where every click and movement matters, mastering your mouse’s sensitivity is paramount. Whether you’re aiming for pixel-perfect precision in design tasks or seeking lightning-fast reflexes in intense gaming sessions, fine-tuning your mouse sensitivity, measured in DPI (dots per inch), can make all the difference.
Fortunately, Windows offers robust tools and methods to help you seamlessly adjust these settings to suit your preferences and needs. In this guide, we’ll delve into the steps you can take to both check and change your mouse sensitivity settings on Windows.
So, let’s roll up our sleeves and unlock the full potential of your mouse.
Watch: How To Enable Double Tap To Turn OFF Screen Galaxy A55 5G
Check & Change Mouse Sensitivity (DPI) On Windows
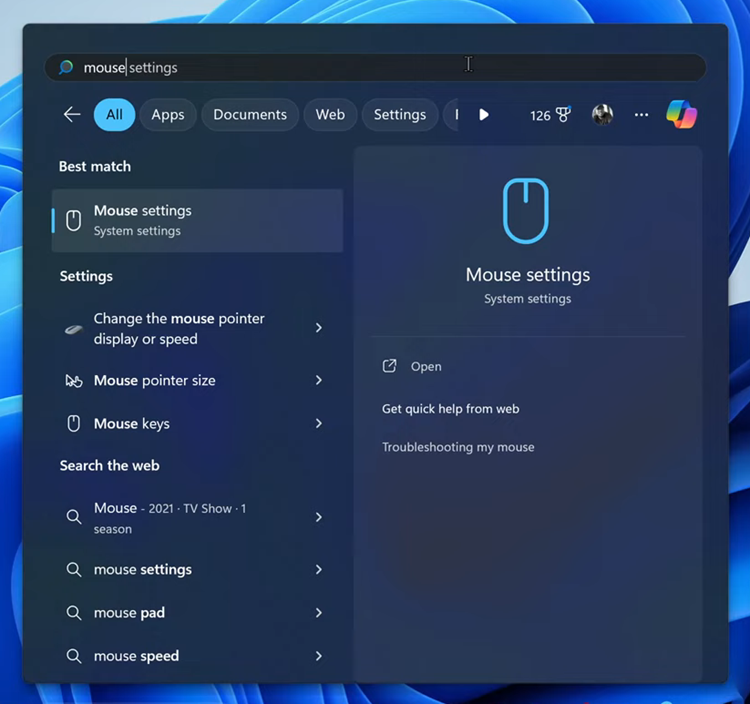
Firstly, click on the Windows Start menu icon located at the bottom left corner of your screen. From the menu, search for “Mouse Settings” and click “Open” to access the settings.

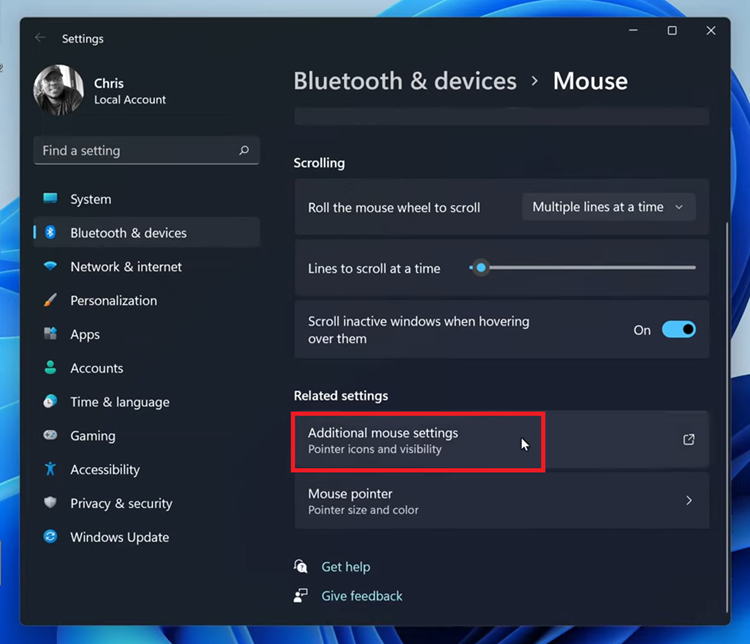
Within the mouse settings, scroll down and click on the “Additional Mouse Settings” option. This will open up various mouse-related settings. At this point, a new pop-up window labeled “Mouse Properties” will appear.

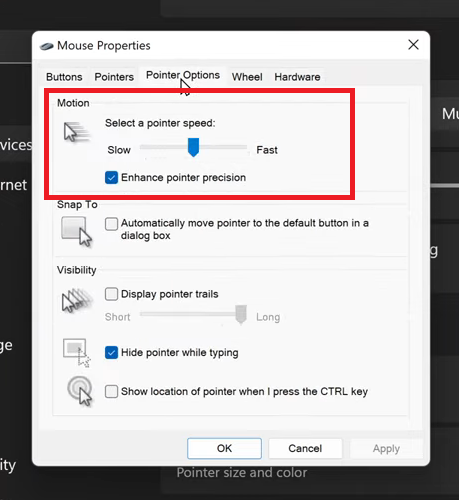
Following that, click on the “Pointer Options” tab to access the mouse sensitivity settings. From here, find the “Motion” section. From here, use the slider to either increase or reduce the mouse sensitivity of your mouse. Once done, click on “Apply” then “OK” to confirm the changes.

In conclusion, mastering mouse sensitivity by adjusting DPI settings can significantly enhance your computing experience, whether you’re gaming, designing, or simply navigating your desktop. With the simple steps outlined in this guide, you can easily check your current DPI settings and make adjustments to suit your preferences.
Read: How To Import & Export Passwords On Samsung Galaxy A35 5G

