Understanding and monitoring the Random Access Memory (RAM) of your Google Pixel is essential for maintaining optimal performance and ensuring a seamless user experience.
RAM plays a crucial role in the functionality of your device, influencing its speed and responsiveness. If you’re curious about how to check the RAM on your Google Pixel, you’ve come to the right place.
In this guide, we’ll walk you through the comprehensive step-by-step process on how to you can check the RAM on your Google Pixel.
Also Read: How To Turn OFF Last Seen On WhatsApp
How To Check RAM On Google Pixel
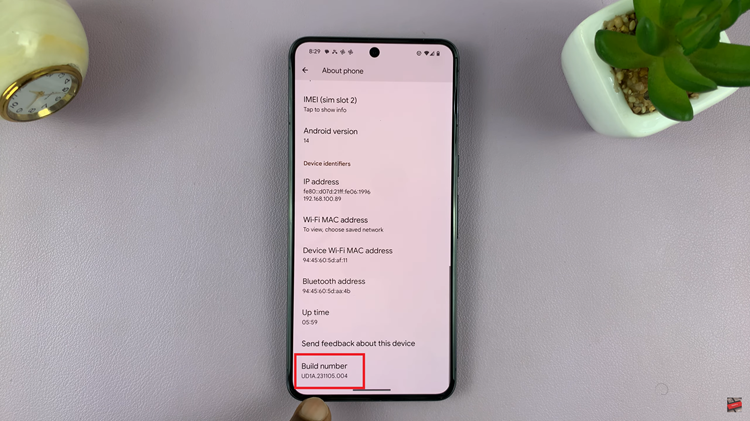
The first step is to enable Developer Options on your Google Pixel. Open the Settings app on your device. Scroll down and select “About Phone.” Find the “Build Number” entry and tap on it seven times. You will be prompted to enter your PIN, password, or pattern to confirm.

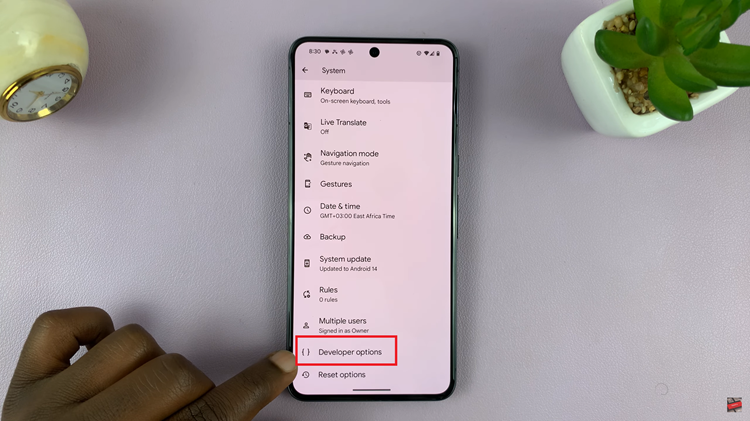
Once you’ve successfully enabled Developer Options, go back to the main Settings menu. Go to the “System” section. Tap on “Developer Options” to access the developer settings.

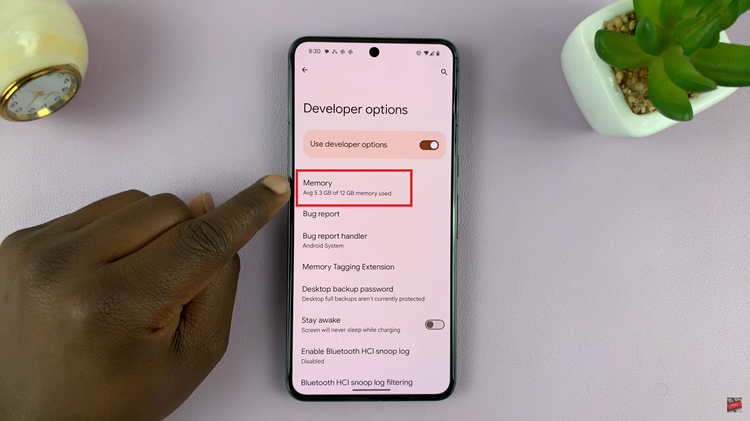
Within the Developer Options menu, look for the “Memory” section. Once you’ve located the Memory section, you should see details about your device’s RAM usage. The information is typically displayed as a fraction, indicating the used and available RAM. For example, it might look like “6.57/12,” where 6.57 represents the used RAM, and 12 represents the total RAM capacity in gigabytes.

By following these steps to access the Developer Options and locate the Memory section, you can stay informed about your device’s performance and ensure optimal functionality. Regularly monitoring your device’s RAM can be beneficial for troubleshooting performance issues and managing applications efficiently.
Watch: How To Add Family Members To YouTube Premium Subscription

