In today’s world, smartphones have become an integral part of our lives, serving as our communication hub, entertainment center, and productivity tool. However, these devices can accumulate temporary files known as cache, which can impact their performance and storage capacity.
The cache is a collection of temporary data stored by apps to speed up processes and enhance user experience. While it’s designed to optimize performance, it may sometimes lead to issues like app crashes, and sluggishness on your Samsung Galaxy device.
Thankfully, clearing the cache is a simple yet effective way to address these concerns and revitalize your device’s performance. Here’s a step-by-step guide to clear the cache on your Samsung Galaxy device.
Watch: How To Turn ON Dark Mode On Samsung Galaxy
To Clear Cache On Android (Samsung Galaxy)
Firstly, open the “Settings” app on your Android device. You can usually find this app by swiping down from the top of the screen and tapping the gear-shaped icon or by finding it in your app drawer.
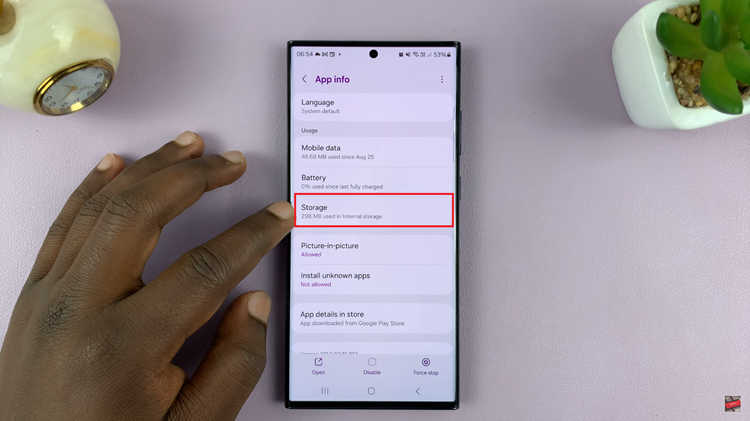
Next, within the Settings menu, scroll down and select “Apps.” At this point, you’ll see all the applications installed on your device. Afterward, find the application you’d like to clear the cache and select it. Under the app’s info page, scroll down and select “Storage.”

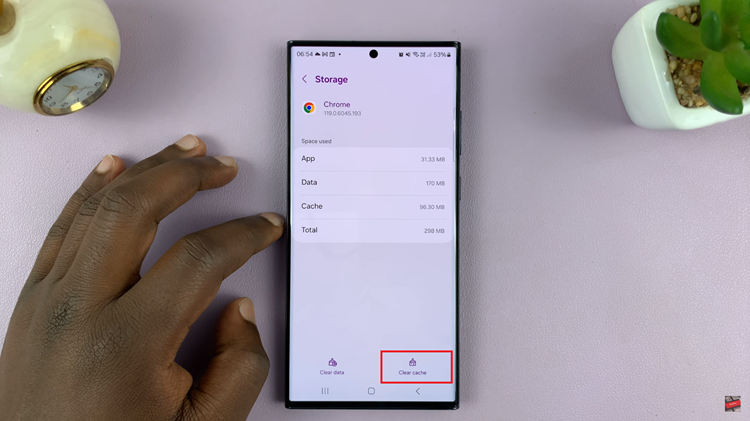
At this point, you should see how much cache your application has accumulated. Following this, tap on the “Clear Cache” option at the bottom right corner, then confirm the process. This will remove the cache that has been accumulated by the application.

In conclusion, clearing the cache on your Samsung Galaxy Android device can help in resolving various performance-related issues. Always ensure that you understand the consequences of clearing the cache, especially for critical apps, and proceed accordingly.

