The Samsung Galaxy S24s stands as a technological marvel, boasting cutting-edge features and powerful hardware. As we immerse ourselves in the seamless experience these smartphones offer, it’s essential to address the inevitable buildup of temporary files and data in the system cache.
Over time, this accumulation can potentially impact the device’s performance, leading to issues such as sluggishness or app malfunctions. To ensure your Galaxy S24 or S24 Ultra continues to operate at its peak, periodic maintenance, including clearing the cache partition, is crucial.
In this guide, we’ll take you through how to clear the cache partition on your Samsung Galaxy S24, S24+, or S24 Ultra, empowering you to optimize your device’s performance effortlessly.
Watch: How To Use Built-In Compass On Samsung Galaxy S24
To Clear Cache Partition On Samsung Galaxy S24
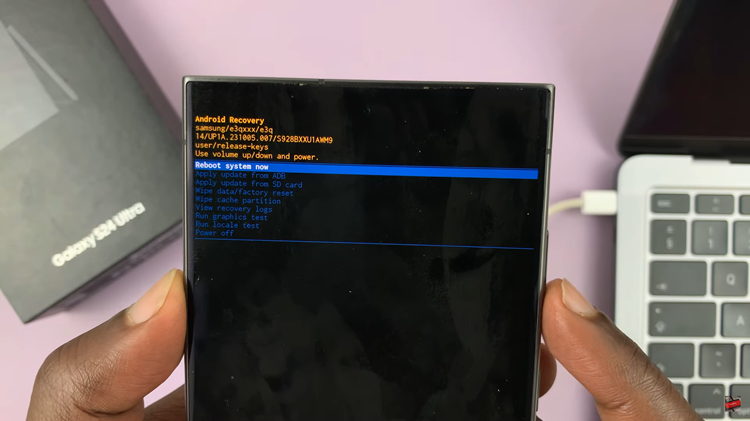
Firstly, power off your Samsung S24 and connect it to a computer using the required USB cable. At this point, access the recovery mode by pressing and holding the Volume Up and Power buttons together until you see the Samsung logo. Then, release the power button but continue pressing the volume button until you see the recovery menu.
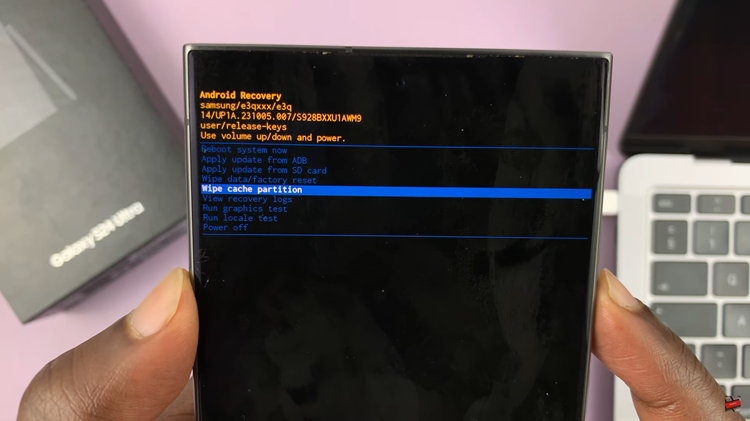
At this point, use the volume buttons to get to the “Wipe cache partition” option and press the Power button to select it. Then, use the buttons to highlight “Yes” and press the Power button to confirm. Allow the device to clear the cache.

After the process is complete select the “Reboot System Now” option and press the Power button to restart your Samsung Galaxy S24.

In conclusion, regular maintenance, such as clearing the cache partition, can help ensure that your Samsung Galaxy S24 or S24 Ultra continues to perform at its best. By following the steps outlined in this guide, you can easily clear the cache partition on your device and address common performance issues.

