The Samsung Galaxy Tab S9 and S9 Ultra are impressive tablets, offering powerful performance, stunning displays, and a range of features that enhance your digital experience. However, over time, like any electronic device, these tablets can accumulate cached data that may slow down their performance or cause glitches.
Clearing the cache partition is an essential maintenance step to keep your Tab S9 or S9 Ultra running smoothly.
In this guide, we will walk you through the process of how to clear cache partition on Samsung Galaxy Tab S9 & S9 Ultra.
Watch: How To Hide Photos On Samsung Galaxy Tab S9
To Clear Cache Partition On Samsung Galaxy Tab S9
Firstly, turn off your Galaxy Tab S9. If it’s on, turn it off by holding down the power button and selecting “Power off.” Next, connect your Tab S9 to a computer or laptop.
Now, to clear the cache partition, you’ll need to access the tablet’s recovery mode. To do this, press and hold the Volume Up button and the Power button simultaneously. Keep holding both buttons until the Samsung Galaxy logo appears. Then, release both buttons.
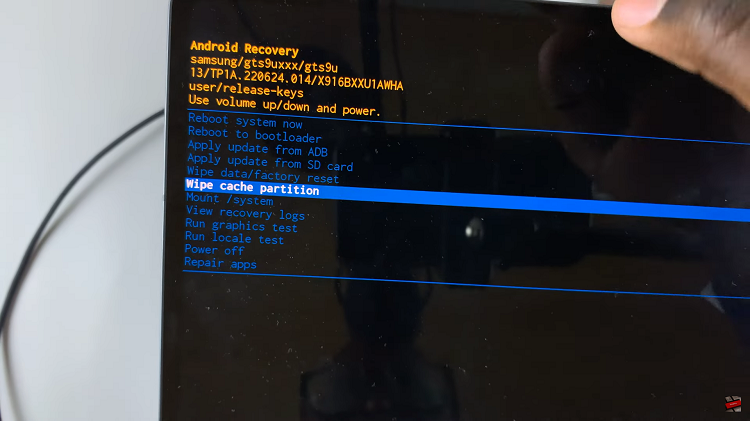
In recovery mode, you’ll see a menu with various options. Use the volume buttons to navigate up and down, and the Power button to select an option. Scroll down to find and select “Wipe cache partition” from the menu.

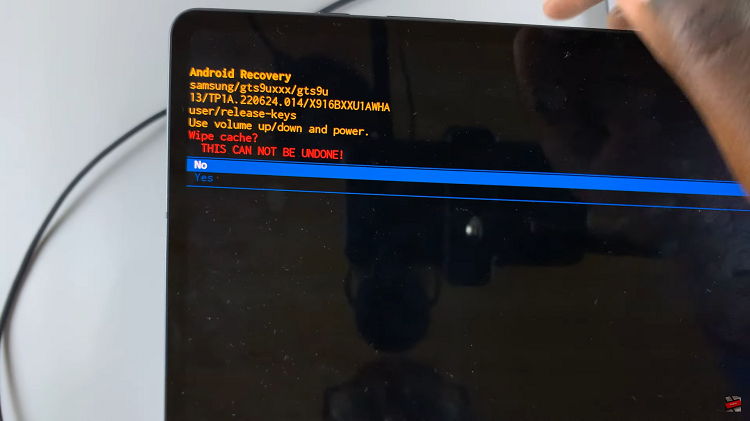
Once you’ve selected “Wipe cache partition,” a confirmation message will appear on the screen. Confirm your choice by selecting “Yes.” This action will begin the cache partition clearing process, which may take a few minutes.

After the cache partition has been successfully cleared, you’ll return to the main menu. Highlight and select “Reboot system now” to restart your tablet.
By following the steps outlined in this guide, you can keep your tablet running smoothly and enjoy a hassle-free digital experience. Let us know in the comment section below if you have any questions or suggestions.
Read: How To Turn Mobile Data ON & OFF On iPhone 15 & iPhone 15 Pro

