Today, the iPad is an extremely capable device for productivity, creativity and entertainment. However, a major constraint that so many users might face is the iPad’s native storage size. It doesn’t take much—large video files, high-resolution photos and extensive document libraries can quickly limit the available storage on your iPad.
If you’re a professional who needs to store large video clips or film projects, this can be incredibly useful as it adds an extra layer of storage on your device. This guide will help you through the steps to connect an external hard drive to your iPad whether it has USB-C or Lightning.
This will leave you with all the info necessary to capitalize off your iPad’s new storage options.
Watch: How To Turn ON Severe Weather Alerts On iPhone
Connect External Hard Drive To iPad
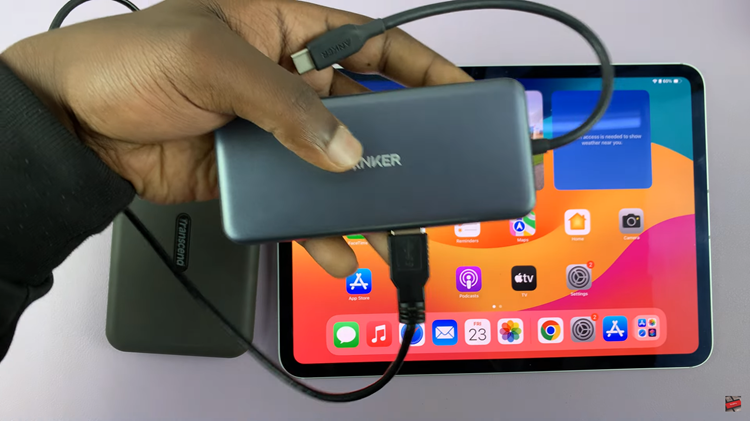
You’ll need an adapter to connect your external hard disk to your iPad. Connect the adapter to your iPad, then plug your external Hard Drive into the female connector of the OTG adapter. Again, make sure the connection is secure.

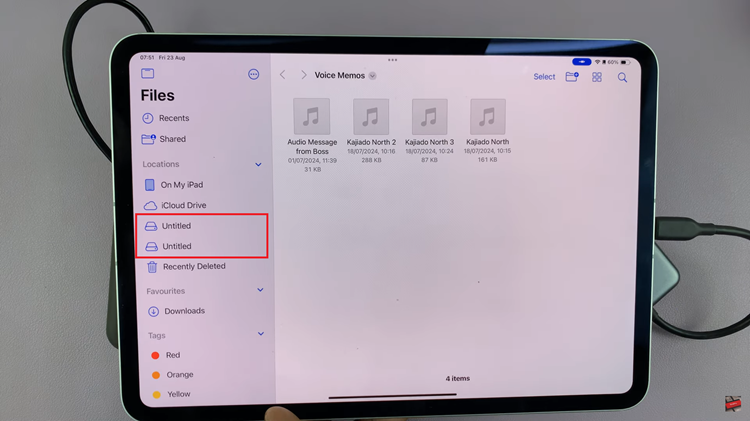
Following this, your iPad should recognize the external hard drive. You can see an icon at the top right side of the screen. In addition, you can open the Files app, and under the ‘Location‘ section, you can find your HDD. From here, you can transfer files between your device and the external hard drive.

In conclusion, connecting an external hard drive to your iPad is a straightforward process that can significantly expand your device’s storage and enhance your workflow. You can manage & transfer files with the hard drive connected to your iPad.
Read: How To Change Default Search Engine In Safari Browser On iPad

