With the explosion of data in this digital age it has become ever so important to store and manage such large amounts of data on portable devices. iPads are very powerful and capable devices; however, they have limited storage space inside of them that can fill quickly because we always download apps or take photos, videos, and more files.
Having an external SSD attached to your iPad can be too life-changing, and you will have a lot more space than before as well as handling larger files while doing backups easily. But if you never configure an external SSD with your iPad, it may seem intimidating.
This guide will show you how to connect an external SSD to your iPad, significantly simplifying the task of organizing and accessing files.
Watch: How To Use Split Screen On iPad
Connect External SSD To iPad
Firstly, ensure that you have an adapter so that you can connect the SSD to your iPad. However, if you have a newer SSD, you can just plug it in on your iPad. Depending on the iPad model, some you’ll require the Lightning to USB Camera Adapter.
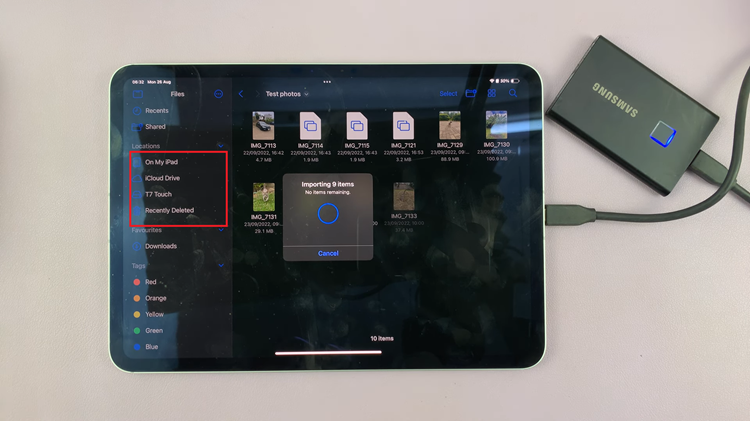
Following this, plug in the SSD to your iPad or plug in the SSD to the adapter, then plug it into your iPad. From there, launch the ‘Files‘ app to confirm the connection. You can find the SSD under the Location section on the Files app. From here, you can transfer files between your SSD & your iPad.

By following these steps, you should be able to connect and use an external SSD with your iPad effectively. Enjoy your expanded storage and improved file management!

