Are you aware that you can create a home button using the Assistive Touch button on your iPhone? Well, yes, it is possible to set up and customize Assistive Touch to create your own virtual home button.
The physical home button on an iPhone has long been a staple for navigating through apps and returning to the home screen. However, with the introduction of newer iPhone models, such as the iPhone X and later, Apple has transitioned to a button-less design.
If you find yourself missing the convenience of a physical home button or have a malfunctioning one, fear not! Apple’s Assistive Touch feature allows you to create a virtual home button on your iPhone’s screen. You can add it among the functions in the Assistive Touch menu, leave the assistive touch as a dedicated home button, or set custom actions for the assistive touch home button.
Watch: How To Copy A Text Message To Clipboard On iPhone
Enable Assistive Touch
Before you can use the Assistive Touch as a home button, you first need to enable Assistive Touch. Simply open the Settings app on your iPhone. Scroll down and tap on Accessibility.
Within the Accessibility settings, locate and select Touch. Then, tap on Assistive Touch. Toggle the switch to enable Assistive Touch. You will notice a grey square or circle icon appear on your screen, indicating that Assistive Touch is now active.
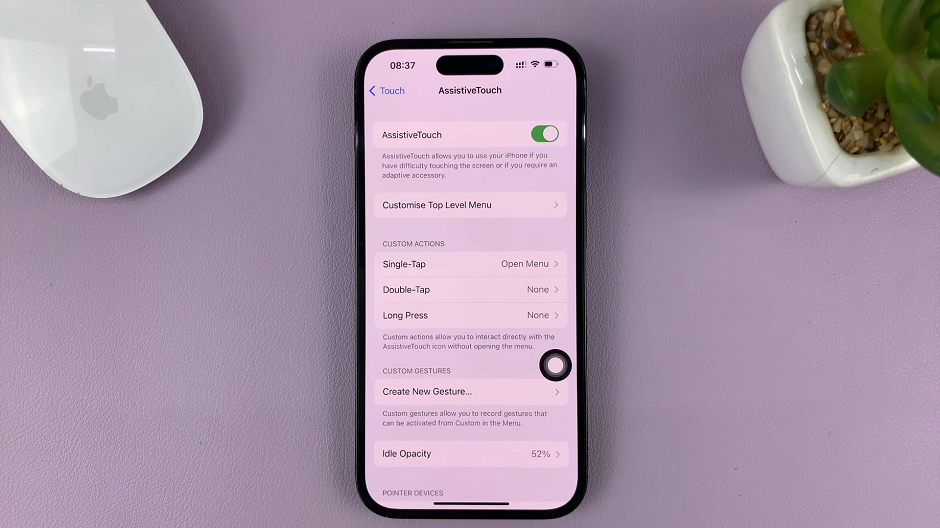
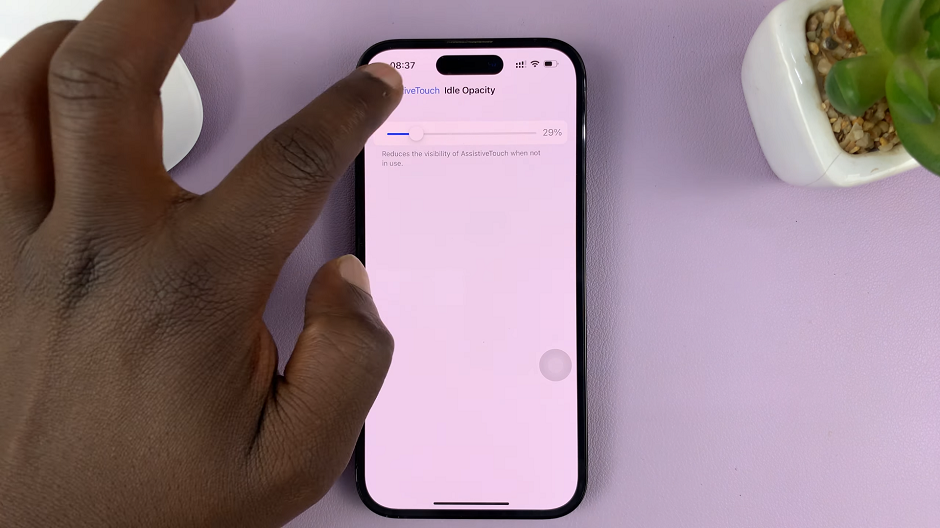
You can further scroll down to Idle Opacity and adjust the transparency of the Assistive Touch button. Set it to whatever level you feel comfortable. This will make sure that it isn’t too disruptive or obvious while using your iPhone.
Add Home Button to Assistive Touch
The next step after you enable Assistive Touch, is to customize the top level menu. While in the Assistive Touch menu, find the Customize top Level Menu option and tap on it to access its settings.
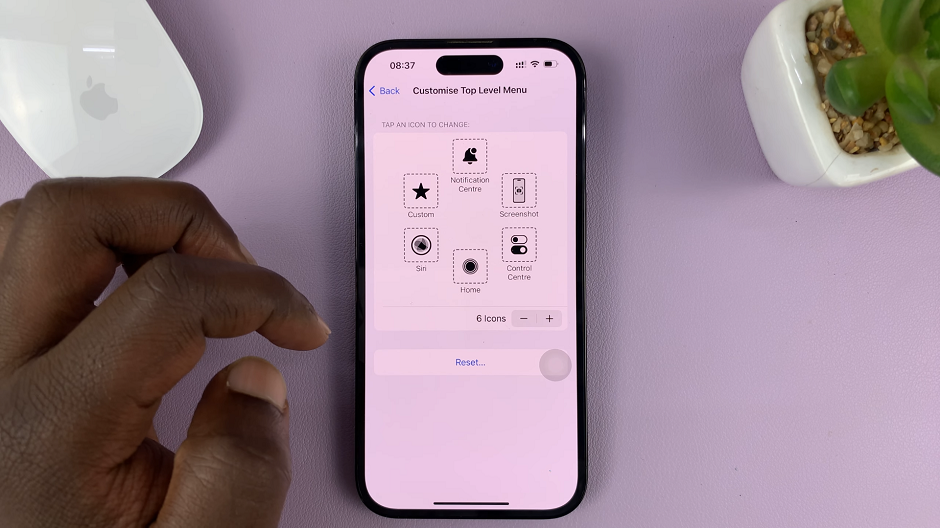
Once you’re in there, you should see the top level menu. You can add or remove icons to it, by tapping on any icon available and selecting the one you want. You can also hit Reset to quickly undo any changes and return the menu to default.
You can also reduce or increase the number of icons on the top level menu. Simply use the – and + buttons respectively to do this.
With this knowledge, you can now go ahead and add the home button to the top level menu. Once you do, you can tap on the Assistive Touch button and tap on Home. This will take you directly to the home page.
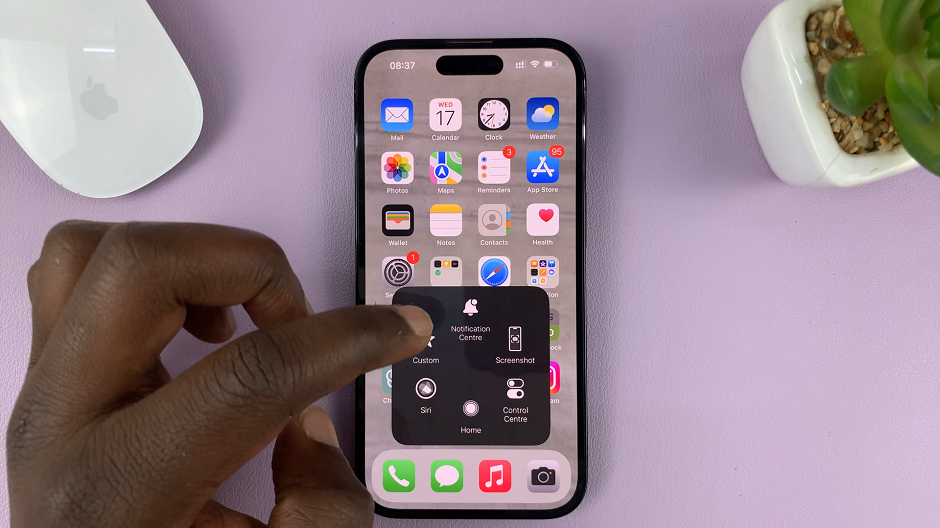
Create Dedicated Virtual Home Button
You can further configure the functionality of the Assistive Touch button. In the Customize Top Level Menu section, tap on the – icon to remove all buttons, save for the Home button.
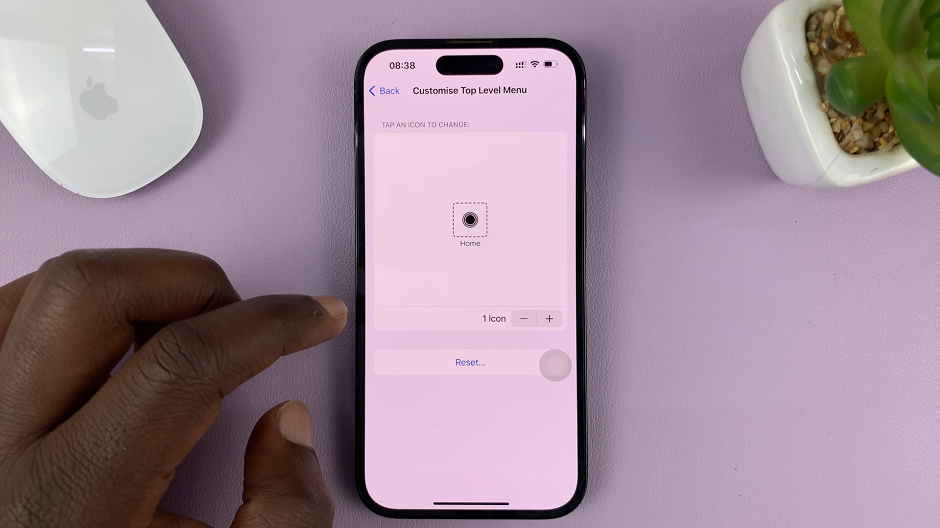
If it is not on there, you can tap on the icon of the function that is there. this will open a menu of functions, from which you can choose Home. Remember to limit the number of icons to one, of course if you prefer. Now, every time you tap on the Assistive Touch button once, the iPhone will direct you straight to the home screen.
Custom Actions
After you add the Home button to the top level menu, you can go back to the Assistive Touch menu. Under the Custom Actions section, you have various options to choose from. You can assign the single-tap, double-tap or long press actions to the virtual home button, mimicking the functions of the physical home button.
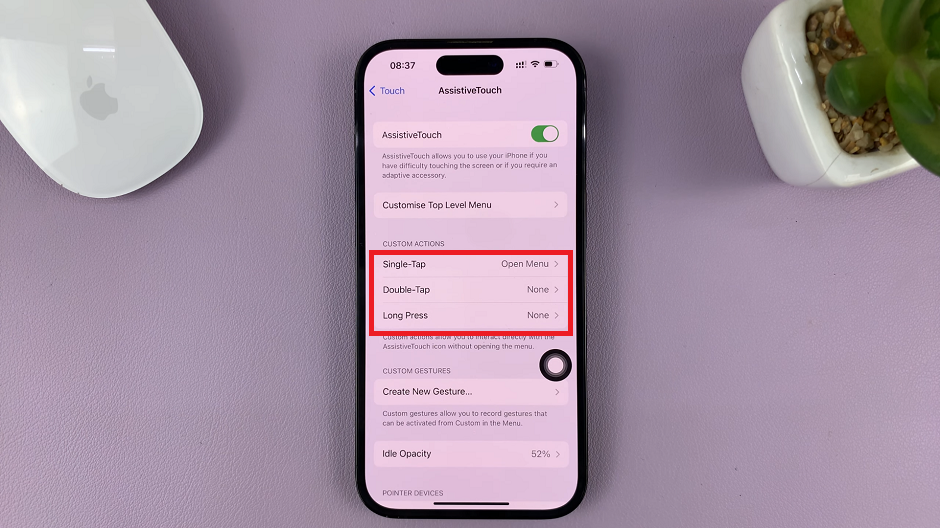
It’s all a matter of preference. Whatever custom action you choose, the Home button will respond acccordingly.
Assistive Touch offers more than just a virtual home button. It provides quick access to various other functions, such as Control Center, Notification Center, and gestures like pinch, swipe, and multi-finger taps. Feel free to explore these options and customize them according to your preferences.
When you create a home button using Assistive Touch on your iPhone, it provides a convenient alternative to the physical button. Especially if the physical home button or swipe gesture is not functioning properly.
Note: The steps mentioned in this article are specific to the iPhone running iOS 16. The process may vary slightly for different iPhone models or iOS versions.
