Deleting contact posters on your iPhone can be a handy way to tidy up your contact list and remove unnecessary clutter.
Whether you no longer want to use custom images or simply want a cleaner look, the process is straightforward and can be done with ease.
In this article, we’ll guide you step-by-step on how to delete a contact poster on your iPhone. Before we continue, make sure that your iPhone is running iOS 17 and any later versions.
Also Read: How To Use ‘Listen To Page’ In Safari Browser On iPhone
How To Delete Contact Poster On iPhone
Firstly, access the “Contacts” app on your home screen. Once inside the app, locate the specific contact you want remove it poster. After finding the contact in question, tap on their name to open up their details.
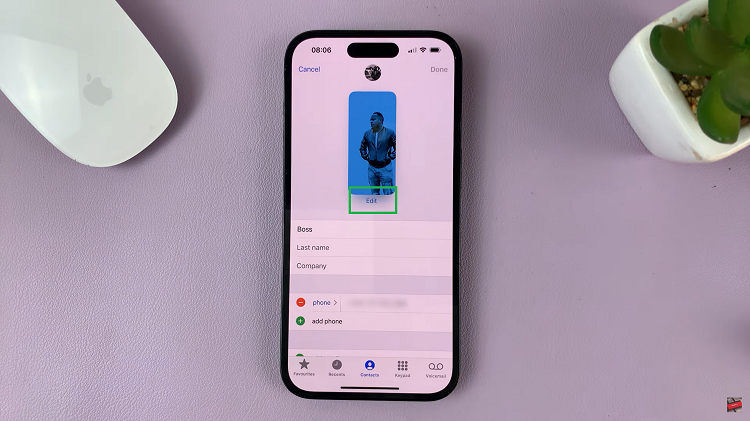
This will lead you to a screen displaying various information about the contact. Now, locate and tap on the “Edit” button in the top-right corner of the screen. Once in edit mode, you’ll notice a small “Edit” button right below the contact’s poster.

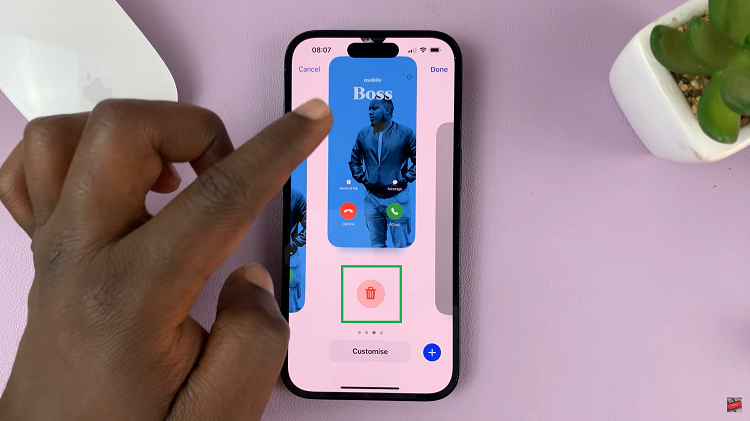
Tap on that, then swipe the contact poster upwards. You’ll should notice a ‘Bin‘ icon appearing at the bottom of your screen.

Now, tap on the ‘Bin‘ icon to to remove the poster. A prompt will appear, and you need to select ‘Delete‘ to confirm your decision.
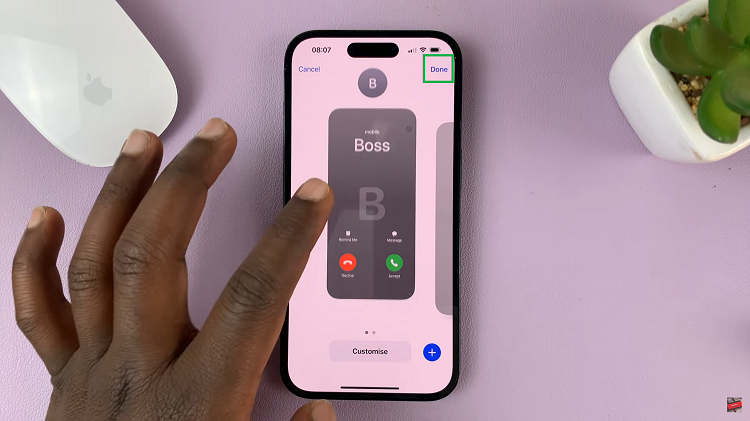
Don’t forget to tap on the “Done” button, located in the top right corner of the screen to save the changes.

And there you have it! From this point forward, when your contact calls or sends a message, you’ll be greeted with either their default initials or, if they have one, their profile picture.

