In today’s fast-paced digital world, communication has never been easier or more instantaneous. With the advent of messaging apps and email, sending a message is as simple as a tap on your screen. However, this ease of communication also means that mistakes can happen just as quickly. Whether it’s a text message sent to the wrong person, an email with a typo, or a message that was sent in haste, there are times when you wish you could take back what you’ve sent.
Fortunately, if you’re using an iPad, there are ways to delete sent messages, giving you the control to correct errors and manage your communications effectively. Understanding how to delete sent messages on your iPad can be a lifesaver, helping you avoid potential misunderstandings and maintain the clarity of your conversations.
This guide will walk you through the process of deleting sent messages, ensuring that you can handle your messaging with confidence and precision.
Watch: How To Add Keyboard Language On iPad
Delete Sent Messages On iPad
To begin the process of deleting a sent message on your iPad, first, locate and open the Messages app. You can find this app either on your home screen or in your dock. Once you have opened the Messages app, navigate to the conversation thread that contains the message you wish to delete. Tap on the conversation to open it.
At this point, within the conversation, scroll through the messages until you locate the specific message you want to delete. Tap and hold your finger on the message you wish to remove. This action will bring up a menu with several options. Look for and tap on “Undo Send” from the menu options.
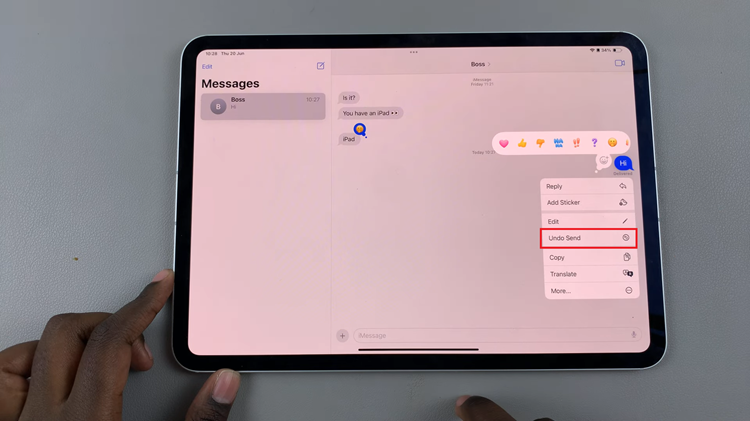
By selecting “Undo Send“, the message will be unsent, effectively deleting it from the conversation. This feature allows you to quickly retract messages that were sent in error or that you wish to remove from the conversation.
In conclusion, deleting sent messages on your iPad can help you manage your digital communication effectively and maintain control over your conversations. By following these steps, you can navigate the Messages app with confidence, knowing you can delete messages when needed.
Read: How To Disable Facebook Messenger Notifications On iPad

