iPhone users have a plethora of exciting features. Among these advancements, is Face ID. It provides a seamless and secure way to unlock devices and access various applications.
However, there are instances when users might prefer to disable Face ID for specific purposes, such as private browsing in Safari.
In this article, we’ll guide you through the step-by-step process on how to disable Face ID for Private Browsing in Safari for your iPhone. Before we continue, it is crucial to ensure that your iPhone is updated to the latest iOS 17 version.
Also Read: How To Use Stand By Mode On iPhone
How To Disable Face ID For Private Browsing In Safari For iPhone
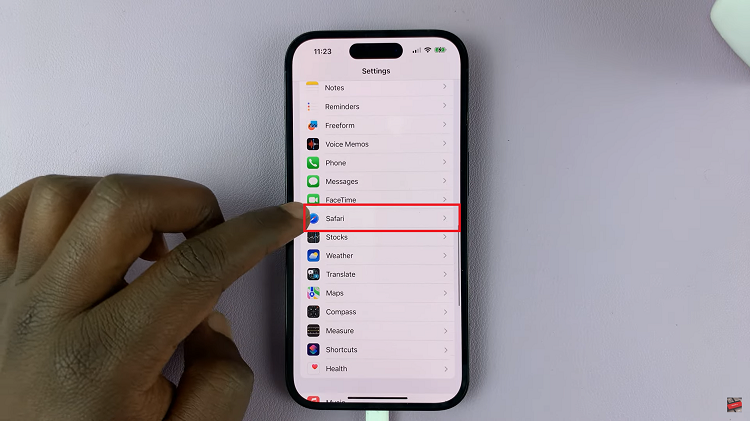
Open the “Settings” app on your iPhone’s home screen. Once inside the Settings menu, scroll down ans select “Safari“.
In the Safari settings menu, continue to scroll down until you reach the section labeled “Privacy & Security.” Tap on the toggle switch next to “Require Face ID to Unlock Private Browsing,” you will effectively disable Face ID for Safari’s private browsing mode.
To confirm your decision, your iPhone will prompt you to scan your Face ID once more. This is to ensure that you are the authorized user making the changes.
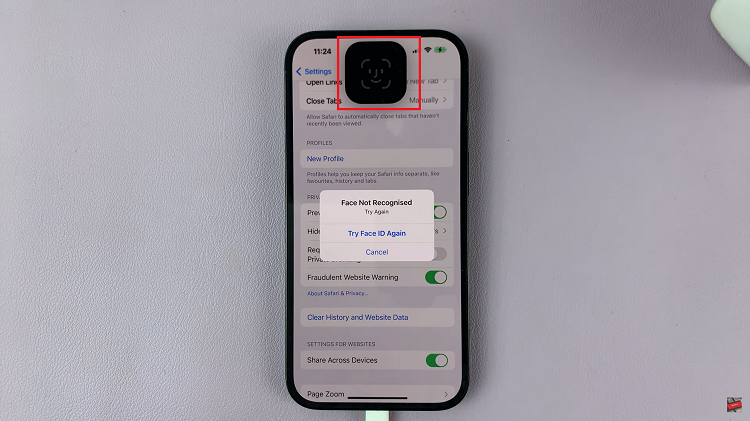
Upon successfully scanning your face, you will receive a confirmation that Face ID has been disabled for Safari’s private browsing.
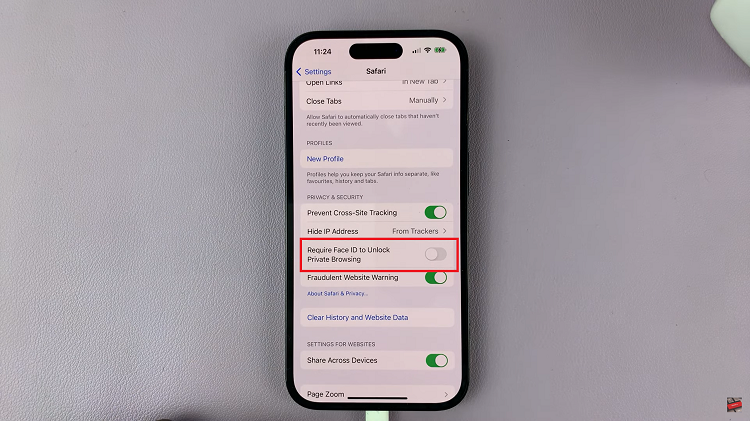
You have now taken control of your privacy settings, allowing you to browse privately without Face ID interference.
