The concept of screen savers, once rooted in the practical necessity to prevent screen burn-in, has now taken on a more personal and aesthetic role in our digital lives.
With the advancement of screen technology and the shifting dynamics of user preferences, the need for screen savers has become less pronounced.
In this article, we’ll take you through the step-by-step process on how to disable screen saver on your Mac / MacBook running macOS Ventura.
Also Read: How To Download Google Nest Camera Events as Video To Phone
How To Disable Screen Saver On Mac / MacBook
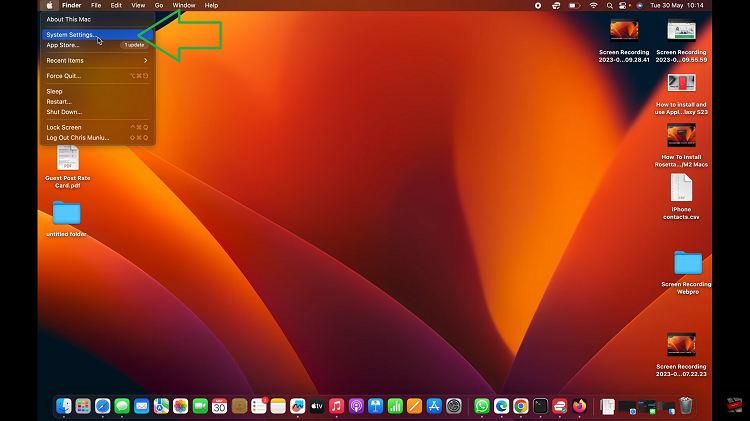
Start by clicking on the Apple logo located in the top-left corner of your screen. This will open a drop-down menu with various options. From the drop-down menu, locate and click on “System Settings.”

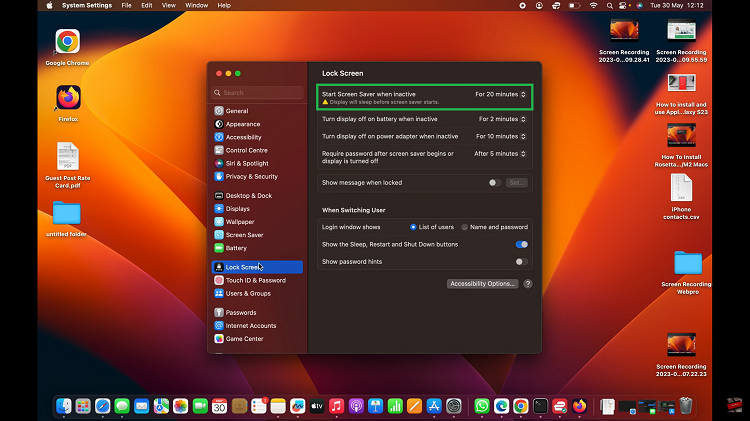
In the System Settings window, look for the “Lock Screen” icon and click on it. Within the Lock Screen window, you’ll see a tab labeled “Start Screen Saver when inactive.”

Click on the drop-down menu next to the screen saver start time. A list of time options will appear. Select “Never” from the list to disable the screen saver from activating automatically.
Disabling the screen saver on your Mac or MacBook is a simple process that can help you avoid distractions and conserve energy. By following the step-by-step guide outlined in this article, you can quickly adjust your screen saver settings to ensure that your display remains active as long as you need it to.

