In this digital age, wireless earbuds have become an indispensable accessory for many smartphone users. Among the plethora of options available in the market, the Oraimo FreePods 4 stand out with their sleek design, advanced features, and seamless connectivity.
However, there are times when you may need to disconnect or unpair your FreePods 4 from your iPhone, whether it’s to troubleshoot connectivity issues or simply to switch to another device.
In this guide, we’ll walk you through the comprehensive step-by-step process on how to disconnect & unpair Oraimo FreePods 4 from iPhone.
Also Read: How To Enable & Disable Active Noise Cancellation On Oraimo FreePods 4
How To Disconnect & Unpair Oraimo FreePods 4 From iPhone
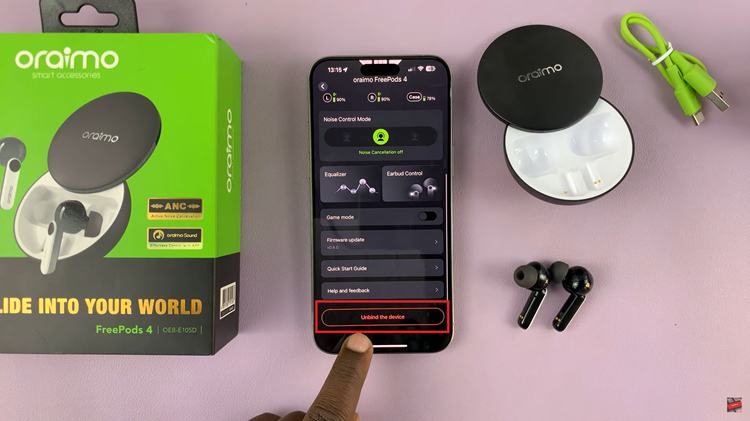
To begin, locate and open the Oraimo companion app on your iPhone. Once opened, tap on the FreePods 4 from the list. Within the FreePods 4 settings in the Oraimo app, tap on option that says “Unbind this device.” A confirmation prompt may appear asking if you’re sure you want to unbind the device.

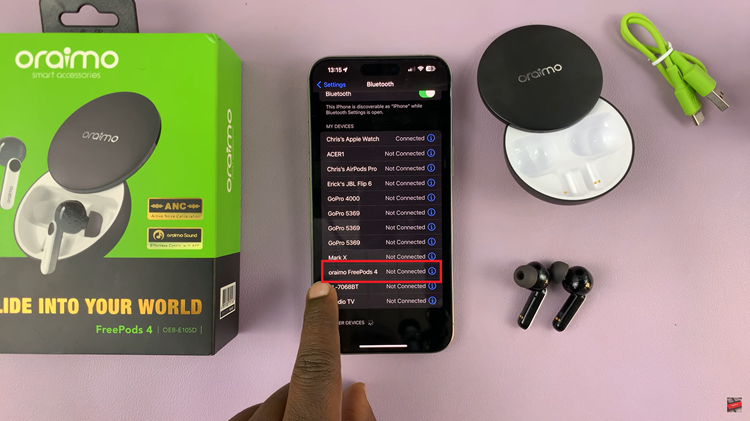
Confirm your choice, and the FreePods 4 will be disconnected from your iPhone. Once you’ve unbound the FreePods 4 from the Oraimo app, exit the Oraimo app and navigate to the iPhone Bluetooth settings. In the list of paired devices under the Bluetooth settings, locate your Oraimo FreePods 4. You should see a small “i” icon next to it.

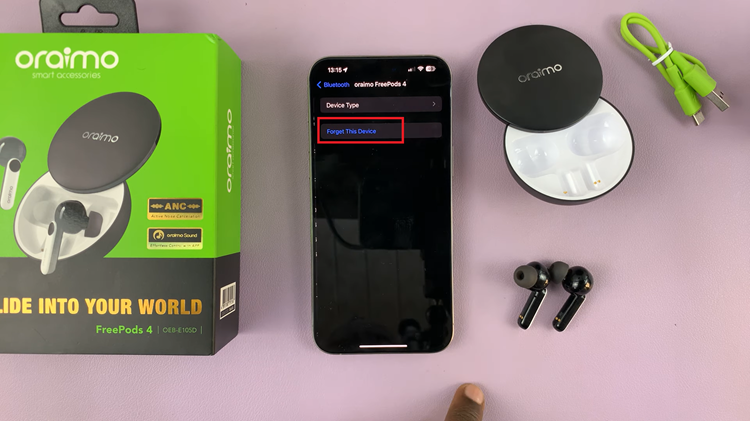
Tap on this icon to view more details about the device. Within the device details screen, you’ll find an option labeled “Forget This Device.” Tap on this option, and confirm your choice when prompted. This action will remove the FreePods 4 from the list of paired devices on your iPhone.

Once you’ve followed the steps, your Oraimo FreePods 4 will be successfully disconnected and unpaired from your iPhone. By following these simple steps, you can easily disconnect and unpair your Oraimo FreePods 4 from your iPhone. Whether you’re troubleshooting connectivity issues or simply switching to another device, knowing how to manage your Bluetooth connections can be incredibly useful.
Watch: How To Rename TCL Google TV

