The new meaning of living in today’s digital world is finding ease in handling your camera for video calls and virtual meetings online with convenience. Google Chrome remains one of the most-used web browsers, offering a host of features that make connecting and communication over the internet way easier.
All these functions will be easily enabled only when your camera is allowed and configured in the browser correspondingly. If you have ever experienced a situation in which your camera didn’t work during an important video call or online class, the problem is actually connected to browser settings.
Chrome, by default, always prompts users for permission to use their camera or anything in the name of privacy. This post will guide you through the steps to enable your camera in Google Chrome.
Watch: How To Change Language Back To English On Pinterest
Enable Camera In Google Chrome
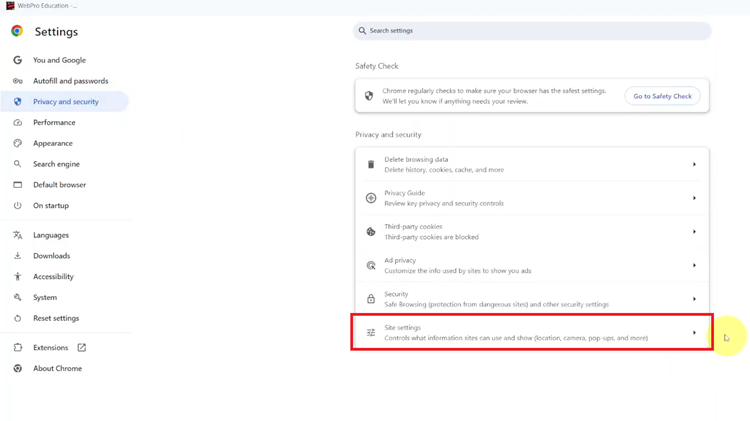
Begin by opening the Google Chrome browser. From here, tap on the ellipsis tool at the top right corner of the screen. From the menu that appears, find and click on “Settings.” Then click the “Privacy & Security” option and find the “Site Settings” option. Click on it to proceed.

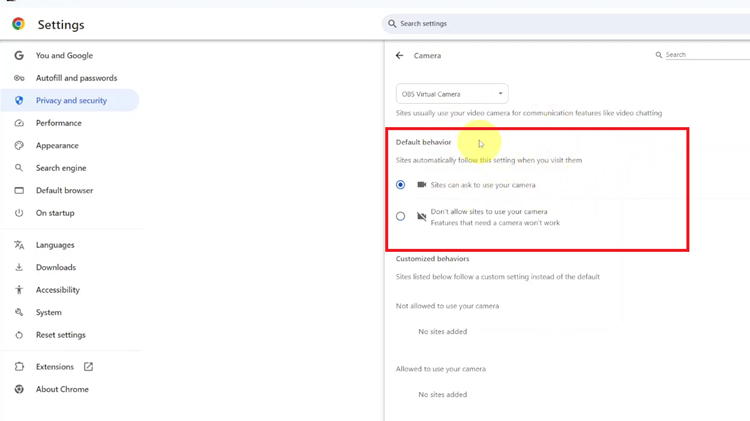
Locate the “Camera” option and click it within the site settings. Then, to turn this feature on, find the “Sites can ask to use your camera.” Click on it, and the camera will be enabled on your Google Chrome browser.

In conclusion, enabling your camera in Google Chrome is a simple yet essential task for smooth online communication and interactive experiences. Following the steps outlined in this guide to manage this feature.
Read: How To Copy Text From A Print Document On Samsung Galaxy Z Fold 6

