Adjusting the display settings on your iPad can significantly enhance usability and comfort, especially if you have specific visual preferences or requirements. One such feature that can make a notable difference is the ability to enable color filters.
Whether you need to reduce eye strain, improve readability, or simply prefer a different color palette, learning how to activate and customize these filters can greatly personalize your iPad experience.
In this guide, we’ll walk you through the comprehensive step-by-step process on how to enable color filters on the Display of the iPad.
Also Read: How To Turn OFF JavaScript On Safari Browser On iPad
How To Enable Color Filters On Display Of iPad
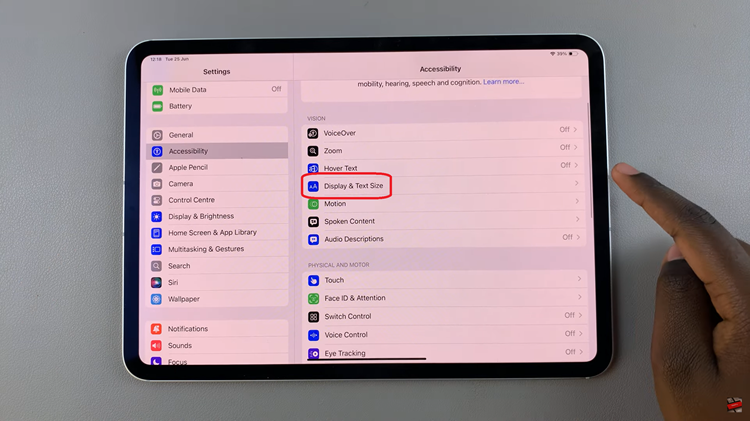
Start by unlocking your iPad and locating the Settings app on your home screen. Tap to open it. In the Settings menu, scroll down and select Accessibility. Within the Accessibility menu, tap on Display & Text Size.

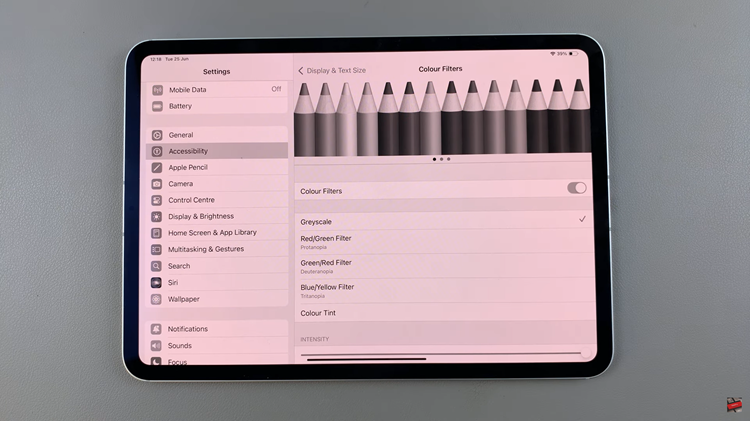
Under Display & Text Size, locate and tap on Color Filters. Toggle the switch next to Color Filters to turn it on. This action activates the feature, allowing you to customize the display according to your needs. Once enabled, you can select the filter style that best suits your preferences.

After selecting your preferred color filter and making any adjustments, simply exit the Settings app. Your chosen settings will now be applied to the iPad’s display. By following these steps, you can effectively enable and customize color filters on your iPad.

