Dictation, a powerful feature available on macOS, allows you to convert spoken words into text. This can be incredibly helpful for various tasks, such as composing emails, writing documents, or simply inputting text without having to type it manually.
Enabling dictation on your Mac or MacBook can greatly enhance your productivity and accessibility. With this feature, it makes tasks like composing emails and writing documents easier than ever.
In this guide, we will walk you through the steps to enable dictation (speech-to-text) on your Mac or MacBook.
Watch: How To Create A Riot Games Account
How To Enable Dictation On MacBook
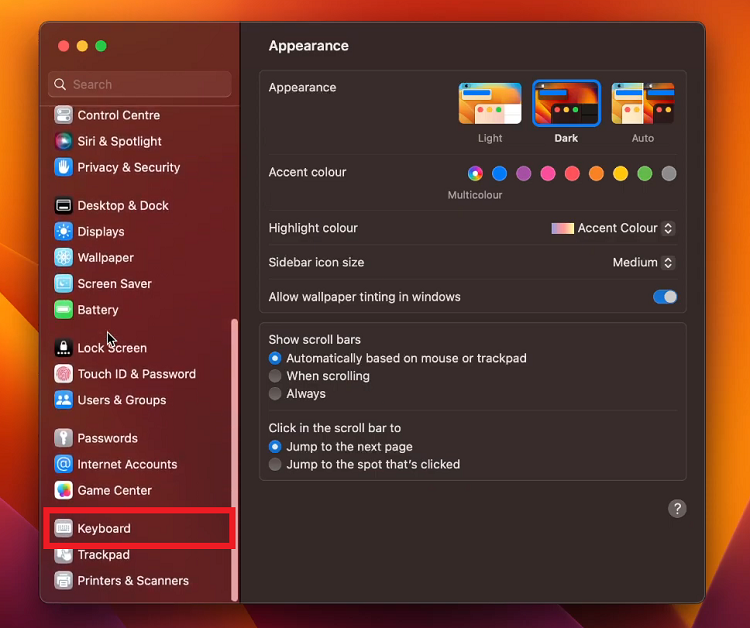
First, click on the Apple logo in the top-left corner of your screen and select “System Preferences.” In the System Preferences window, locate and click on the “Keyboard” option.

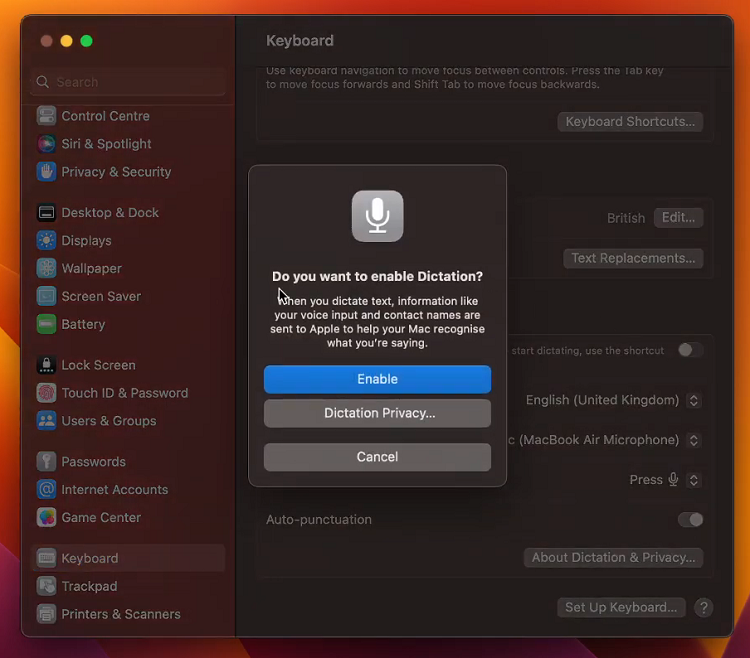
Now, scroll down the Keyboard settings and find the “Dictation” option. To enable dictation, click on the toggle switch to the ON position. This will prompt a pop-up message explaining that your spoken words will be sent to Apple’s servers for processing. Click “Enable” to proceed.

After enabling dictation, you can choose your preferred dictation language from the dropdown menu. macOS supports a wide range of languages for dictation.
Optionally, you can assign a keyboard shortcut to activate dictation quickly. By default, you can press the “fn” key twice to start dictation. However, you can customize this shortcut to better suit your preferences.
And that’s how to go about it. Let us know in the comment section below if you have any questions or suggestions. Feel free to share this article with anyone who needs this information.

