Despite the basic nature of the Nokia, this phone includes practical functionalities, such as the Automatic Redial feature.
Automatic Redial allows you to automatically redial a previously dialed number, making it easier to connect with contacts or businesses even if the initial call attempt fails.
In this article, we guide you through the process on how to enable and disable Automatic Redial in Nokia phones. These instructions are useful for the Nokia 105, Nokia 105 4G, Nokia 225, Nokia 106, Nokia 3310, Nokia 110 and Nokia 8110 models.
Also Read: How To Enable Standby Mode On Nokia Phones
How To Enable & Disable Automatic Redial In Nokia Phones
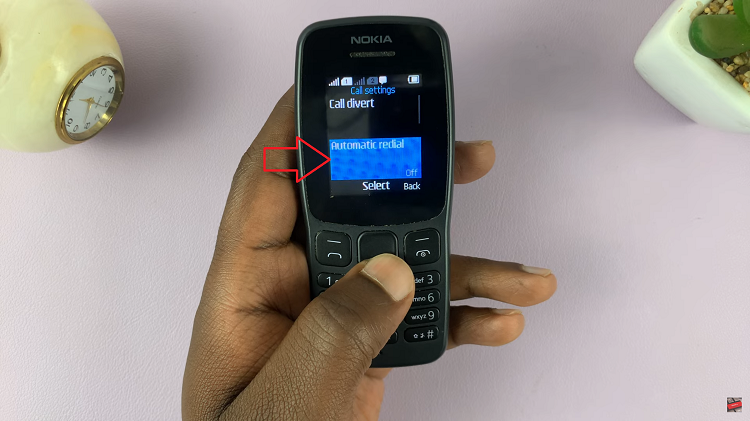
To begin, navigate to the main menu. Open the “Settings” app. Then scroll through the Settings menu and select “Call Settings.” Within the Call Settings menu, you will find various options related to calling features. Look for “Automatic Redial” and select it by pressing the “OK“.

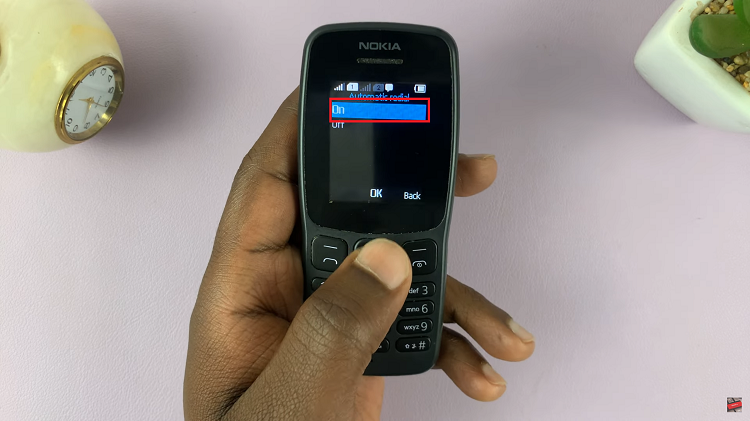
Once you are in the Automatic Redial settings, you will be presented with the option to enable or disable the feature. Choose “On” to activate the Automatic Redial function. Now, when you encounter a call failure or disconnection, your phone will automatically redial the last dialed number for you.

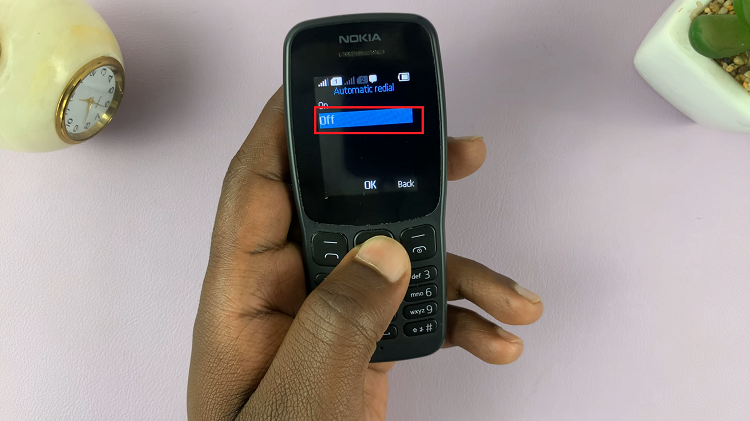
To disable “Automatic Redial” on your Nokia, choose “Off” to deactivate the Automatic Redial function. This action will prevent your Nokia from automatically redialing a number that was not successfully connected.

By following the steps outlined in this article, you can easily enable or disable Automatic Redial based on your preferences. Whether you want to automatically redial a busy number or avoid repeated redialing, the Nokia user-friendly interface makes it simple to adjust this feature to suit your needs.

