JavaScript is very important in how modern websites function. It makes web pages interactive and dynamic, which allows form validation, animations, pop-up notifications, and a lot more. While it is vital for a better browsing experience, there are times you may want to manage the way JavaScript works in your browser.
Such as disabling JavaScript speeds up page loading for some Web pages, protects privacy, or stops some security problems. In addition, some websites do not work correctly without active JavaScript. You may want to consider keeping it on to have a great experience. Chrome has built-in actions for enabling or completely disabling JavaScript for all or only for specific Web pages.
In this guide, we will show you how to enable/disable JavaScript in Google Chrome.
Watch: How To Scan Documents On Samsung Galaxy Z Fold 6
Enable/Disable JavaScript In Google Chrome
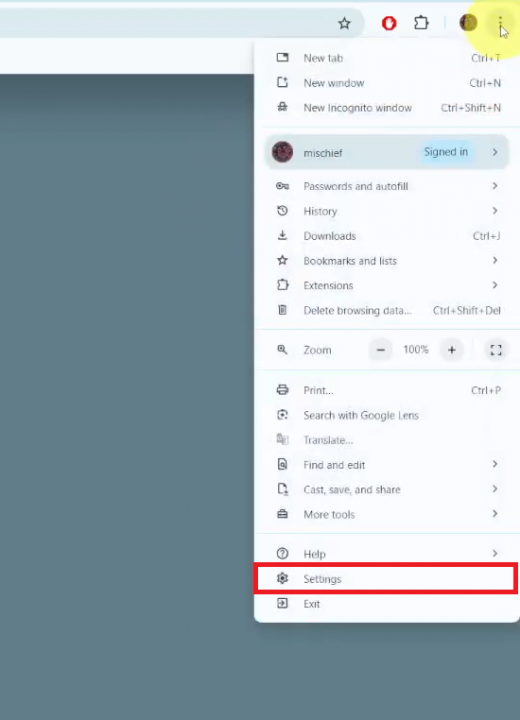
Begin by opening the Google Chrome browser. From here, tap on the ellipsis tool at the top right corner of the screen. From the menu that appears, find and click on “Settings.”

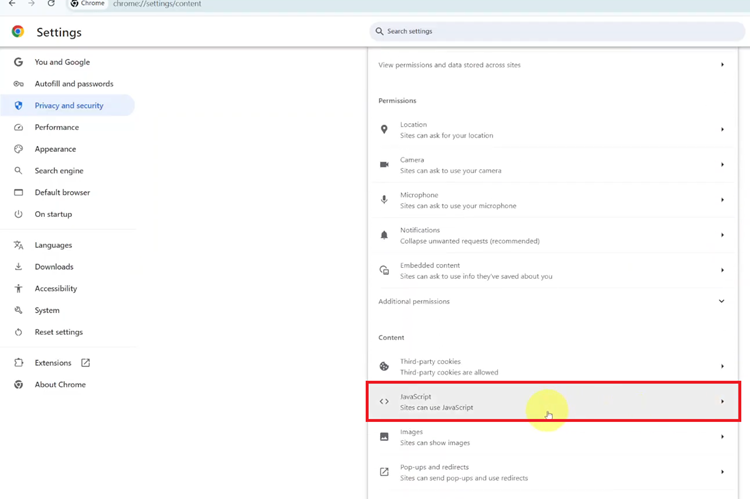
Following this, click on the “Privacy & Security” option then find the “Site Settings” option. Then, scroll down and click on the “JavaScript” option.

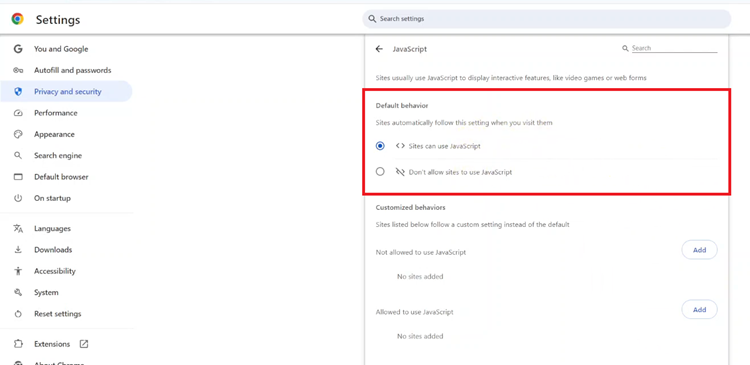
At this point, you’ll see two options; ‘Sites can use JavaScript‘ & ‘Don’t allow sites to use JavaScript.’ To enable JavaScript, choose the first option, while to disable it, select the second option.

In conclusion, whether for privacy, security, or testing, controlling JavaScript in Google Chrome is simple and can be done within a few clicks. By enabling or disabling it as needed, you ensure a tailored browsing experience.

