SharePlay is an exciting feature available on iPhones, iPads, and Macs that allows users to share content from various streaming services, such as Apple TV+, Netflix, Apple Music, and Disney+, during FaceTime calls. It enables you to enjoy movies, music, and more with friends and family in real time, creating shared experiences even when physically apart.
However, there may be times when you want to enable or disable SharePlay based on your preferences or specific circumstances. In this article, we will provide a detailed guide on how to enable and disable SharePlay on your iPad.
We will explore the necessary steps to activate this feature and explain how you can turn it off when desired. So, let’s dive in and discover how to make the most of SharePlay on your iPad.
Watch: How To Enable Message Notification Badges On iPad
Enable & Disable SharePlay On iPad
To begin enabling SharePlay on your iPad, start by unlocking your device and launching the Settings app. Next, scroll through the options until you find “Apps,” where you can view a list of all the applications currently installed on your iPad.
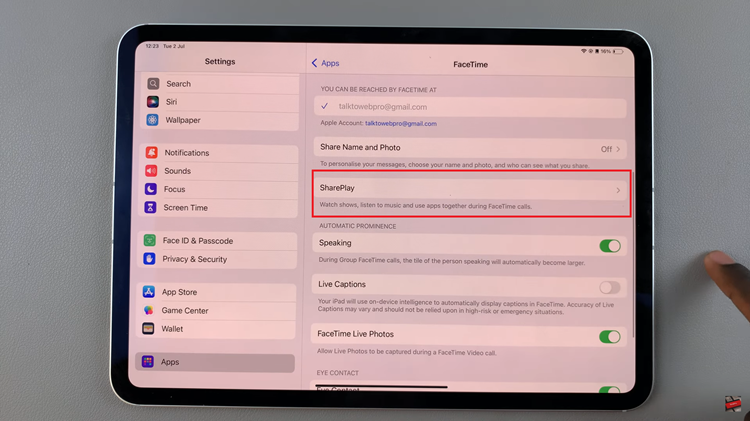
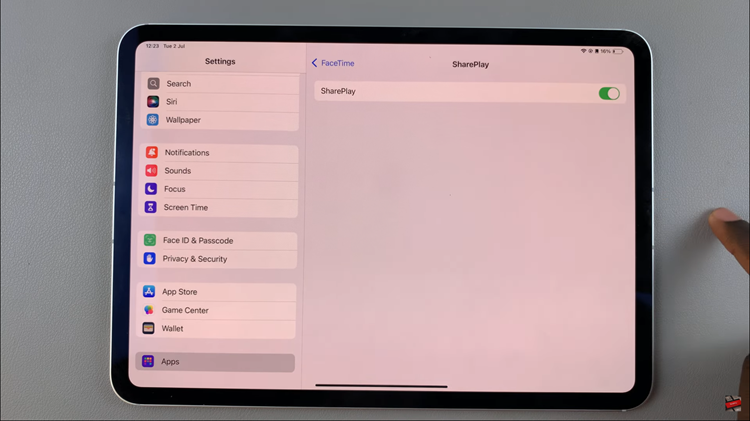
Subsequently, continue scrolling until you locate the “FaceTime” app. Tap on it to access its settings. Within the FaceTime settings menu, scroll down until you see the “SharePlay” option. Here, you’ll find a toggle switch positioned next to the “SharePlay” setting.

To activate SharePlay, simply toggle the switch into the ON position. This action enables the feature, allowing you to enjoy synchronized experiences with others during FaceTime calls. Conversely, if you wish to disable SharePlay, toggle the switch back to the OFF position.

By following these steps within your iPad’s Settings and FaceTime app, you can easily manage and control the activation of SharePlay, enhancing your collaborative experiences with friends and family during FaceTime calls.
