Voice typing, also known as dictation, offers a convenient way to input text on your iPad without the need for typing. Whether you’re composing emails, taking notes, or engaging in instant messaging, this feature can significantly enhance your productivity and accessibility.
By enabling and disabling voice typing settings, you can tailor your iPad’s functionality to suit your preferences and workflow seamlessly. In this guide, we’ll walk you through the steps to enable and disable voice typing on your iPad.
Whether you’re new to this feature or looking to adjust its settings, these instructions will help you navigate your device’s settings effectively. Let’s explore how you can harness the power of voice dictation to make your iPad experience more efficient and user-friendly.
Watch: How To Clear Cache In Safari On iPad
Enable & Disable Voice Typing (Dictation) On iPad
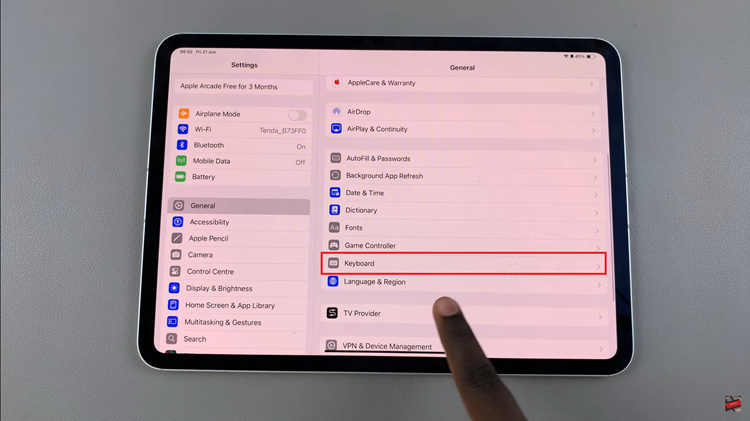
To begin, unlock your device and navigate to the Home screen. Once there, locate the Settings app icon—it resembles a gear cog—and tap on it to open the Settings menu. From here, scroll down until you find and tap on “General.”
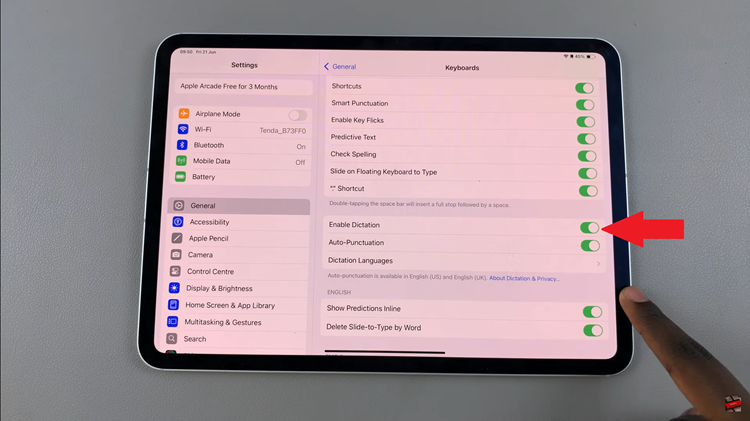
At this point, navigate further down the settings list and tap on “Keyboard.” This section manages keyboard inputs and also includes settings for voice typing on your iPad. Once you’re in the Keyboard settings, scroll down until you locate the “Enable Dictation” option.

Then, toggle the switch next to “Enable Dictation” to turn it on. When enabled, the switch will turn green, indicating that the dictation feature is now active. Should you wish to turn off dictation, simply toggle the switch to the OFF position. You’ll notice the switch turn grey, indicating that the feature has been successfully disabled.

By following these steps, you can easily manage voice typing settings on your iPad, enabling or disabling dictation as per your preference with a few simple taps in the Settings menu.

