When lending your Mac or MacBook to others, privacy and security become paramount concerns. Fortunately, macOS offers a convenient solution in the form of the Guest User feature.
Enabling the Guest User account allows individuals to use your computer without accessing your personal files, applications, or settings.
In this article, we’ll take you through the step-by-step process on how to enable guest user on your Mac / MacBook running macOS Ventura.
Also Read: How To Connect Bluetooth Mouse To Google Pixel Tablet
How To Enable Guest User On Mac / MacBook
To get started, click on the Apple menu icon situated at the top-left corner of your screen. From the drop-down menu that appears, select “System Settings.”
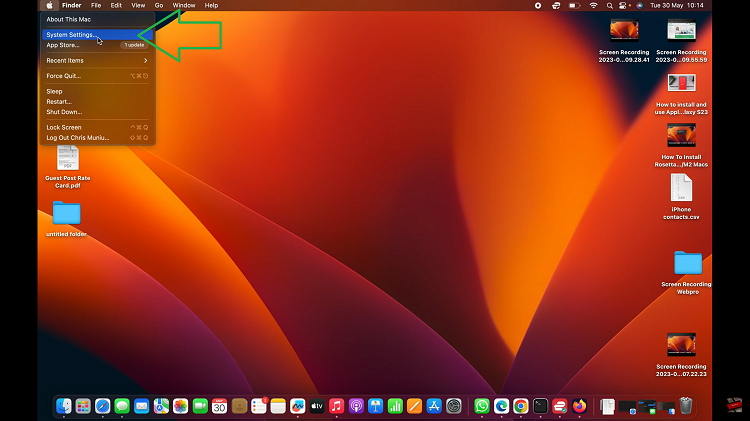
Within the System Settings window, locate and click on the “Users & Groups” icon from the list of available options in the left-hand side panel. In the Users & Groups section, you will find a list of user accounts. Among them, locate the “Guest User” option. To proceed, click on the small “i” icon next to the Guest User account.
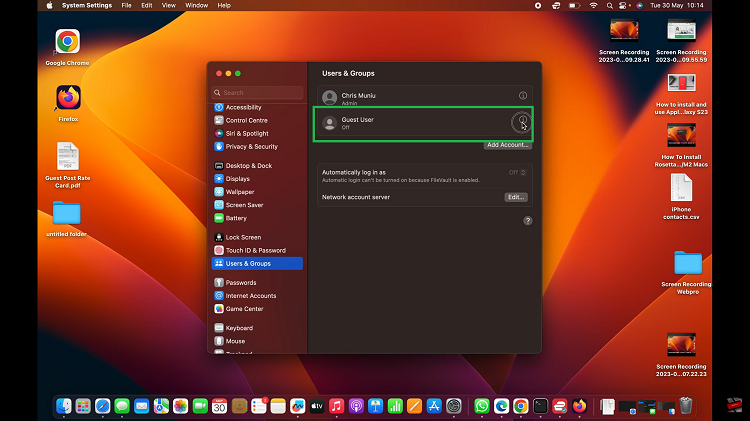
Within the Guest User account information window, you’ll see a toggle button labeled “Allow guests to log in to this computer.” Click this toggle button to enable the Guest User login functionality. To confirm the changes, you’ll be prompted to enter your administrator password. After entering your password, click “Unlock.”
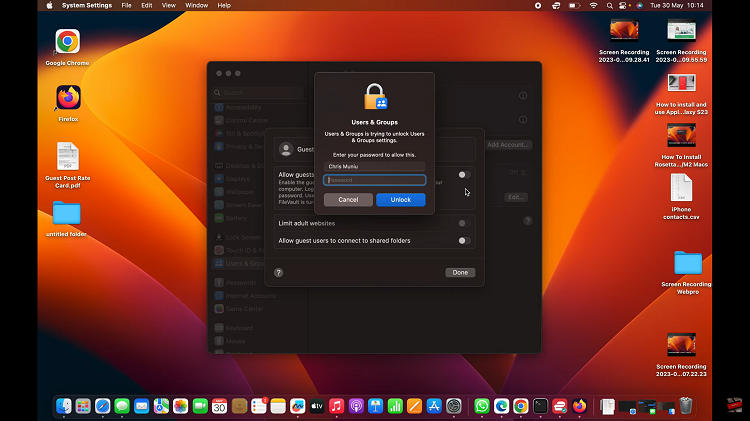
For more control over the Guest User experience, you can customize various settings. You have the option to allow or disallow guest access to shared folders and shared screens. To complete the customization, click “Done” to save your settings.
Watch: How To Download Google Nest Camera Events as Video Clips To Your Phone
