In the world of smartphone photography, capturing the perfect shot is not just about composition and lighting; it’s also about preserving memories and adding context to your photos.
One way to enhance the storytelling aspect of your images is by enabling location tags. These tags imprint the geographical coordinates or location name onto your photos.
In this guide, we’ll walk you through the comprehensive step-by-step process on how to enable location tags in Camera on Samsung Galaxy S24s.
Also Read: How To Enable Camera Shot Suggestions On Samsung Galaxy S24s
How To Enable Location Tags In Camera On Samsung Galaxy S24s
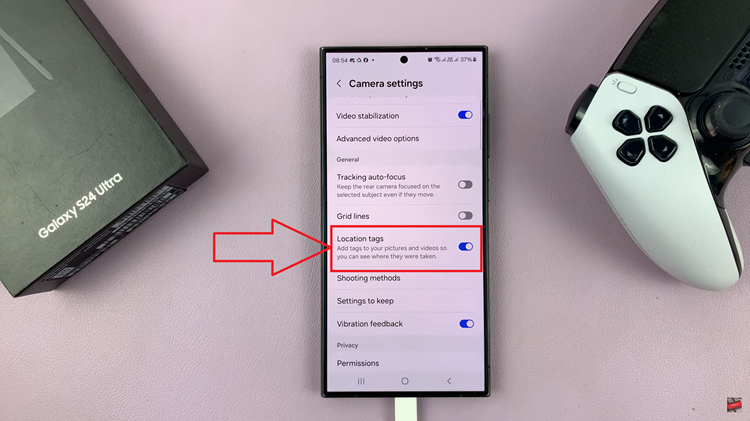
Begin by opening the Camera app. Once the camera app is open, you’ll typically find the settings icon in the top-left corner of the screen. Tap on it. Within the camera settings menu, scroll down or navigate to find the “Location tags” option, tap on the toggle switch next to it to enable this feature.

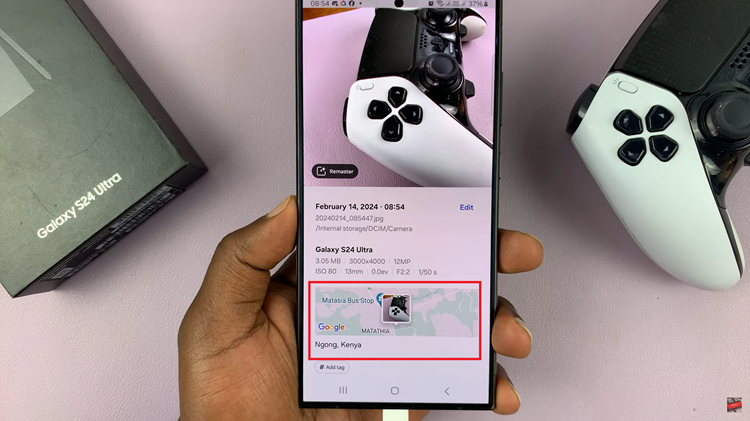
To confirm that location tags are successfully enabled, return to the camera interface by tapping the back button or navigating out of the settings menu. Take a test photo by aiming the camera at your desired subject and pressing the shutter button. After capturing the photo, open it in the gallery or photo viewer app.

Within the photo viewer, locate the option to view additional details or metadata associated with the image. This may involve tapping on an “Info” or “Details” icon, typically represented by an ‘i‘. Once you’ve accessed the photo details, look for the location information. You should see the location name indicating where the photo was taken.

By following these simple steps, Samsung Galaxy S24 users can easily enable location tags in the camera. Whether you’re documenting a scenic landscape, a memorable event, or simply snapping selfies with friends, location tags provide a valuable layer of information that enriches the photography experience.
Watch: How To Enable & Disable Camera Focus Enhancer On Samsung Galaxy S24 / S24 Ultra

