Unlock the potential of your Samsung Smart TV with maintenance mode—a powerful tool designed to keep your entertainment hub running smoothly. Enabling maintenance mode empowers users to diagnose issues, perform troubleshooting tasks, and optimize performance with ease.
In this guide, we’ll delve into the steps required to enable maintenance mode on your Samsung Smart TV, ensuring you have the knowledge to navigate through its advanced features confidently. Whether you’re troubleshooting software glitches, updating firmware, or conducting hardware diagnostics, accessing maintenance mode opens a gateway to a world of tailored solutions for your Smart TV.
Let’s dive in and unleash the full potential of your Samsung Smart TV.
Watch: How To Use TikTok On Samsung Smart TV
To Enable Maintenance Mode On Samsung Smart TV
Firstly, press the Home button on your remote to bring you to the home screen. Following this, navigate to the left-hand side of the screen to reveal the menu. Then, scroll down and select “Settings” from the menu that appears.
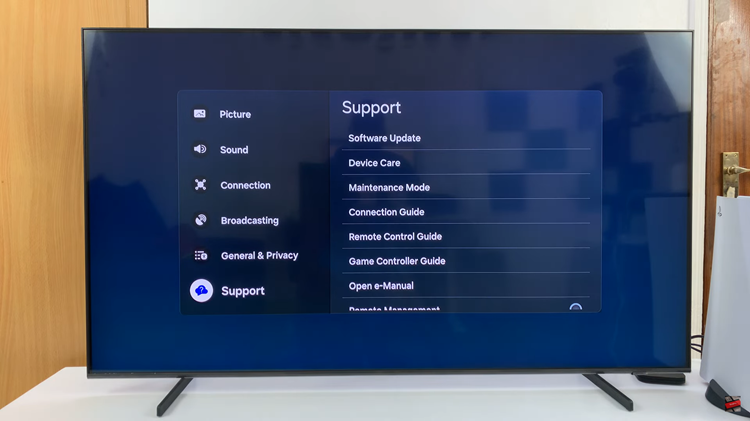
Within the settings menu, scroll through and select “All Settings.” At this point, scroll down and select the “Support” option.

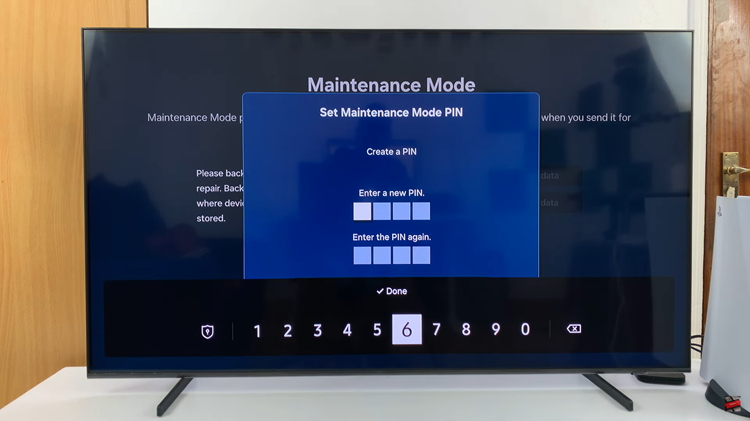
From here, select the “Maintenance Mode” option. Following this, select the “Start” option. This will prompt you to create a maintenance mode PIN for your Samsung Smart TV.

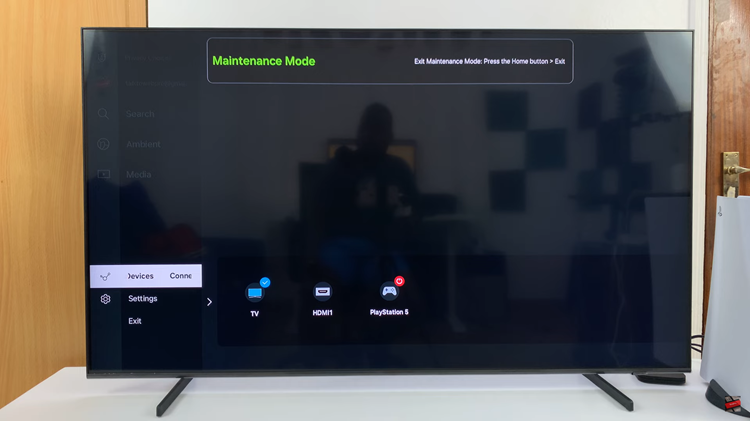
Once you’ve created the PIN, your Samsung Smart TV will reboot and you can access the maintenance mode. Here, you’ll find various options such as software update, factory reset, and hardware diagnostics. Navigate through these options using your remote control to perform the desired maintenance task.

In conclusion, enabling maintenance mode on your Samsung Smart TV provides you with the tools needed to diagnose and resolve issues efficiently. Whether you’re troubleshooting software glitches or performing routine maintenance tasks, accessing maintenance mode empowers you to keep your Smart TV running smoothly.

