Enabling your microphone in Google Chrome is crucial for tasks such as video calls, voice searches, and online meetings. Without the correct settings, you might find that your voice is not heard, which can be frustrating. Therefore, check and update your microphone permissions in Chrome to ensure smooth communication.
Once you enable the microphone, you are ready for any activity requiring voice input. For instance, virtual meetings and hands-free browsing become more straightforward. By properly setting up your microphone, you stay connected and work efficiently. Consequently, these adjustments help you avoid interruptions and enjoy a seamless online experience.
Watch:How To Check Google Chrome Version
Enable Microphone In Google Chrome
Open Chrome Settings
Launch Google Chrome and click the three dots in the top right corner. Select Settings from the dropdown menu to access Chrome’s settings.


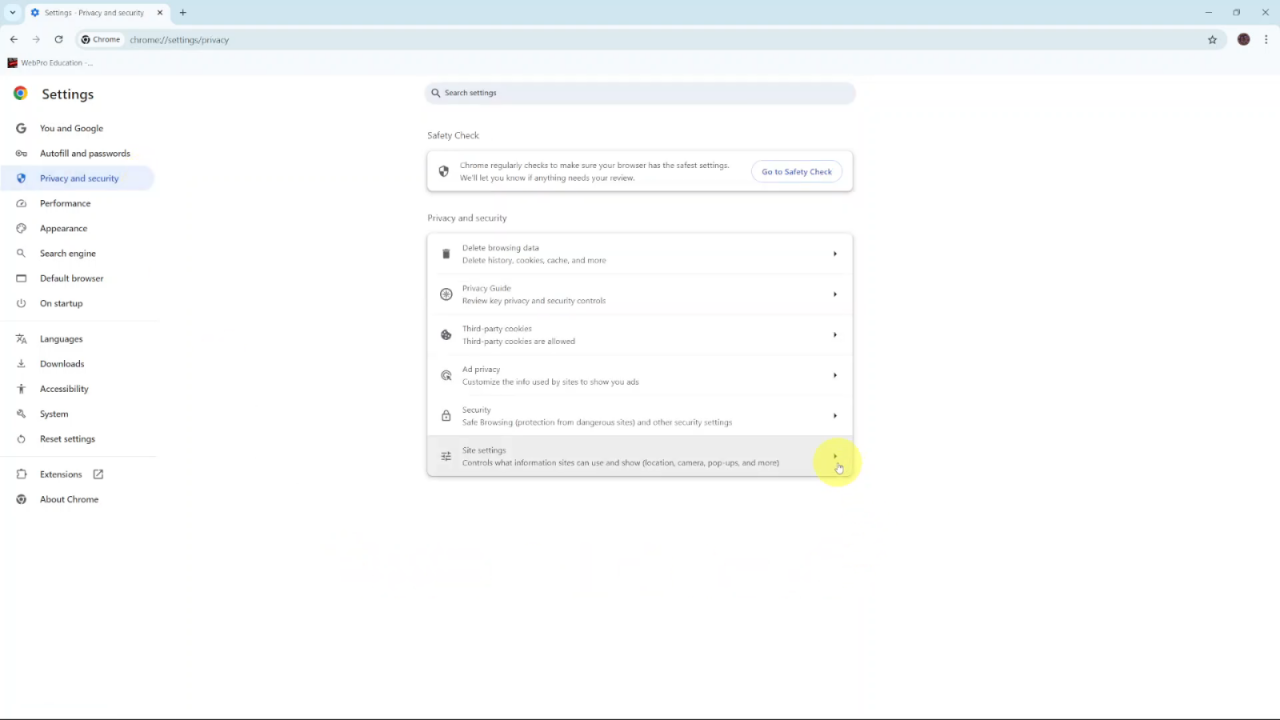
Navigate to Privacy and Security
Scroll down to Privacy and security and click on Site settings to access permissions.

Check Microphone Settings
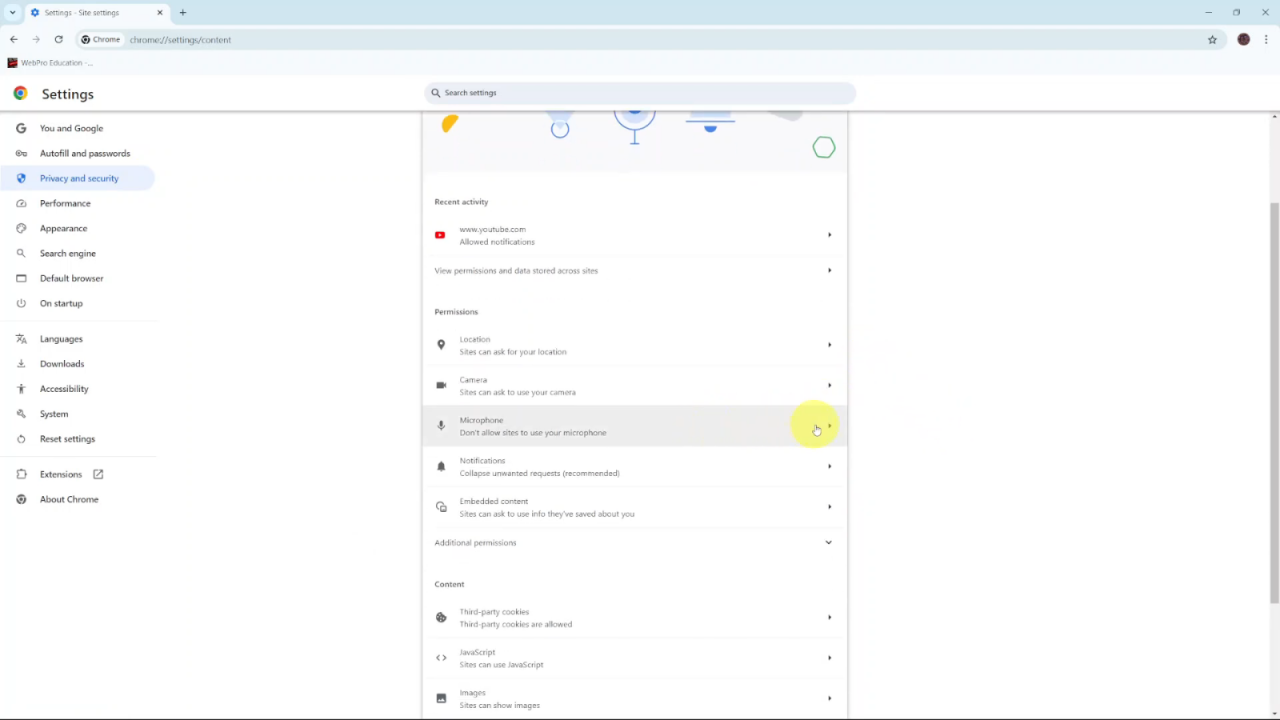
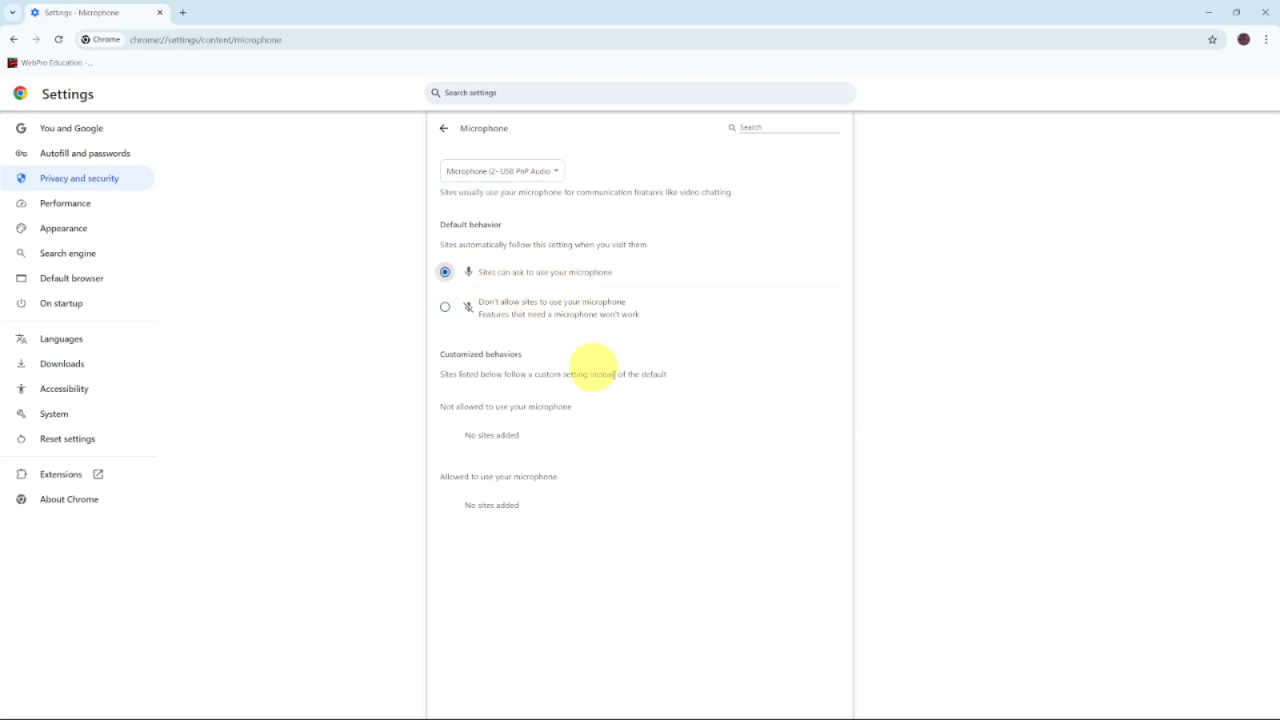
In the Permissions section, select Microphone. Make sure your microphone is connected, as Chrome typically detects it automatically.
Set Microphone Permissions
Under Default behavior, choose Sites can ask to use your microphone to allow websites to request microphone access. For automatic access, go to Site settings, find Microphone, and change the setting from Ask to Allow.
Optional: Keep the Prompt
If you prefer to be asked each time a site wants to use your microphone, leave the setting on Ask for more control.fer to be prompted each time.
