Your Android phone, a powerful companion in the digital age, comes equipped with a range of features designed to enhance user experience. One such feature that adds a layer of convenience to your device is the screen auto-rotate function.
Gone are the days of fixed screen orientations. Now, with a simple tap, you can seamlessly transition between portrait and landscape views, optimizing your screen for different tasks and activities.
In this guide, we’ll walk you through the comprehensive step-by-step process on how to enable screen auto rotate on your Android phone.
Also Read: How To Record Incoming Calls On Android Phone
How To Enable Screen Auto Rotate On Android Phone
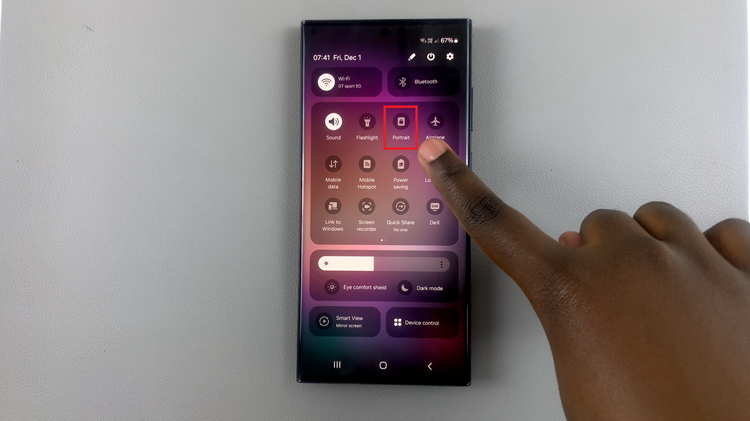
The first step is to swipe down from the top of your screen to reveal the Quick Settings menu. Within the Quick Settings menu, keep an eye out for the option labeled “Portrait.” This is the setting responsible for controlling the screen rotation on your Android device.

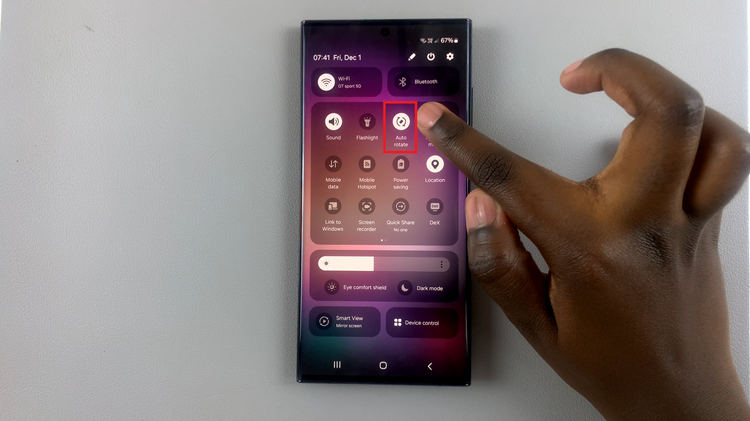
Once you’ve identified the Landscape option, tap on it. As you do so, the button should change color, turning a vibrant blue to indicate that the Auto Rotate feature is now active. Additionally, the label will switch to “Auto Rotate,” replacing the previous “Portrait” designation.

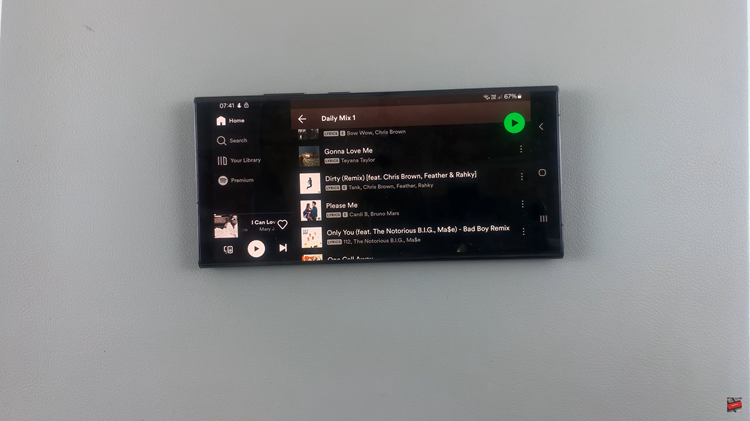
With Auto Rotate enabled, you can now effortlessly switch between portrait and landscape views on your Android phone. Whether you’re watching videos, browsing the web, or simply prefer a different orientation for certain apps, this feature provides the flexibility you need.

In just a few simple steps, you’ve unlocked the convenience of screen auto-rotation on your Android phone. By utilizing the Quick Settings menu, you can easily toggle this feature on or off, adapting your device to various activities and enhancing your overall user experience.
