The iPad’s ability to switch between portrait and landscape modes is one of its many user-friendly features, making it easier to view content in the most convenient orientation. However, sometimes the screen may not rotate automatically, which can be frustrating.
In this guide, we’ll walk you through the steps to enable screen auto rotate on your iPad. The screen rotation feature allows your iPad to automatically adjust its display orientation when you physically rotate the device.
This can be especially useful when watching videos, reading, or using apps that function better in either landscape or portrait mode. By default, auto-rotate is enabled, but it can be easily turned off or disrupted due to various settings or minor glitches.
Read: How To Find Serial Number On Galaxy Z Fold 6
Enable Screen Auto Rotate On iPad
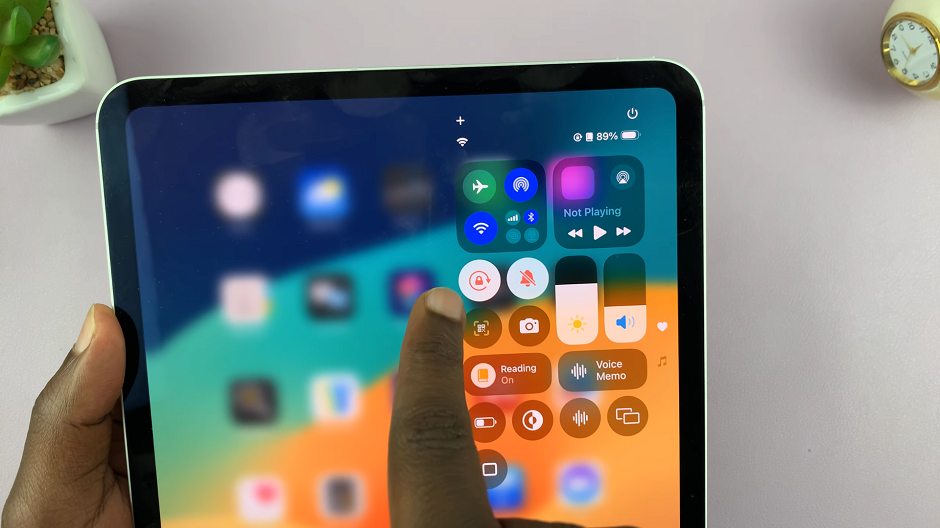
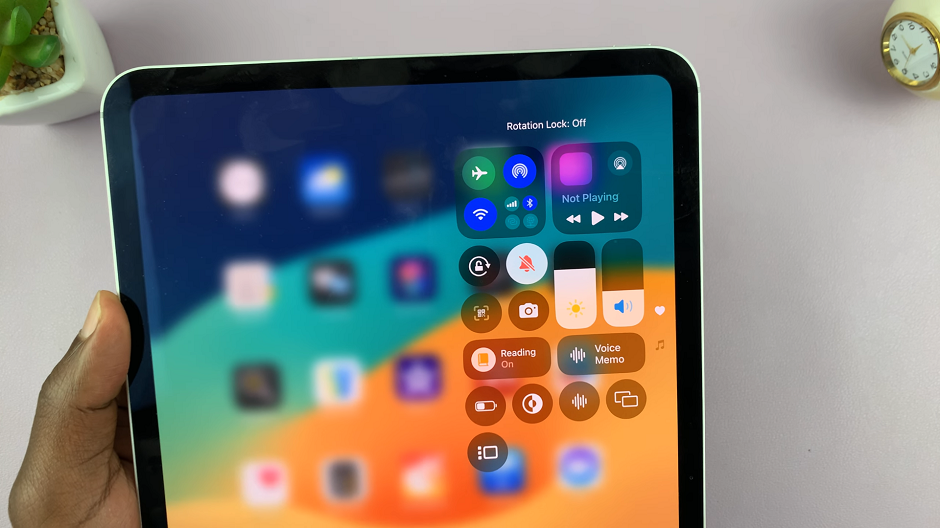
First, swipe down from the top-right corner of the screen to open Control Center. Locate the Rotation Lock option.

It’s the icon that resembles a lock with a circular arrow around it. This icon represents the screen rotation lock feature. Tap the Screen Rotation Lock icon to turn it off.

Once activated, the icon will turn white. Now, you’ll be able to switch the screen orientation between landscape and portrait as per your needs, when you physically rotate the iPad.
Watch: Disable Fingerprint / Face ID Temporarily On Samsung Galaxy Z Fold 6

