Standby mode is a useful feature found on Nokia phones. It allows users to conserve battery power while keeping the device ready to receive calls, messages, and notifications.
By enabling standby mode, you can extend your Nokia phone’s battery life and ensure it remains operational when not in active use.
In this article, we guide you through the process on how to enable Standby Mode on Nokia phones. These instructions are useful for the Nokia 105, Nokia 105 4G, Nokia 225, Nokia 106, Nokia 3310, Nokia 110 and Nokia 8110 models.
Also Read: How To Divert Incoming Calls In Nokia Phones
How To Enable Standby Mode On Nokia Phones
To begin, access the main menu. Go to the “Settings” app then scroll down using the navigation pad and select “Display Settings.” Inside the Display Settings menu, tap on the option labeled “Standby Screen“.
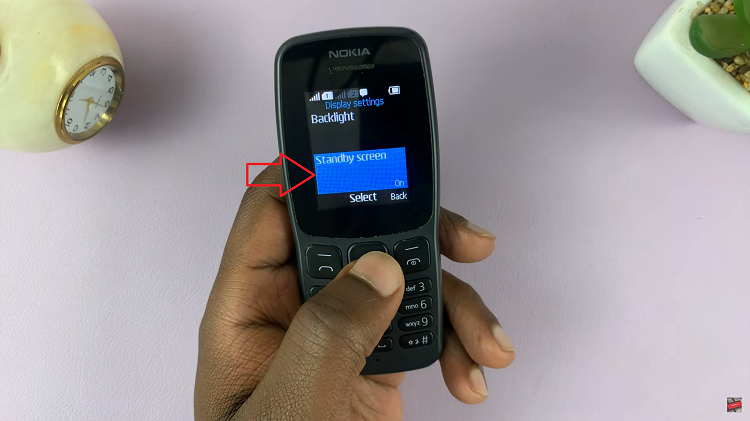
In the Standby Screen settings, you should see an option to turn the Standby Screen On or Off. Use the navigation pad to select “On” and press the center button to enable Standby Mode.
Now, return to the main Settings page. Scroll down and select “Phone Settings.” In the Phone Settings menu, scroll down and tap on “Keyguard Settings“.
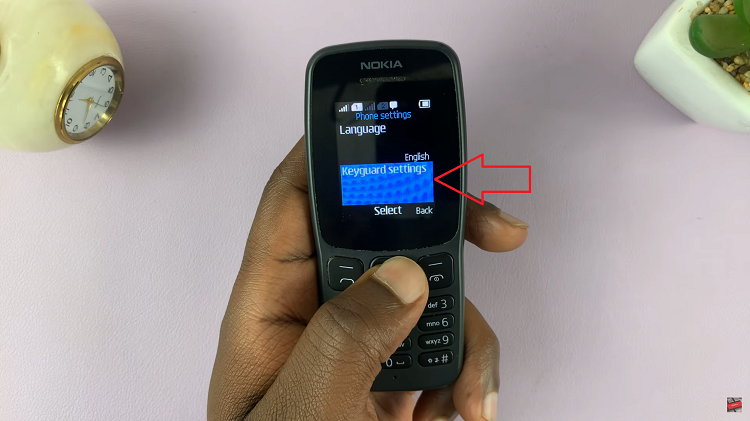
Inside the Keyguard Settings menu, look for the option labeled “Automatic Keyguard” and select it. In the Automatic Keyguard settings, make sure the feature is turned on. After enabling Automatic Keyguard, you can set a delay period for how long the phone should be inactive before entering Standby Mode.
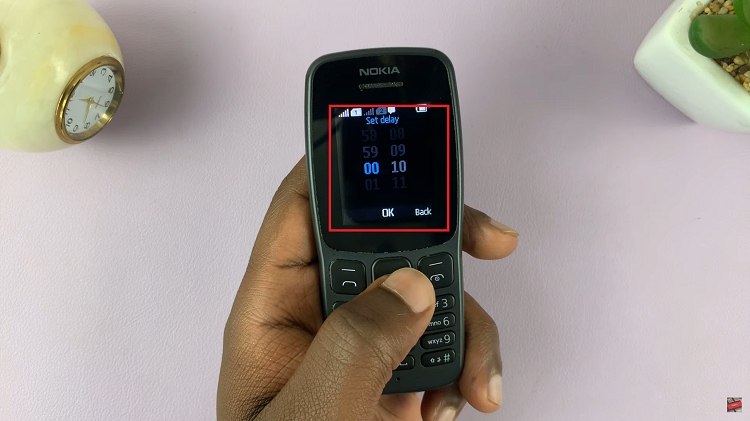
Use the navigation pad to adjust the delay period, then press “OK” to confirm your selection. Now, when the phone remains idle for the specified delay period, it will automatically enter Standby Mode, conserving battery power and extending its overall usage time.
Watch: How To Enable & Disable Automatic Redial In Nokia Phones

