Social media sites like Pinterest contain a great deal of personal information, from your favorite ideas to shopping inspirations. This vital information must be secured against unauthorized access through two-step authentication.
Two-factor authentication is an extra line of defense that prevents anyone from attempting to access your account simply by knowing your password. It requires not just the password but another level of verification: a code sent to your phone or generated via an authenticator app. This addition of protection makes access to your account much more difficult, even if someone did have your password.
In this tutorial, we’ll show you how to enable two-step authentication on Pinterest. Let’s get started!
Watch: How To Add Pronouns To Your Pinterest Account
Enable Two Step Authentication On Pinterest
Begin by launching Pinterest on your favorite browser. Then, click on the drop-down arrow next to your profile icon. From here, click on “Settings” from the menu that appears.
At this point, click on the “Security” option from the left-side menu. Then, scroll down within the security settings and find the “Require code at login” option. Click on it to proceed.
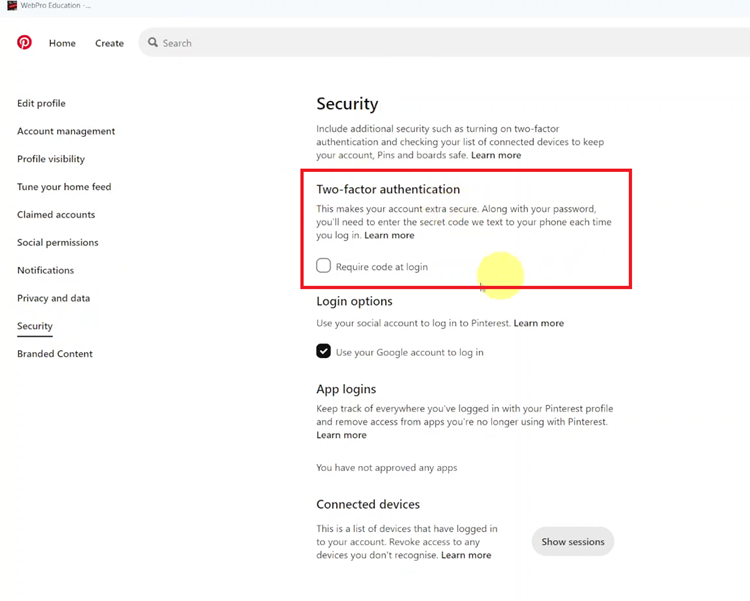
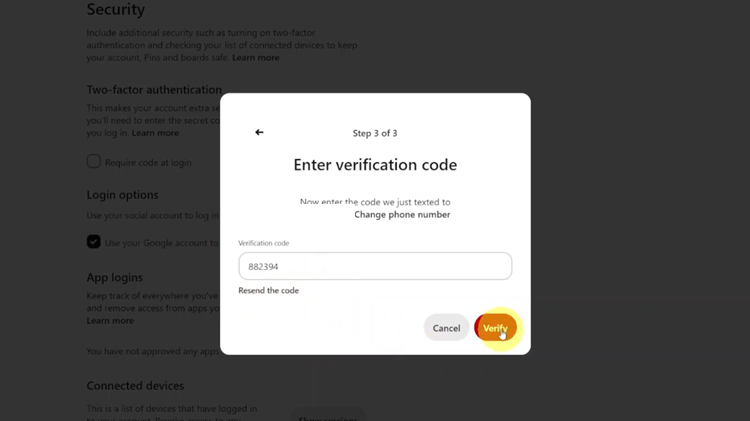
Now, you’ll be prompted to type in your required details, email address, and password. Following this, you’ll be prompted to type in your active phone number, and a verification code will be sent to your number.
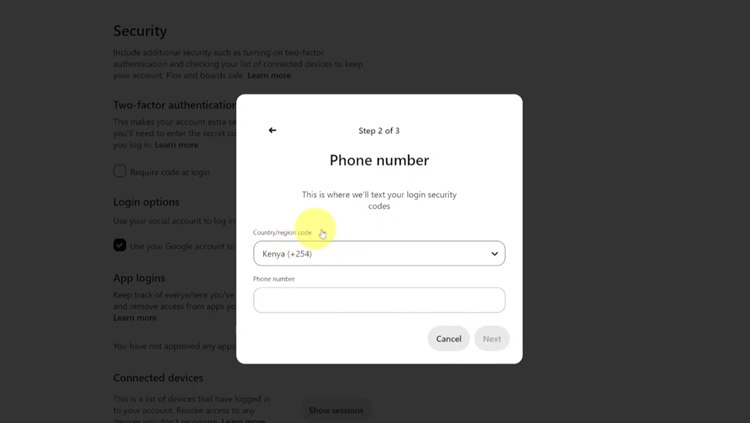
Then, type in the verification code and tap on “Verify.” Once done, the account will be verified on your Pinterest account.
In conclusion, enabling two-step authentication on Pinterest significantly enhances your account security. By following these steps, you can enjoy a safer browsing experience. Keep your verification methods updated and store any backup codes securely.
Read: How To Turn ON/OFF Screen Auto Rotate On Samsung Galaxy A06
