Unlocking the full potential of your Android device often involves diving into its developer settings and enabling USB debugging. Whether you’re an aspiring app developer, a tech enthusiast, or simply seeking to troubleshoot your device, USB debugging is a fundamental step that allows your Android phone to communicate with your computer for various advanced tasks.
This crucial feature opens up a plethora of possibilities, from app development to customizing your device, making it an essential skill for anyone looking to harness the full capabilities of their Android smartphone.
In this guide, we will walk you through the step-by-step process of how to enable USB debugging on your Android phone.
Watch: How To Turn ON Live Captions On Android
To Enable USB Debugging On Android Phone
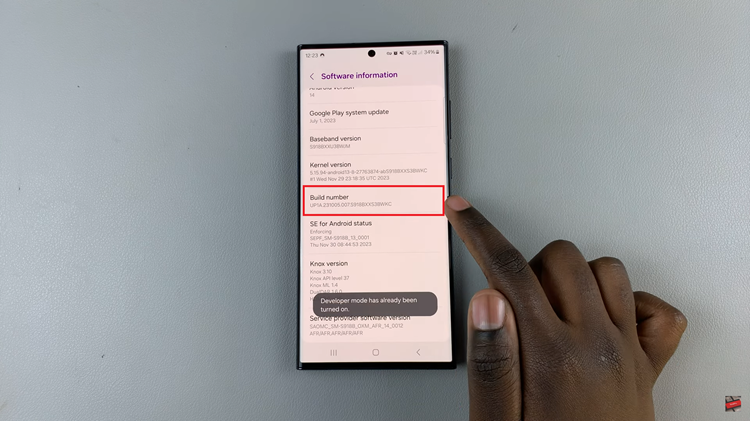
The first step is to navigate to the settings menu on your Android device. Once you’re in the Settings menu, scroll down and find the “Developer options” menu. If you don’t see it, tap on “About phone” and look for “Build number“. Tap on “Build number” seven times to enable developer options.

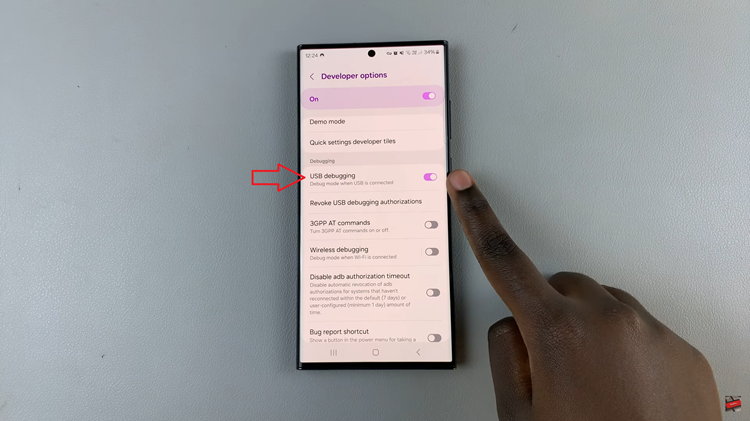
After you’ve enabled the developer options, go back to the main settings menu and find the “Developer options” menu. Tap on it then scroll down and find the “USB debugging” option. At this point, tap on the toggle switch to the ON position to enable USB Debugging. You might encounter a warning message; click “OK” or “Allow” to proceed.

By following these detailed steps, you should now have successfully enabled USB debugging on your Android phone. This unlocks a realm of possibilities for advanced users, allowing them to interact with their devices on a deeper level for debugging, testing, and customization purposes.

