USB Debugging is an Android developer option that enables communication between your smartphone and a computer via a USB connection. This feature grants access to the device’s system for debugging, installing custom software, and various other tasks that would otherwise be off-limits.
By enabling USB Debugging on your Google Pixel 8 or 8 Pro, you can troubleshoot issues, root your device, and perform other advanced functions.
If you own a Google Pixel 8 or 8 Pro and want to enable USB Debugging, this guide will walk you through the process step by step.
Watch: How To Use Split Screen On Google Pixel 8
To Enable USB Debugging On Google Pixel 8
Ensure your Google Pixel 8 or 8 Pro is powered on and unlocked. To access USB Debugging, you need to enable Developer options on your device. To do so, go to “Settings” > “About Phone” > “Build Number” and tap on it seven times.
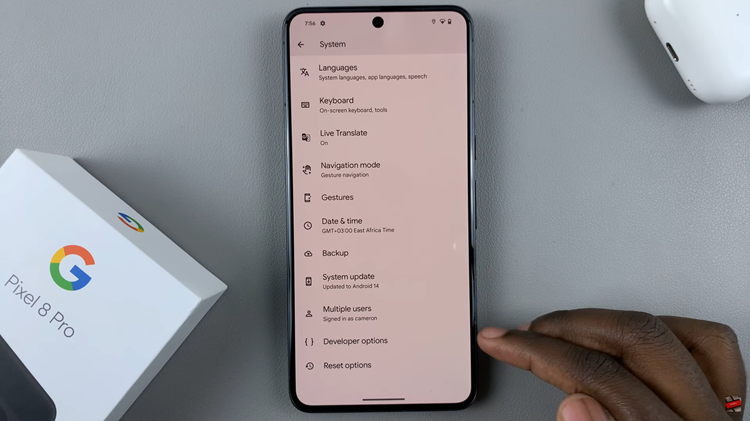
At this point, once you’ve enabled developer options, go back to “Settings” and select “System.” Under the system menu, scroll to the bottom and select “Developer Options.”

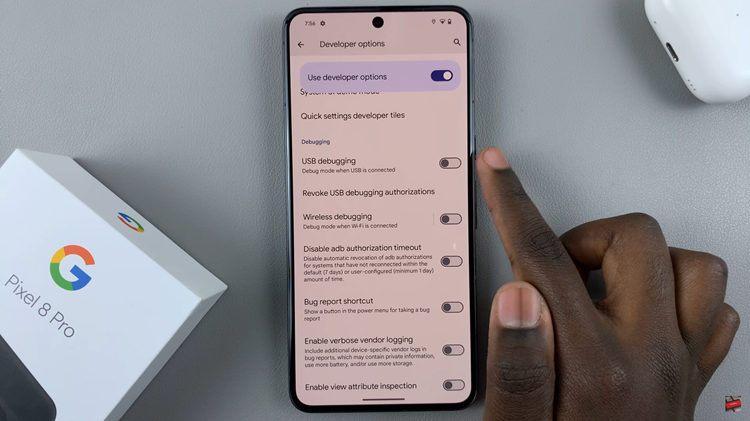
Next, Scroll down in the “Developer Options” menu until you find the “USB Debugging” option. Slide the toggle switch to enable it. Once you enable USB Debugging, a prompt will appear, asking you to confirm your action. Tap “OK” to allow USB Debugging on your device.

Enabling USB Debugging on your Google Pixel 8 or 8 Pro is a relatively simple process, and it opens up a world of possibilities for those looking to explore their device’s capabilities. Be cautious when connecting your device to untrusted computers and only use this feature if you understand its implications.

