We all prefer a little privacy while browsing the internet. Luckily, the Opera GX Browser has a free in-built VPN. This will help you secure your browsing experience and you can activate it at any time.
The VPN is free and doesn’t require any subscription, payment, or additional extensions. You can also customize the VPN to suit your preference. In the article, we will show you how to enable VPN on Opera GX Browser.
Watch: How To Install Opera GX On Windows 11 PC
How To Enable VPN On Opera GX Browser
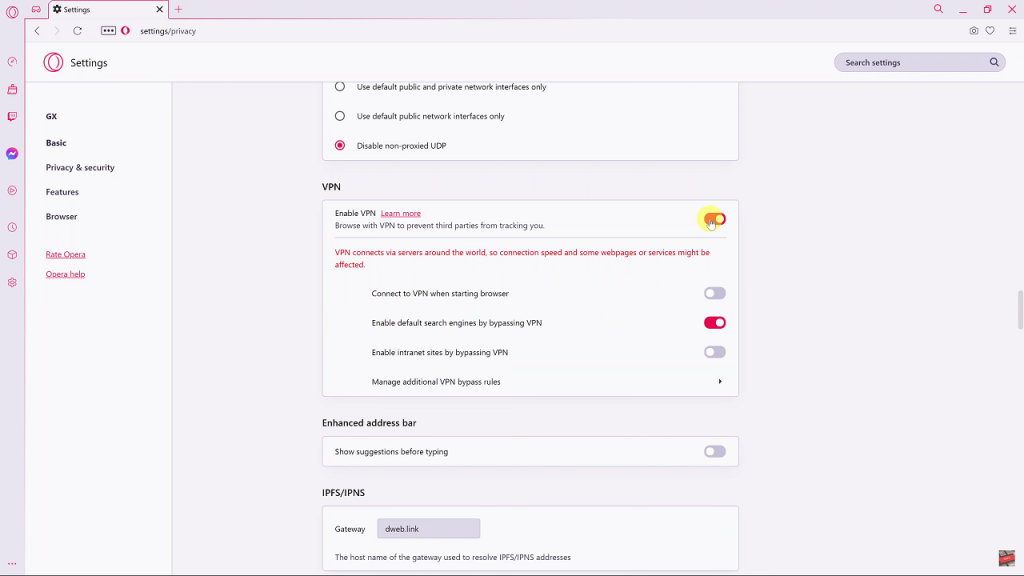
This in-built VPN is free to use and you can enable it at any given time. To enable it, simply launch the Opera GX browser. On the left side, tap on the Settings icon. Then, click on Features from the left side menu. You can also access VPN by clicking on Privacy & Security, then scroll down until you see VPN.


You will see a subheading for VPN and other details. By default, the Opera GX VPN is disabled. To turn it on, click on the toggle icon beside it to enable it. Once enabled, the ‘VPN icon’ will be visible on the address bar.
Click on the VPN icon and you’ll be able to choose the ‘Virtual location‘ of your choice. It’s a simple VPN that only gives you regions to choose from and not specific countries. Also, the VPN will only work on the browser and not the whole computer.
If you’re not sure of the region you want, simply select ‘Optimal location‘. The Opera GX VPN will try its best to re-route your traffic through the location with the best speed while giving you VPN benefits.
You can actually view the data transferred that month when the VPN was enabled. Although it says you have Unlimited VPN data.

That’s it. You have now activated the free VPN on the Opera GX browser. You can enjoy a more private browsing experience. In case of any questions or comments, let us know in the comment section below.

