Resetting your Roku TV can be a game-changer when it comes to resolving persistent issues, whether it’s sluggish performance, freezing, or other software-related glitches. Knowing how to factory reset your Roku TV is a valuable skill that can breathe new life into your entertainment hub.
This process is particularly useful for troubleshooting problems, preparing your device for resale, or simply optimizing its performance by clearing accumulated data.
In this guide, we’ll take you through a step-by-step journey, empowering you to take control of your Roku TV’s settings and give it a fresh start.
Watch: How To Download & Install Apps On Roku TV
To Factory Reset Roku TV
First, turn on your Roku TV and ensure you are on the home screen. If you’re not already there, press the home button on your Roku remote to navigate to the main screen. Next, scroll up or down using the arrow buttons on your remote to highlight “Settings.” Press the OK button to enter the Settings menu.
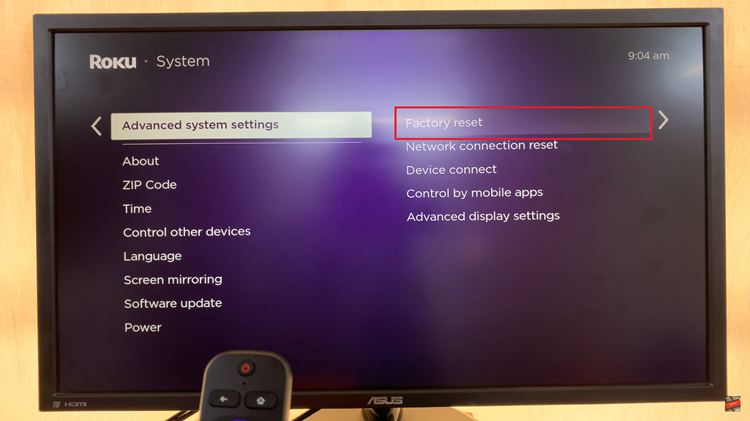
In the Settings menu, use the arrow buttons to navigate to “System” and press OK. Scroll down to “Advanced system settings” and select it. At this point, choose “Factory reset” from the list of options.

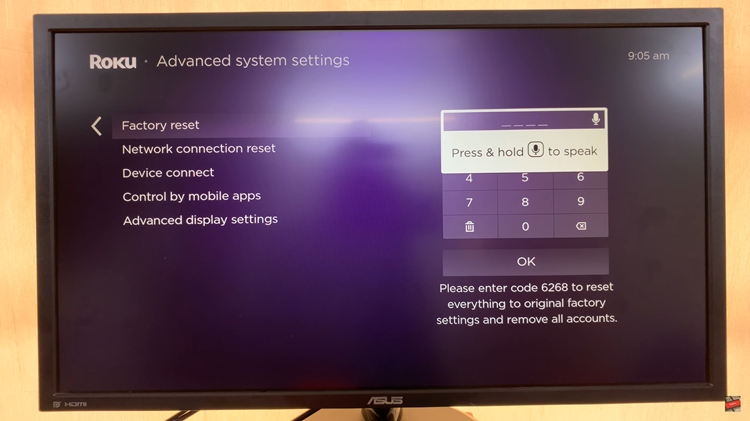
Depending on your Roku TV model, you may be prompted to enter a code displayed on the screen. This is to ensure you want to proceed with the factory reset. Follow the on-screen instructions. Once prompted, confirm that you want to perform a factory reset.

The factory reset process may take a few minutes. Your Roku TV will restart, and you’ll see the initial setup screen.
Congratulations! You have successfully performed a factory reset on your Roku TV. This process should resolve many software-related issues and provide a clean slate for your device.
Read: How To Move From ‘No Command’ Screen On Google Pixel 8

