Expanding the storage capacity of your Samsung Galaxy Tab S9, S9+, or S9 Ultra has never been easier. With the capability to use external SD cards, you can store more photos, videos, apps, and files without worrying about running out of space.
However, over time, you might encounter issues with your SD card, such as corrupted files or slow performance. In such cases, formatting your SD card can be a quick and effective solution.
In this guide, we will walk you through the step-by-step process of formatting an SD card on your Samsung Galaxy Tab S9 series tablet.
Watch: How To Turn OFF Samsung Galaxy Tab S9
To Format SD Card In Samsung Galaxy Tab S9 Series
If your SD card isn’t inserted, gently eject the SIM card tray using the provided tool or a paper clip. Then, place your SD card into the appropriate slot on the tray and reinsert it into your tablet.
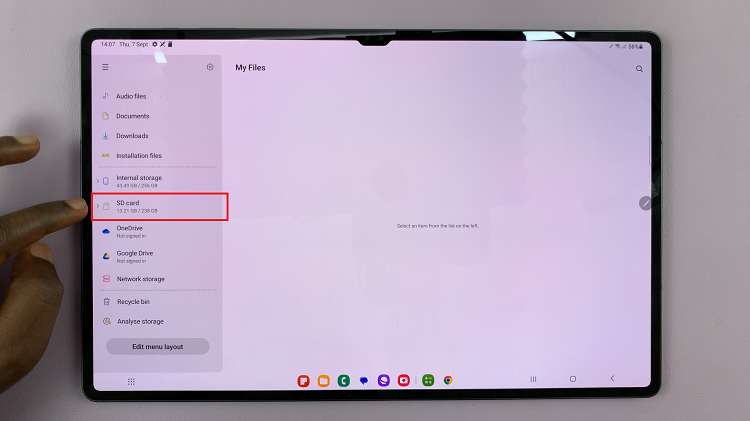
Unlock your Samsung Galaxy Tab S9 and find the “My Files” folder on the home screen or the App Drawer. Tap on it. Now, scroll down in the storage settings to find and tap on “SD card.”

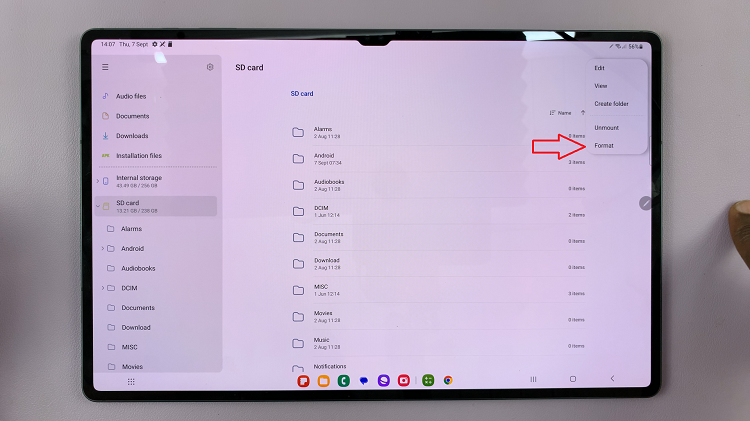
At this point, tap on the three dots that appear at the top right corner of the screen. From the menu that appears, tap on “Format.” Then tap the “Format” option again to confirm the process. You’ll see a progress bar indicating the formatting process. Wait patiently for it to complete.

Afterwards, your tablet will display a confirmation message, indicating that the process is complete. By following these step-by-step instructions, you can efficiently format your SD card on your Samsung Galaxy Tab S9 series tablet and resolve any storage-related issues you may encounter.

