In the era of expanding digital content and feature-rich smartphones, external storage options like SD (Secure Digital) cards have become indispensable for Android users seeking additional space for their photos, videos, apps, and other data. While these tiny memory cards significantly enhance your device’s storage capacity, there are instances where formatting becomes necessary.
Whether you’re troubleshooting issues or preparing the SD card for optimal performance, understanding how to format an SD card on your Android device is a valuable skill.
This guide will walk you through the step-by-step process of formatting an SD card, ensuring that you can manage your storage efficiently.
Watch: How To Connect HDD /SSD To Android Phone
To Format SD Card On Android
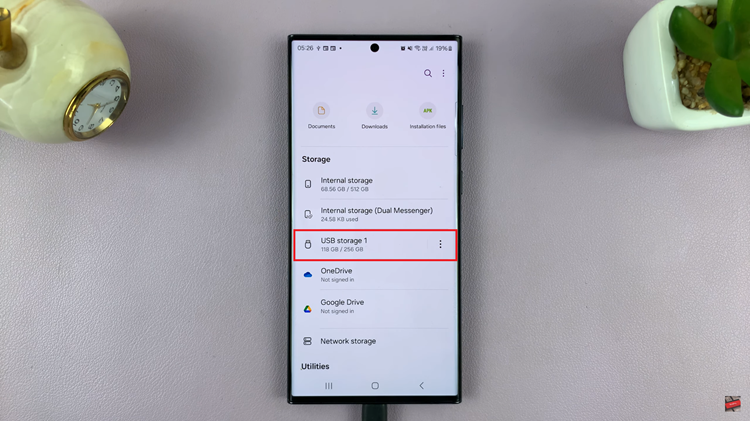
Firstly, ensure the Android device is powered on and functioning properly. Insert the SD Card into your Android device or an OTG (On-The-Go) adapter if required. Once inserted, navigate to your Android device’s file manager application.
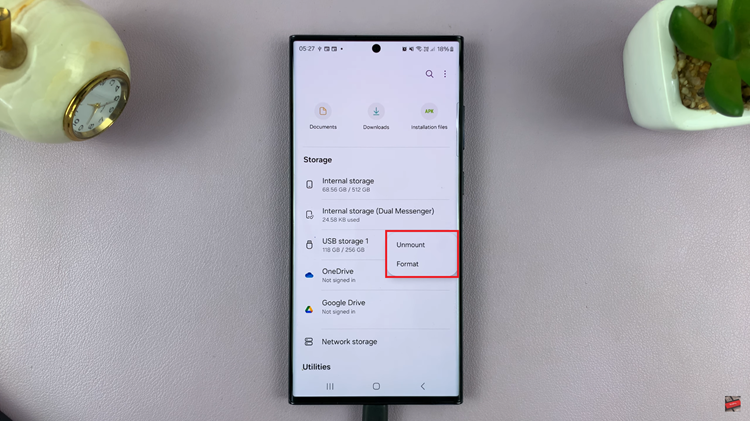
Within the file manager, locate and select the USB device. It is typically labeled as “USB Storage” or “SD Card,” depending on your device. At this point, tap the menu icon (usually represented by three dots) to reveal a menu of additional options related to the SD Card.

At this point, tap on the “Format” option and this will initiate the formatting process for the USB drive. Wait patiently while the Android device formats the SD Card. The time taken can vary based on the USB drive’s size and the speed of your Android device.

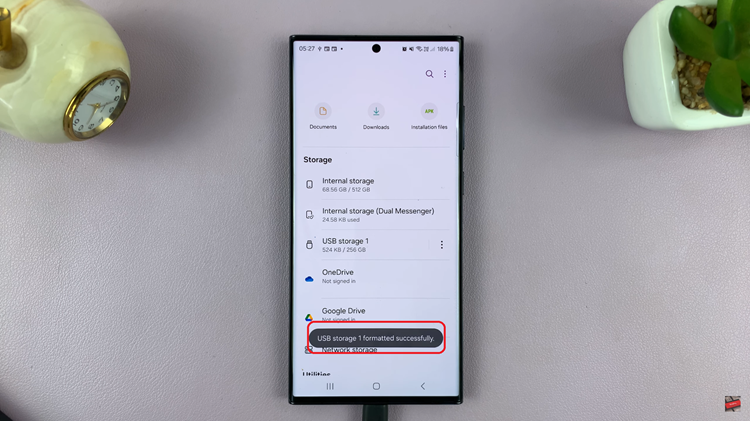
Upon completion, the device will display a notification to indicate the successful formatting of the USB device. After this, safely eject the SD Card.

In conclusion, formatting an SD card on Android is a straightforward process, but it’s crucial to take precautions to avoid data loss. By following these step-by-step instructions, you can easily format your SD card and optimize its performance for extended use.
Read: How To Enable Screen Saver Immediately On TCL Google TV

