In today’s digital era, our devices, especially iPads, have become repositories for countless personal memories captured through photos. With the convenience of carrying a portable photo album, however, comes the necessity to maintain privacy.
Whether it’s protecting sensitive images from prying eyes or simply organizing your extensive photo library, knowing how to hide photos on your iPad is an essential skill. This guide will walk you through the steps to ensure your photos remain private and secure, providing peace of mind whenever you hand your device to someone else or leave it unattended.
Let’s dive into the detailed steps and explore the best practices for maintaining photo privacy on your iPad.
Watch: How To Change Region On iPad
Hide Photos On iPad
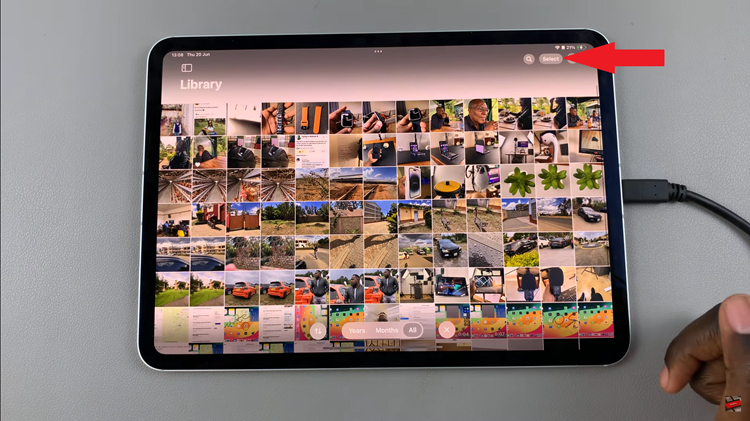
To begin hiding photos on your iPad, launch the Photos app from your iPad’s home screen. Once the app is open, navigate to the photos you want to hide. In the top right corner, tap “Select” to start choosing the photos. You can select multiple photos by tapping on each one you want to hide.
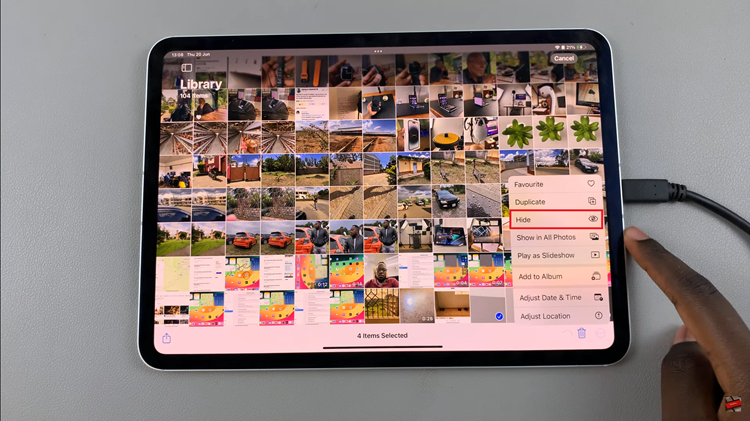
After you’ve selected the desired photos, look for the three vertical dots (…) located at the bottom right of the screen and tap on them. This will bring up a menu with several options. From this menu, find and select the “Hide” option. A confirmation prompt will appear; tap “Hide Photo(s)” to confirm your choice.
The selected photos will now be moved to a special album called “Hidden.” To access these hidden photos, navigate to the Albums tab at the bottom of the Photos app. Scroll down until you find the “Hidden” album, where all your hidden photos are stored.
In conclusion, hiding photos on your iPad can be done easily through the Photos app. By following these steps, you can ensure that your personal photos remain private and secure.

