Facebook allows its users to share their relationship status with everyone. You can choose to hide it from everyone or simply let everyone know you’re in a relationship. It depends on how you want to keep your life on social media.
Fortunately, you can choose to hide your relationship status on Facebook. Not only that, you can select a few people you’d like to share this information with. This can be done by using the audience selector on your account. The steps below show you how to hide your relationship status on Facebook.
Watch: How To Repost Facebook Stories
Hide Relationship Status Using Facebook App
The steps are quite similar on Android and iOS devices.
First, launch the Facebook app on your Android or iOS device and sign into your account. Then, tap on your profile icon on the Facebook home page. For Android, the icon is located just below the Home icon, while for iOS its located at the bottom right of the page.
Next, tap on ‘Edit profile‘. On the next page, scroll down and tap on ‘Edit Your About Info‘, then tap on ‘Edit‘ under the Relationship section. Tap on the drop-down menu and choose your desired relationship status. Once done, tap on the button next to Relationship and choose ‘Only me‘.
Once finished, tap on ‘Save‘ to finalize the changes on your Facebook account. Your relationship status will only be visible to you alone.
Hide Relationship Status On Facebook Website
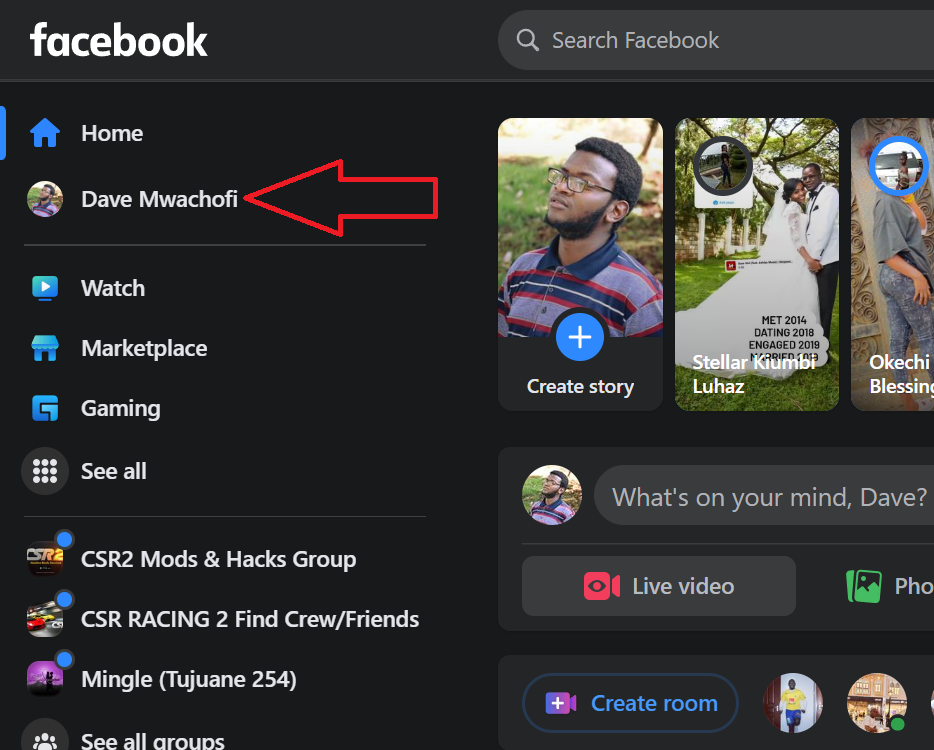
First, open your browser and go to the Facebook website. Next, sign into your account and click on your profile name in the left-sided menu.
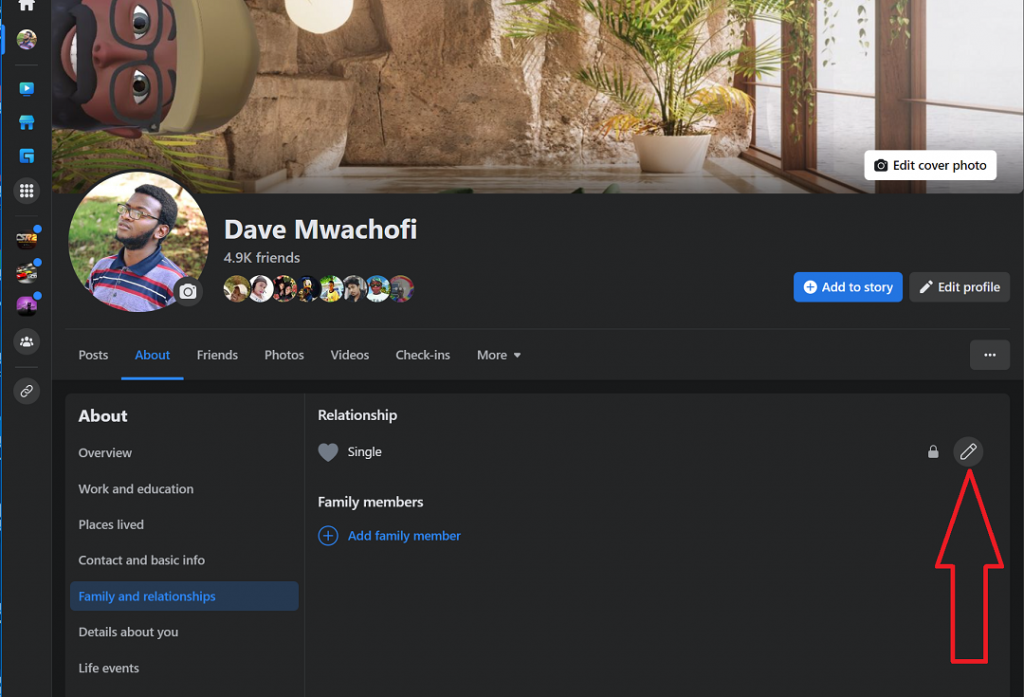
In this section, click on ‘About‘ and then select ‘Family and relationships‘. You will see information on your relationship status and family members if you added some to your Facebook account.
Then, click on the pencil icon next to Relationship. Choose the desired relationship status from the drop-down arrow. There are a couple of options you can choose from.
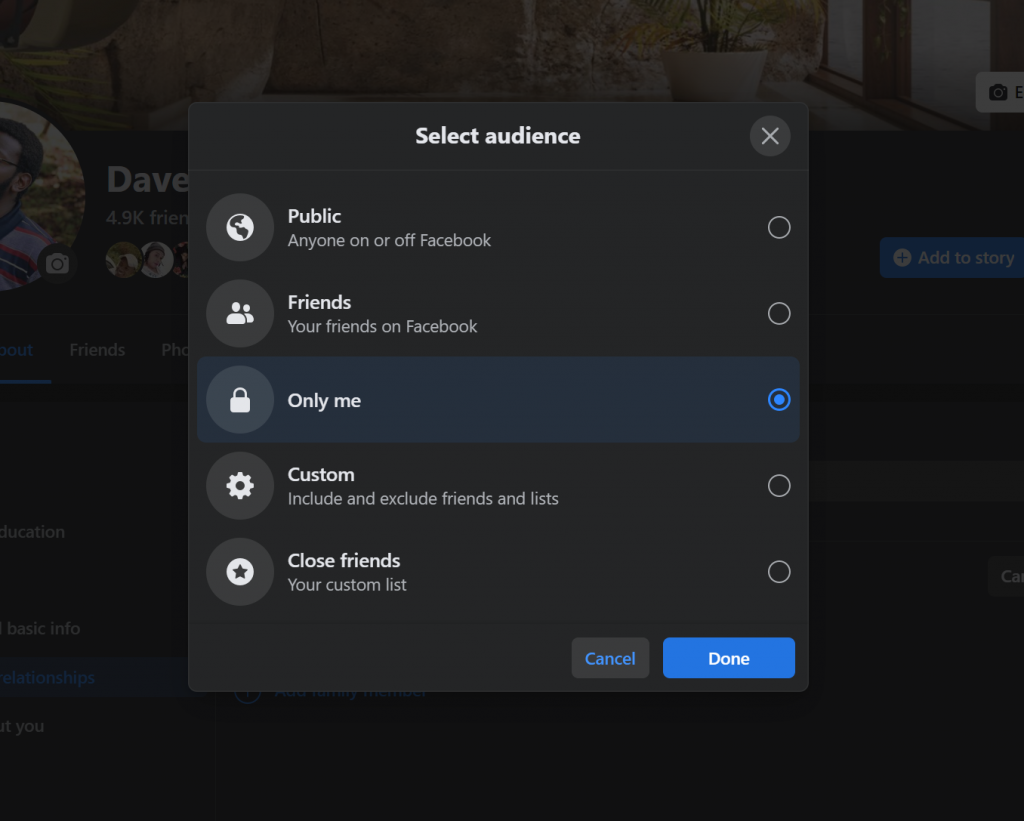
Select your desired relationship status, then, just below it, click on the button that’s there. On the pop-up window that appears, click on ‘Only me‘, then click on ‘Done‘. Click on ‘Save‘ to finalize the changes on your Facebook profile.
And that’s how to go about it. Let us know in the comment section below if you have any questions or suggestions.
Also read: How To Remove A Website Link From YouTube Channel
