From simple directional indicators to elaborate design elements, arrows play a pivotal role in guiding the viewer’s attention and enhancing the overall composition of a design. With Canva’s intuitive interface and robust feature set, unlocking the potential of arrow design becomes not only accessible but also enjoyable. Join us as we embark on a journey through the fundamentals of arrow creation in Canva, unraveling the secrets to crafting captivating visuals that leave a lasting impression. Whether you’re designing social media graphics, presentations, or promotional materials, mastering these skills will undoubtedly take your designs to new heights of creativity and impact.
Watch:How To Scale And Resize Text In Canva
Creating Arrows On Canva
Here’s how To Create Arrows On Canva
Step 1: Adding a line to your project is the foundational step in crafting your arrow design. Navigating to the ‘Elements’ tab within Canva, you can easily locate the ‘Lines’ category either by directly typing “lines” into the search bar or by exploring the ‘Shapes’ section where lines are also available. This step ensures that you have the basic structure in place upon which to build your arrow.
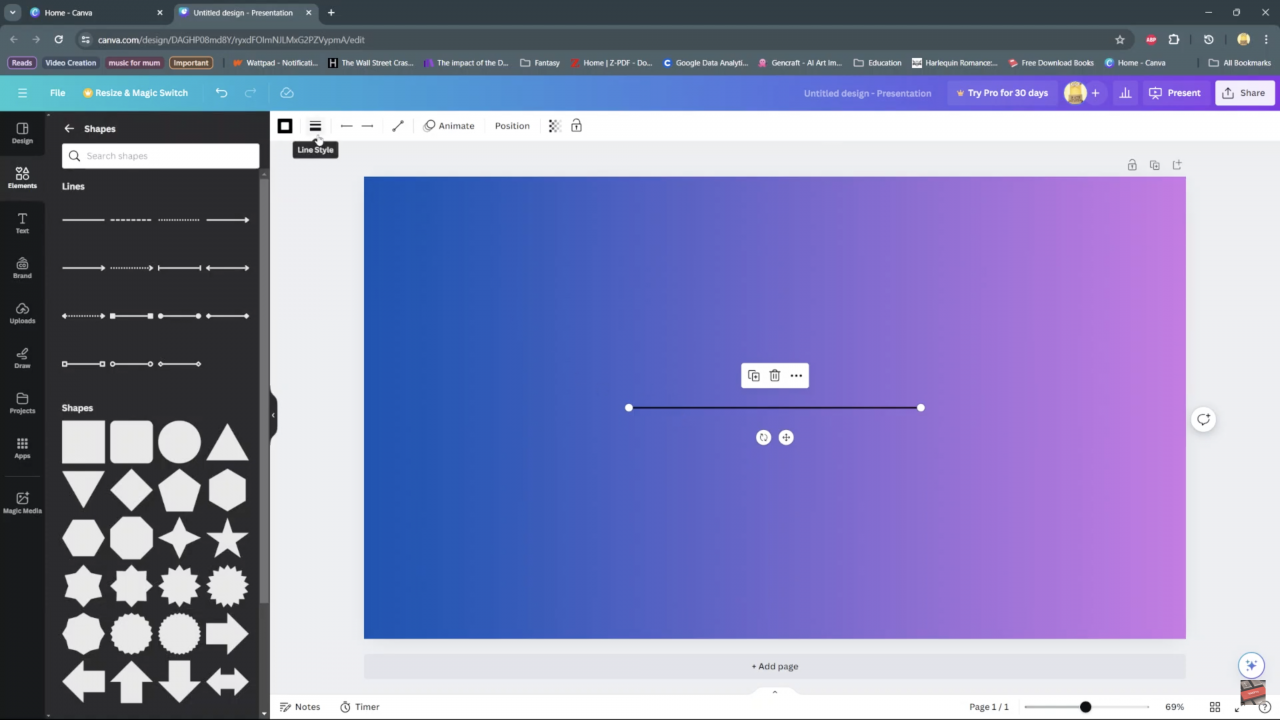
Step 2: Once the line is added to your project, customization begins. With the line selected, you can adjust its appearance to match your design preferences. This includes changing the color of the line to harmonize with your overall aesthetic. Ensuring the line remains selected, locate the ‘Line Style’ option, where further adjustments can be made to the line’s thickness, allowing you to achieve the desired visual impact.
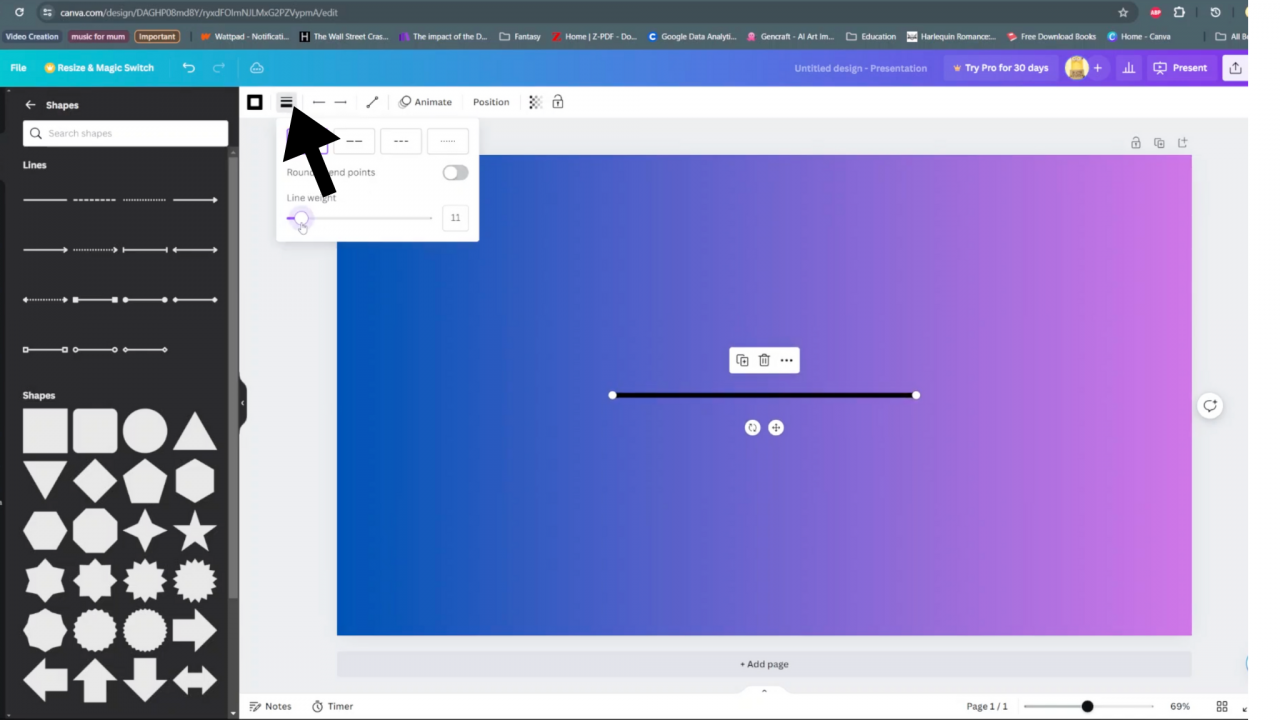
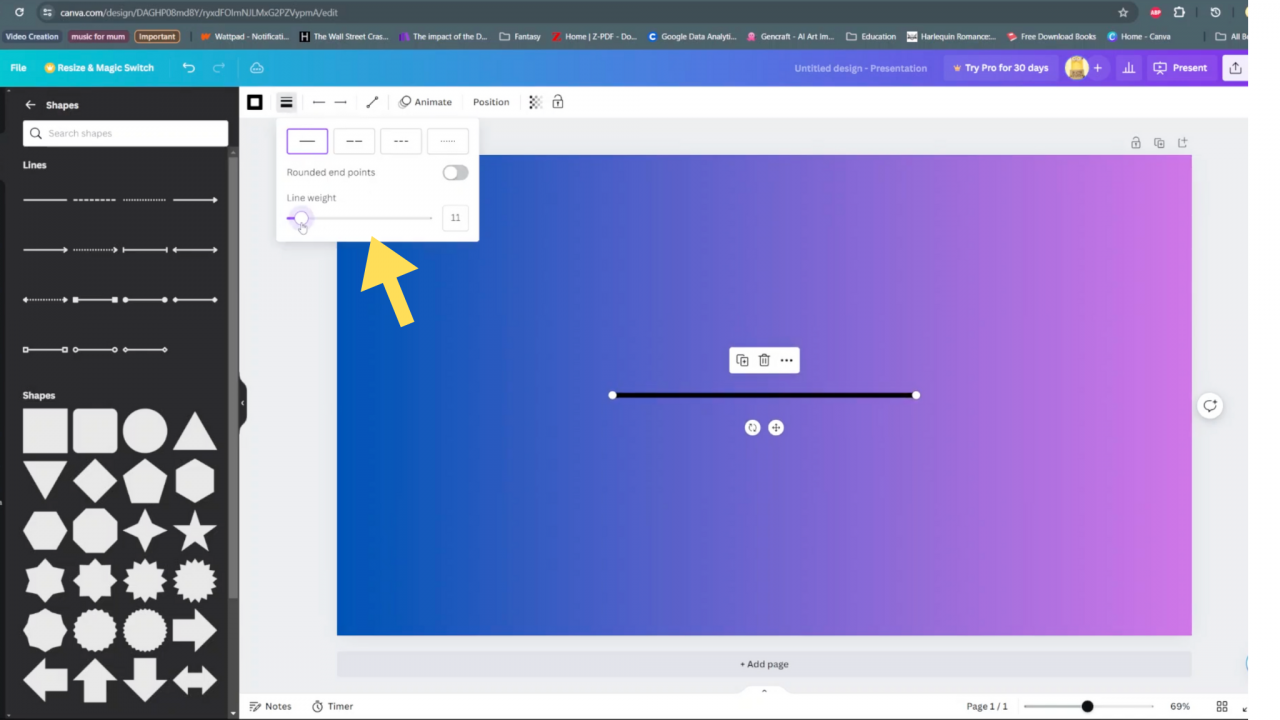
Step 3: The ‘Line Style’ menu also offers the ability to fine-tune the weight of the line, enabling you to make it thinner or thicker according to your design requirements. This level of control ensures that your arrow not only complements but also enhances the overall composition of your project, whether it’s a presentation slide, social media graphic, or any other visual content.
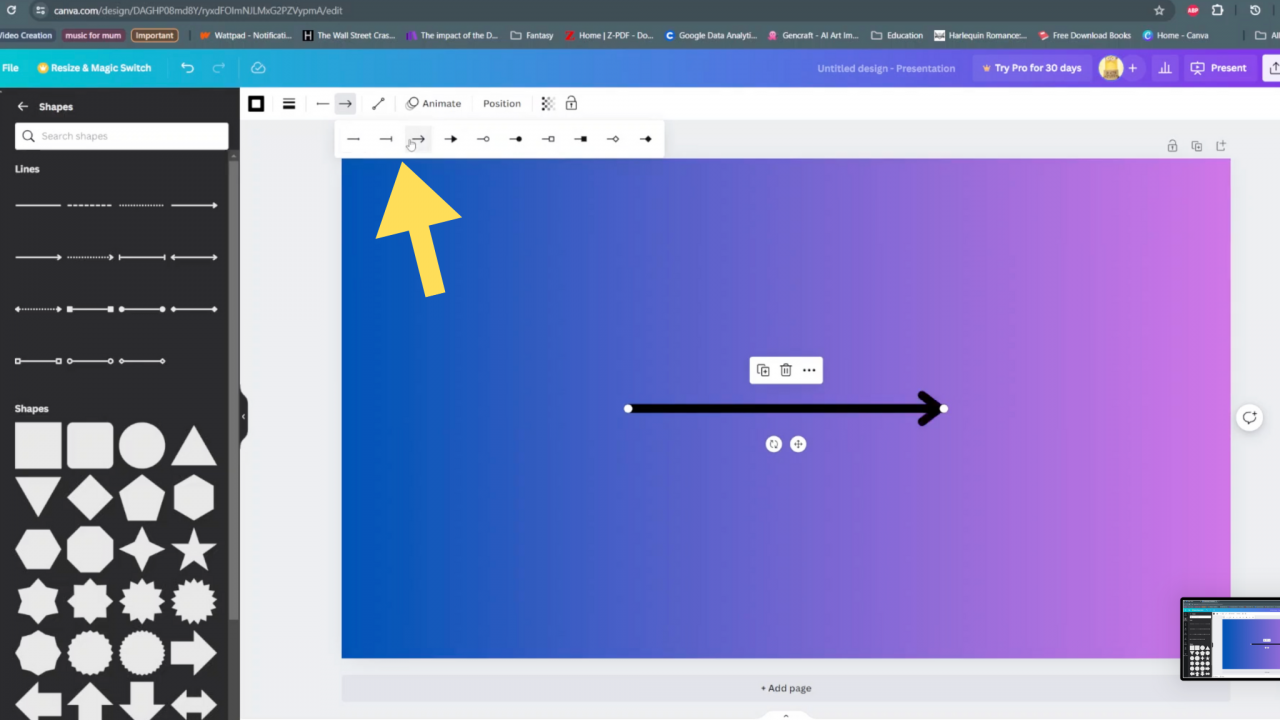
Step 4: With the line’s basic attributes adjusted to your satisfaction, attention turns to adding the arrowhead. Canva’s intuitive interface provides options for customizing the placement of the arrowhead through the ‘Line Start’ and ‘Line End’ settings. This feature allows you to dictate precisely which end of the line will feature the arrowhead, giving you full control over the directional aspect of your design. By leveraging these tools effectively, you can create arrows that not only guide the viewer’s attention but also add visual interest and clarity to your designs.
Read:How to Scale and Resize Text In Canva
Thank you for exploring our comprehensive guide on creating arrows in Canva! We hope this tutorial has empowered you with valuable insights and techniques to enhance your graphic design skills.

