Managing automation features on your iPad allows for a more personalized and efficient user experience. By delving into the settings menu and navigating to the automation section, you can fine-tune how your device responds to various triggers and events.
Whether it’s adjusting notifications, controlling background tasks, or scheduling actions, disabling automation where necessary ensures your iPad operates in a way that enhances productivity without unnecessary interruptions.
Taking charge of automation settings empowers you to tailor your iPad’s functionality to better align with your daily routines and preferences. This proactive approach not only optimizes performance but also minimizes distractions, allowing you to focus on tasks that matter most.
Whether you’re a busy professional managing workloads or a casual user seeking a streamlined interface, mastering automation management on your iPad enhances usability and improves overall satisfaction with your device.
Watch:How To Enable USB Accessories On Your iPad Lock Screen
Disable Automation On An iPad
Here’s how you do it;
Step 1: Accessing Automations
First, open the Shortcuts app on your iPad and navigate to the “Automations” section. This interface displays all currently active automations, providing an overview of how your device handles tasks based on predefined triggers.
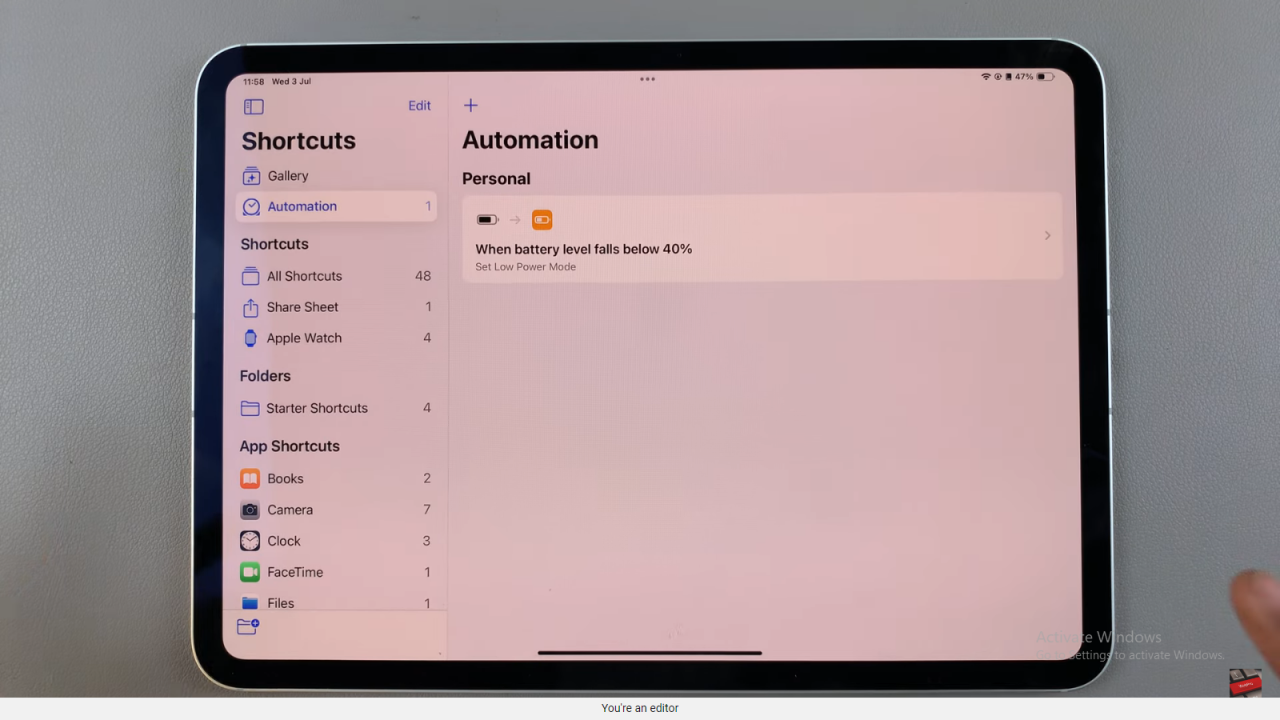
Step 2: Disabling an Automation
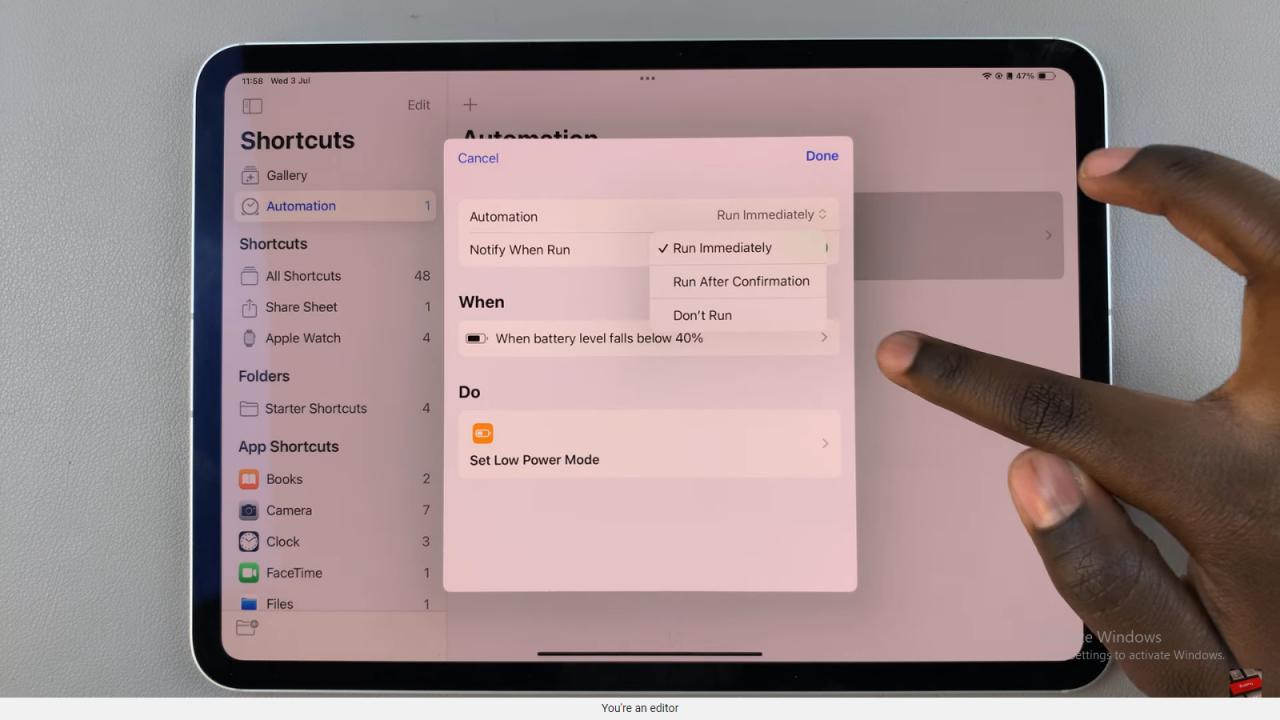
To disable a specific automation, tap on it to open its settings. Within the automation settings, select the option labeled “Automation,” then choose “Don’t Run.” Finally, confirm your selection by tapping “Done” to save the changes effectively.
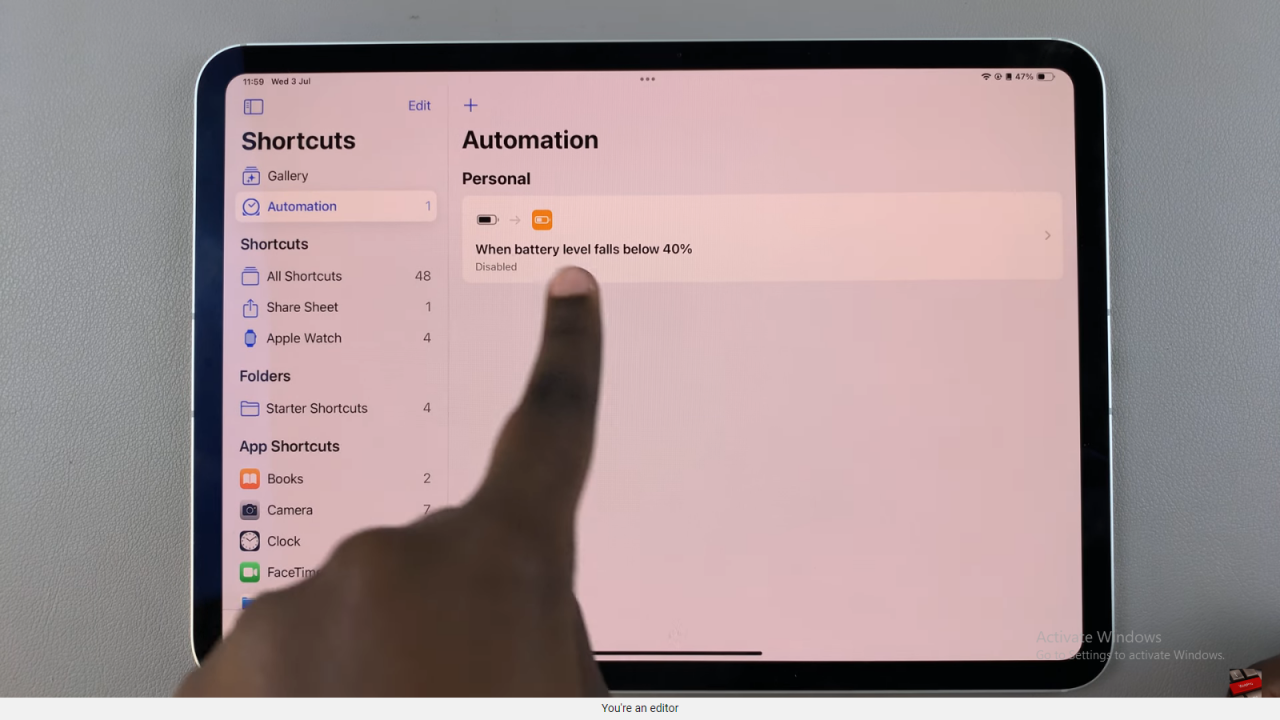
By following these straightforward steps, you can effortlessly manage automations on your iPad, ensuring it operates according to your preferences and needs without unnecessary automated actions.
