The article explores the significance of staying informed about weather conditions directly from your iPad, emphasizing both convenience and effective day planning. By utilizing the right tools and settings, you can seamlessly receive weather alerts and stay prepared for changing conditions. Whether navigating through daily routines or planning outdoor activities, knowing how to set up weather alerts on your iPad can significantly enhance preparedness. This comprehensive guide provides step-by-step instructions to configure your device effortlessly, empowering you with timely weather updates at your fingertips.
Moreover, enhancing your iPad’s capabilities to receive weather alerts extends beyond its typical use as a mobile device. By leveraging built-in features and possibly additional apps, you can customize both the method and timing of weather notifications, ensuring you remain informed about meteorological shifts. The process of setting up weather alerts on your iPad is designed with intuitive navigation and user-friendly interfaces, making it accessible for users of all levels. Whether you’re a frequent traveler or simply interested in staying updated, mastering this feature equips you with the tools to navigate various weather conditions seamlessly.
Watch:How To Enable Face ID In Photos App On iPad
Get Weather Alerts On iPad
Here’s how you do it;
Step 1: To begin, launch the Weather app on your iPad. This initial step is pivotal as it lays the foundation for configuring weather alerts directly on your device.
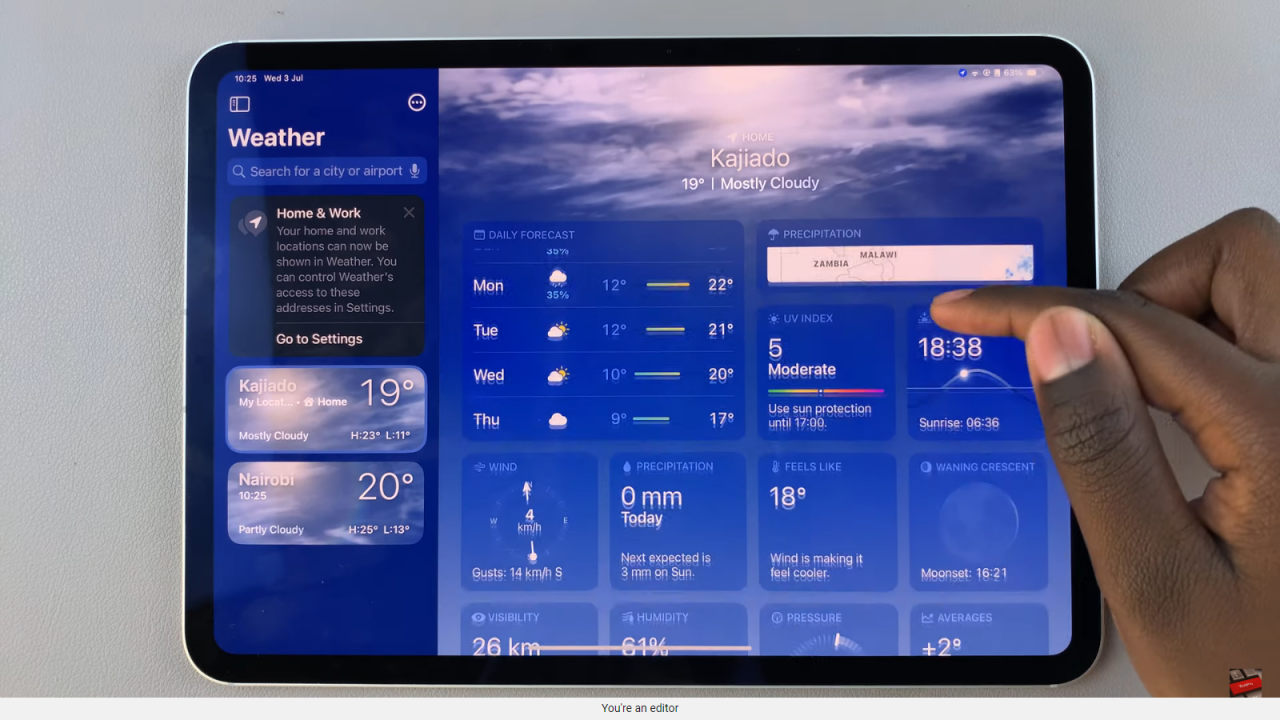
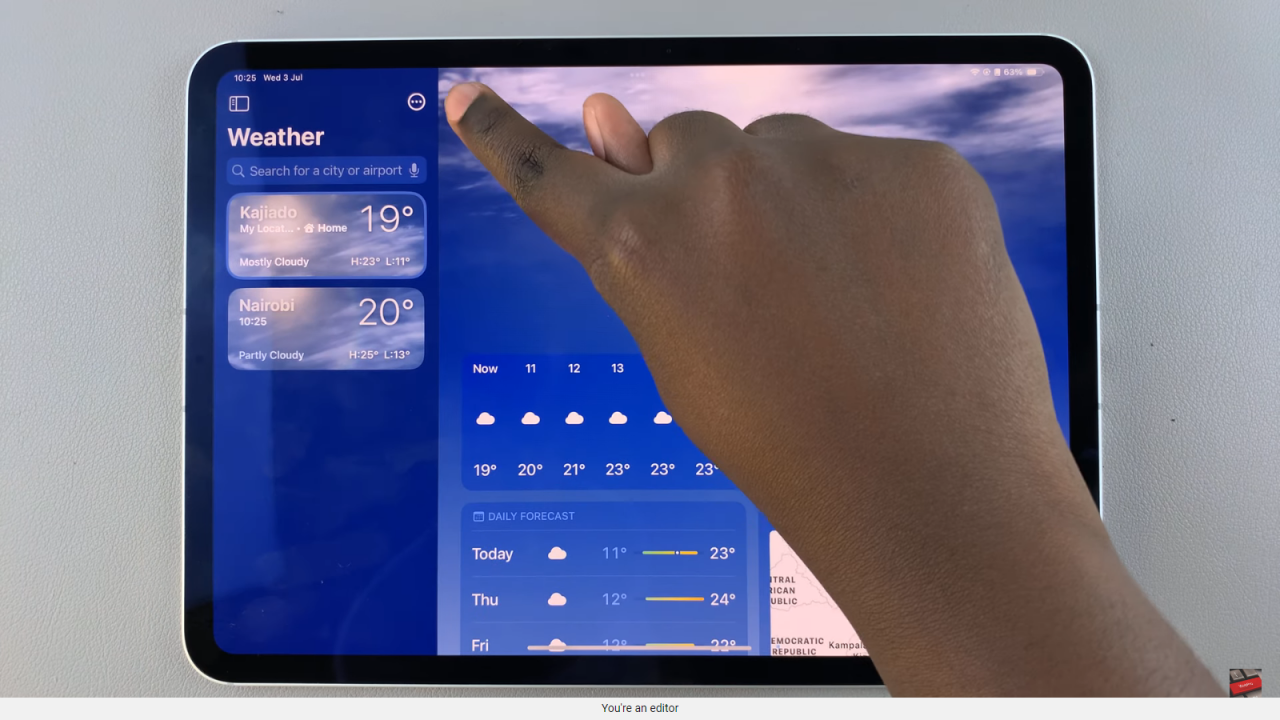
Step 2: Once inside the app, navigate to the side panel by tapping on the three dots situated in the top corner of the screen. This action will reveal a menu with additional settings and options.
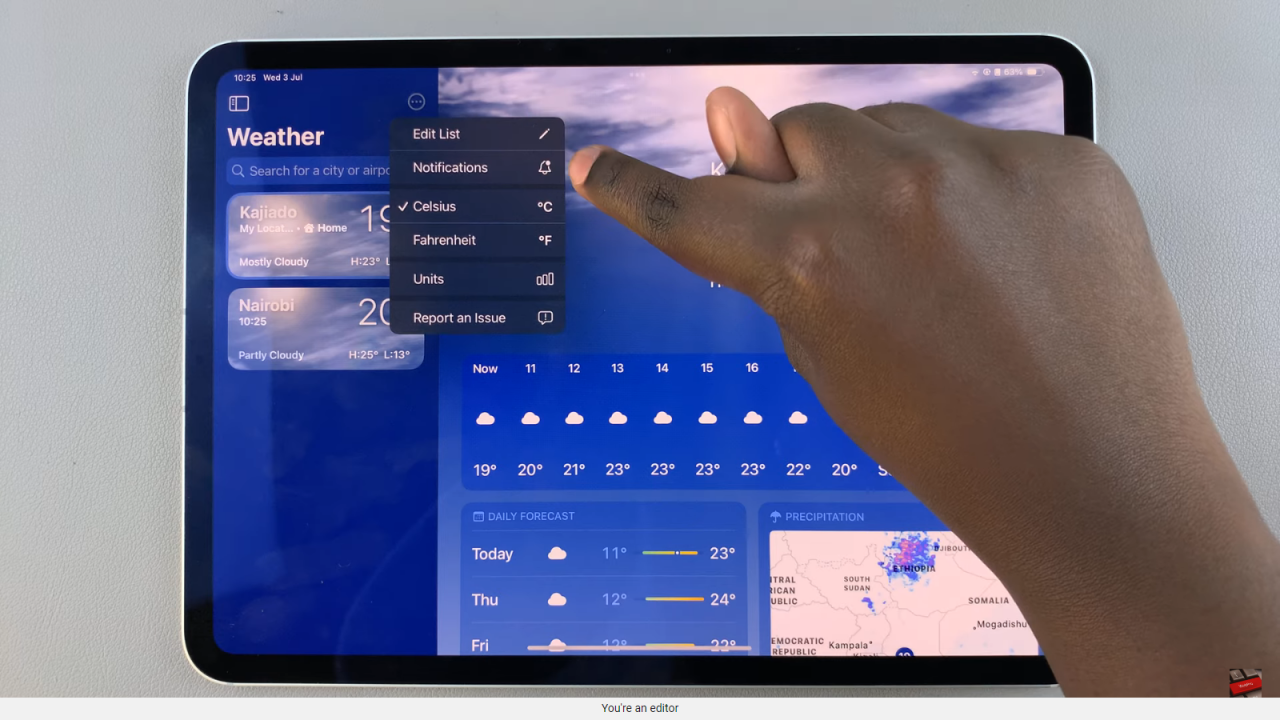
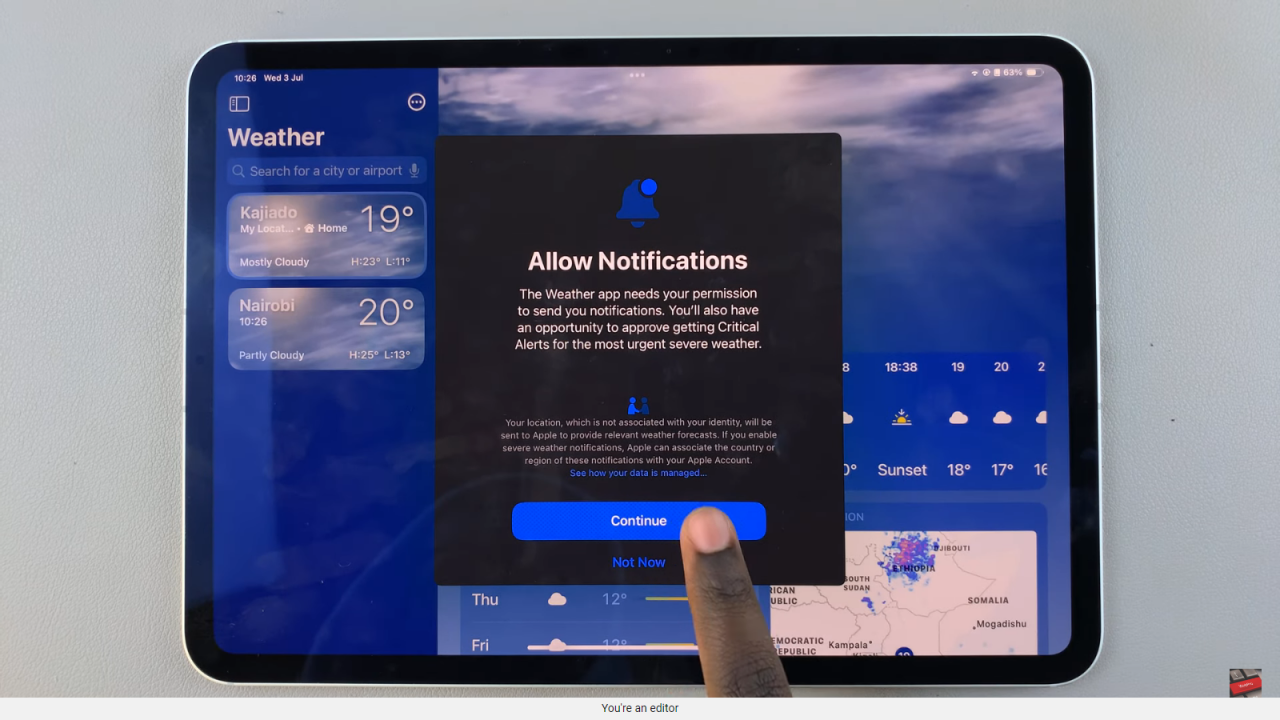
Step 3: Within the side panel menu, locate and click on “Notifications.” From there, proceed to select the option to continue setting up notifications. It’s essential to confirm your preference to receive alerts promptly to ensure you stay informed about weather updates.
Step 4: After completing the notification setup within the Weather app, it’s time to refine your settings in the main iPad Settings menu. Return to your device’s home screen and tap on the “Settings” icon.
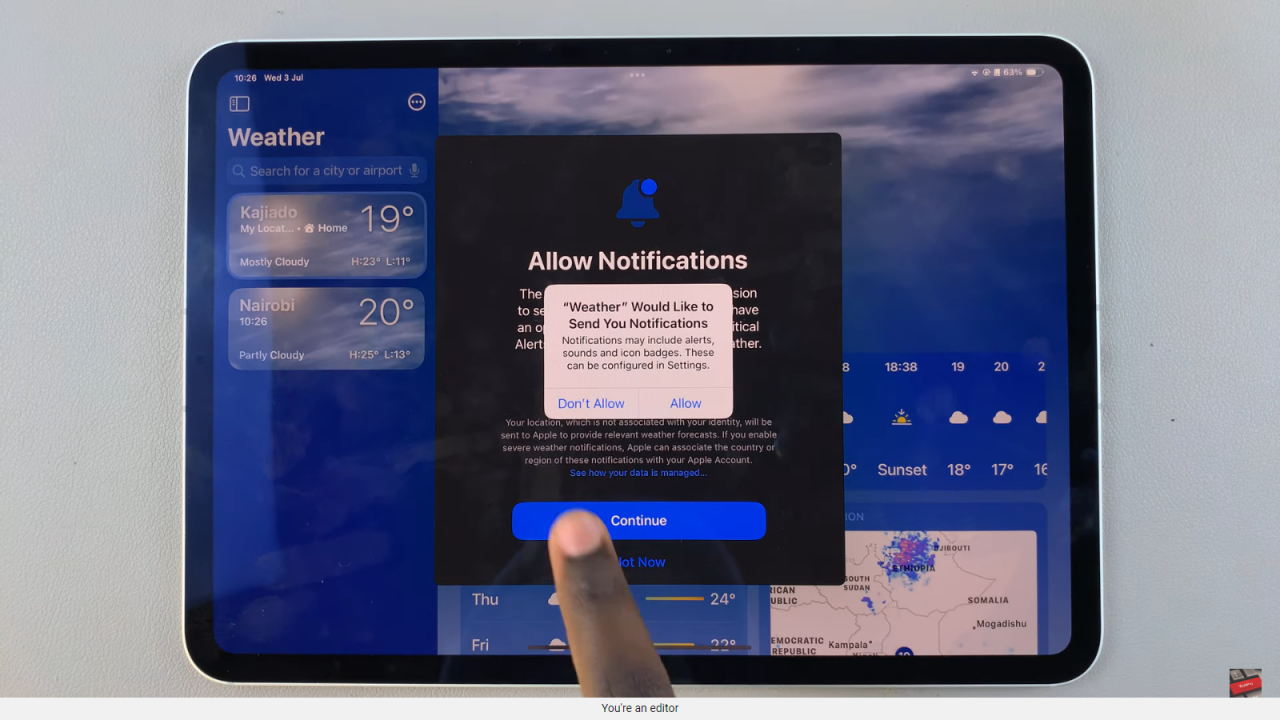
Step 5: Go to settings scroll down the list of options until you find “Weather.” Tap on this option to access more specific settings related to the Weather app.
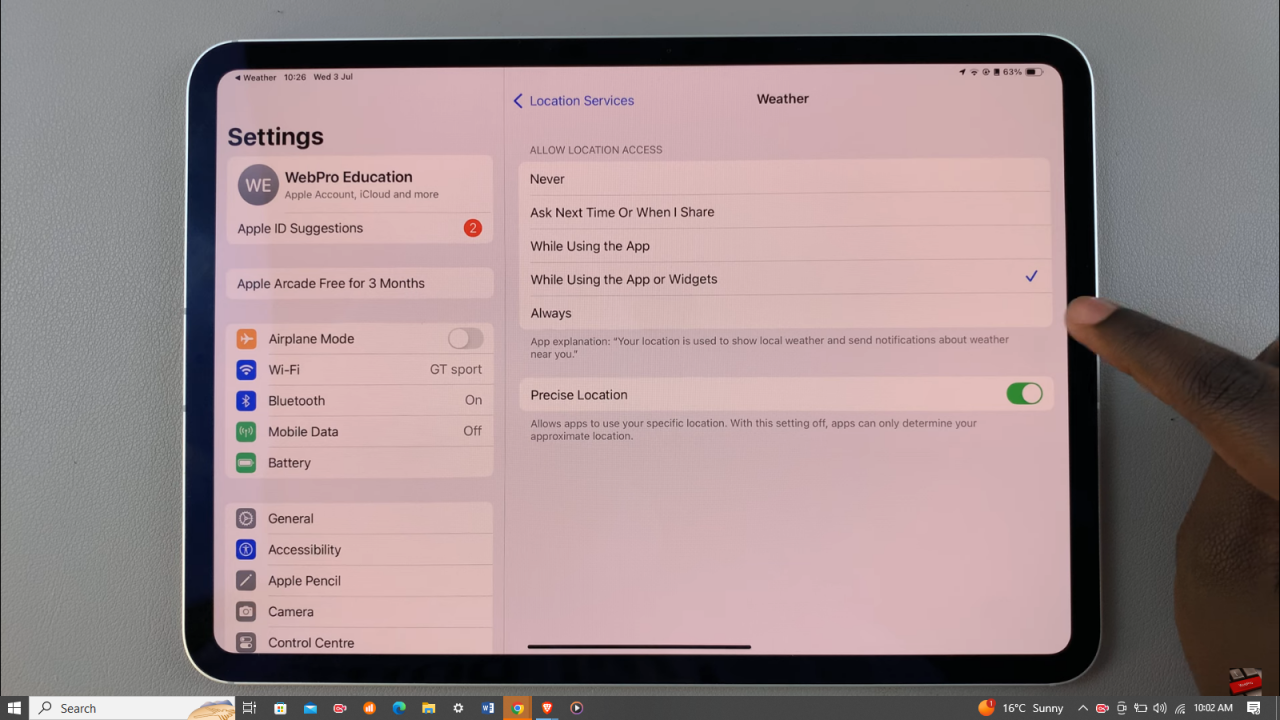
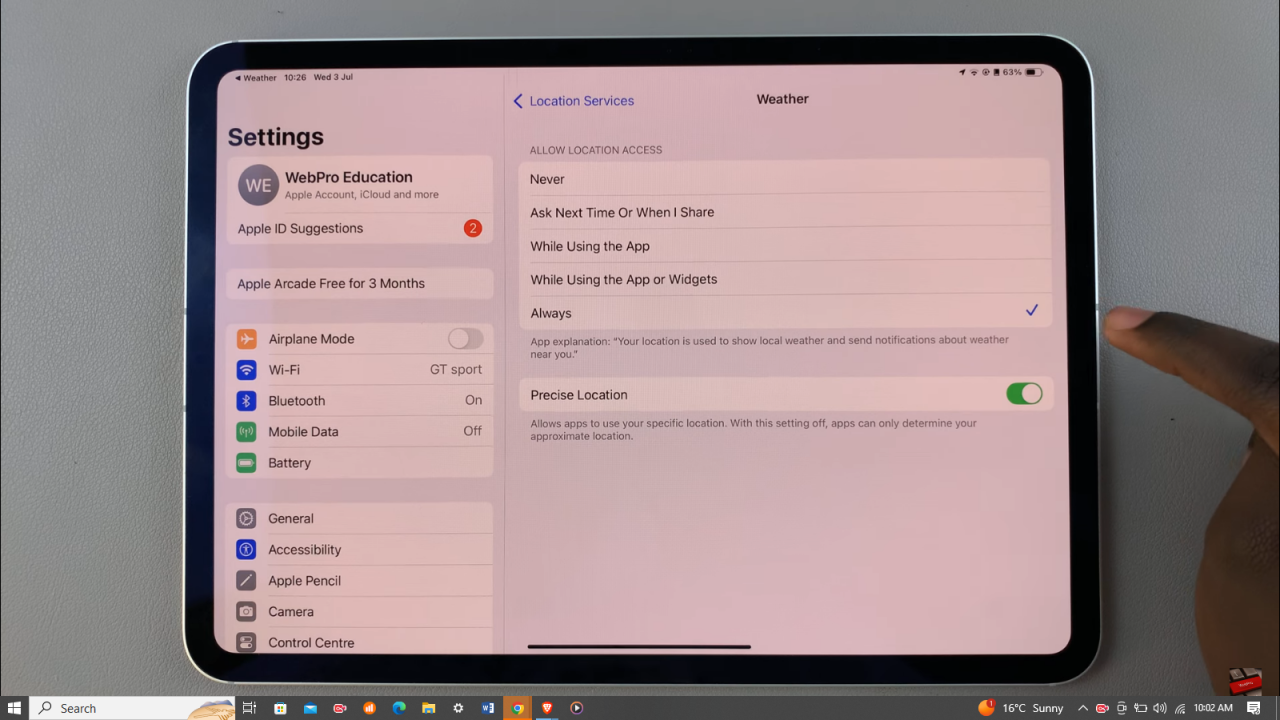
Step 6: Under the “Weather” settings, locate the section labeled “Allow Location Access.” Here, you will need to select the option “Always” to ensure that the app can provide accurate weather updates based on your current location.
In conclusion, mastering the setup of weather alerts on your iPad enhances your readiness for any weather scenario. Consequently, you’ll seamlessly receive updates, thereby ensuring timely adjustments to your plans. Additionally, this capability extends beyond convenience; it empowers you to adapt effortlessly to meteorological changes.
Ultimately, whether you’re a daily commuter or an avid outdoor enthusiast, staying informed via your iPad guarantees optimal preparation. Thus, by integrating these features into your daily routine, you’re equipped to navigate through diverse weather conditions with ease and confidence.
![How To Change Hotspot Name and Password In Windows 11 [Video]](https://www.webproeducation.org/wp-content/themes/mts_sense/images/nothumb-ad-sense-featured.png)
