In the realm of design, integrating captivating images into your Canva creations is paramount for elevating visual impact and engaging your audience. To begin, navigate to Canva’s interface and select your desired template, setting the stage for your creative journey. Once you’ve chosen your canvas, seamlessly upload your selected image, ensuring it harmonizes with your overall design scheme. With Canva’s user-friendly tools and intuitive interface, the process becomes both straightforward and efficient, empowering you to bring your vision to life with ease.
Furthermore, Canva offers a vast and diverse library of images to explore, providing an extensive selection to suit any project or theme. Whether you’re seeking a striking photograph to evoke emotion or an eye-catching illustration to convey a concept, Canva’s image repository has you covered. By integrating carefully chosen images into your designs, you not only enhance aesthetic appeal but also imbue your creations with depth and meaning. With each visual element strategically placed, you captivate your audience’s attention, effectively conveying your message with clarity and style.
Watch:How To Set A Timer In Canva
Putting Image In Shape In Canva
Here’s how;
Step 1: Start by navigating to the sidebar of your Canva interface and selecting the “Elements” option. This will open up a wide array of elements that you can incorporate into your design.
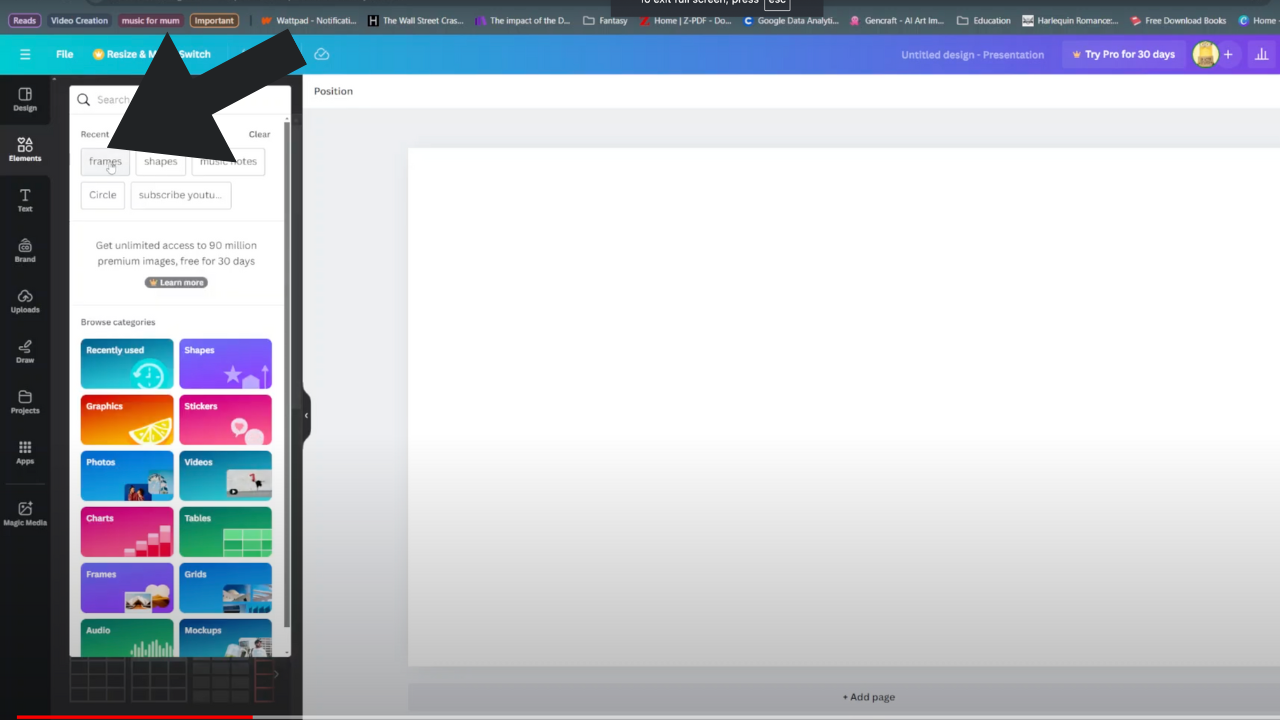
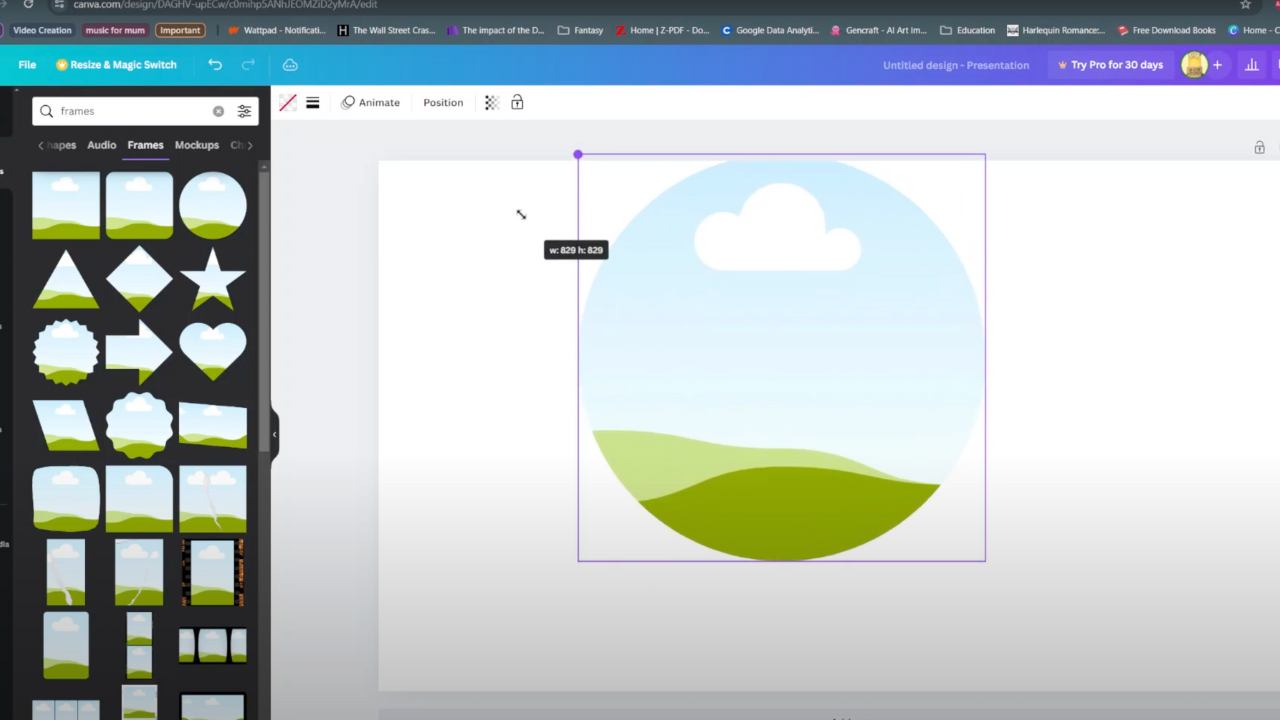
Step 2: Within the “Elements” section, use the search bar to look for “Frames.” Once you’ve found the frames option, browse through the available frames until you find the one that suits your design needs. Click on the frame to select it, and then place it anywhere on your canvas by clicking and dragging.
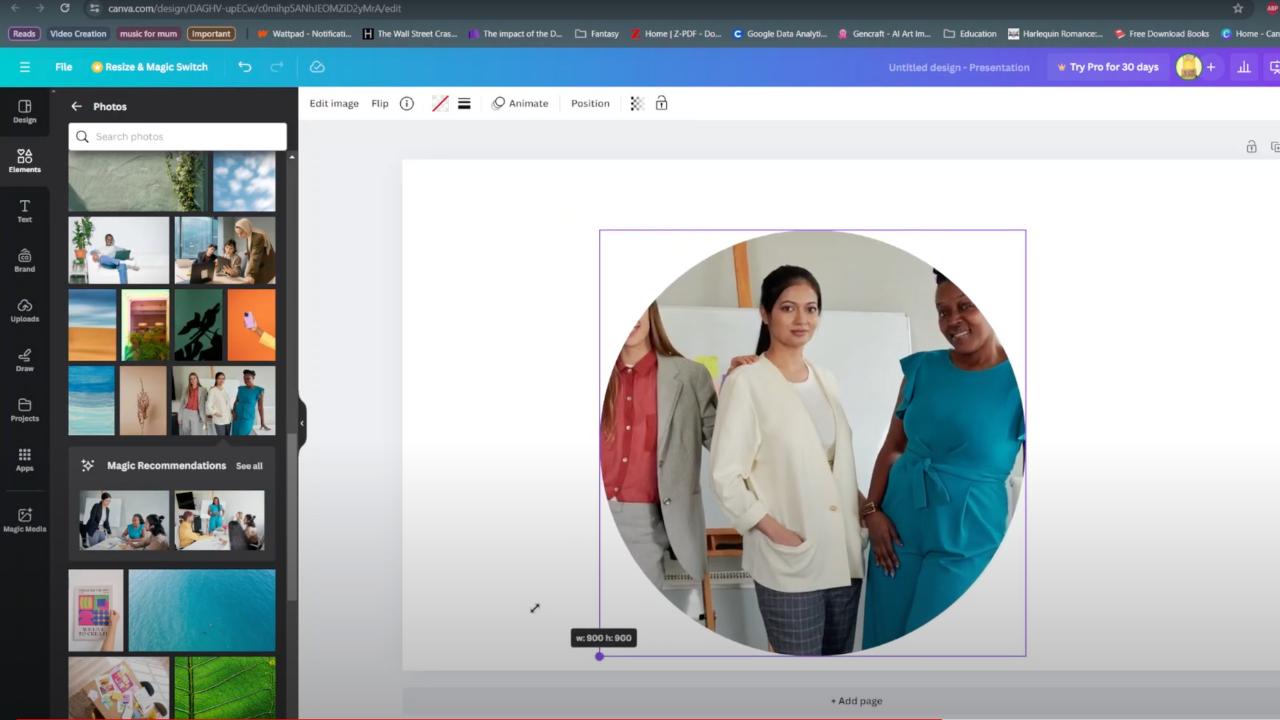
Step 3: With the frame in place, it’s time to add your desired image. Return to the sidebar and navigate to the section where your images are stored. Select the image you wish to place within the frame. Once the image is selected, long-press on it and drag it over to the frame on your canvas. Canva’s intuitive interface will automatically place the image within the frame, ensuring a seamless and professional-looking result.
Read:How To set A Timer In Canva
As we conclude this tutorial, you’ve gained valuable insights into the process of placing images within shapes in Canva. By following the steps outlined, you’ve unlocked a powerful technique for enhancing your designs and creating visually stunning compositions. With Canva’s intuitive interface and versatile tools, the possibilities for creative expression are endless.
Now equipped with the knowledge to seamlessly integrate images into shapes, you’re ready to elevate your design projects to new heights. Whether you’re crafting social media graphics, presentation slides, or marketing materials, this newfound skill will undoubtedly set your work apart and captivate your audience.
As you continue on your design journey, remember to explore and experiment with different shapes, images, and compositions. Embrace your creativity, push the boundaries, and let your imagination soar. Thank you for joining us on this tutorial, and we hope it inspires you to create beautiful and impactful designs in Canva.