Airdrop has to be the easiest way to share files between Apple devices. It’s actually one of my reasons to get caught up in the Ecosystem. Every now and then I find myself needing to turn on Airdrop to either send or receive files.
Your Apple device will automatically turn on Airdrop when you attempt to send a file. After the file transfer is complete, it will go back to the state it was in before you started sending. But to receive files, you need to have Airdrop turned on.
Since Airdrop uses both Wifi and Bluetooth to send files, make sure those are both turned on first on both devices; But don’t worry about forgetting because your device will let you know when you attempt to enable Airdrop.
How To Turn On Airdrop On iPhone / iPad
Like I mentioned earlier, your iPhone will turn on Airdrop when you’re trying to send files via the service. But to receive files, you need to turn it on yourself.
From Settings
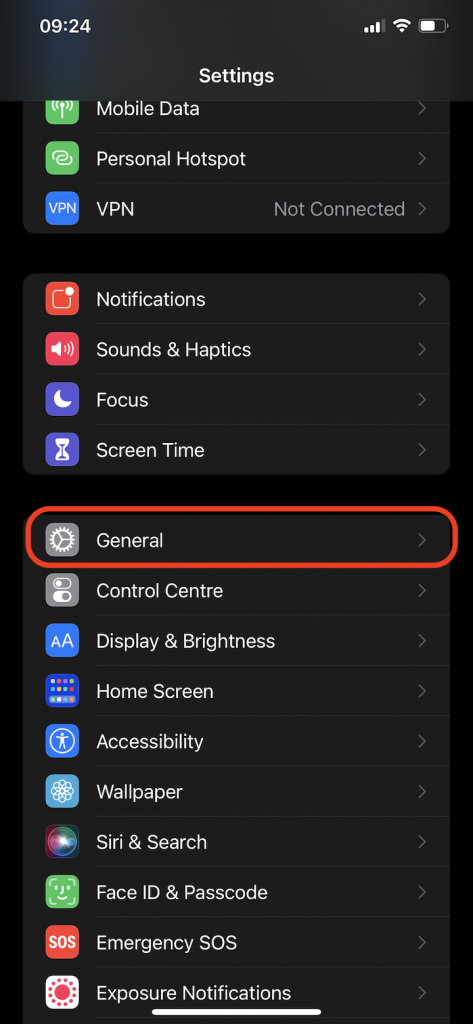
Step 1: Go to Settings and then select ‘General‘
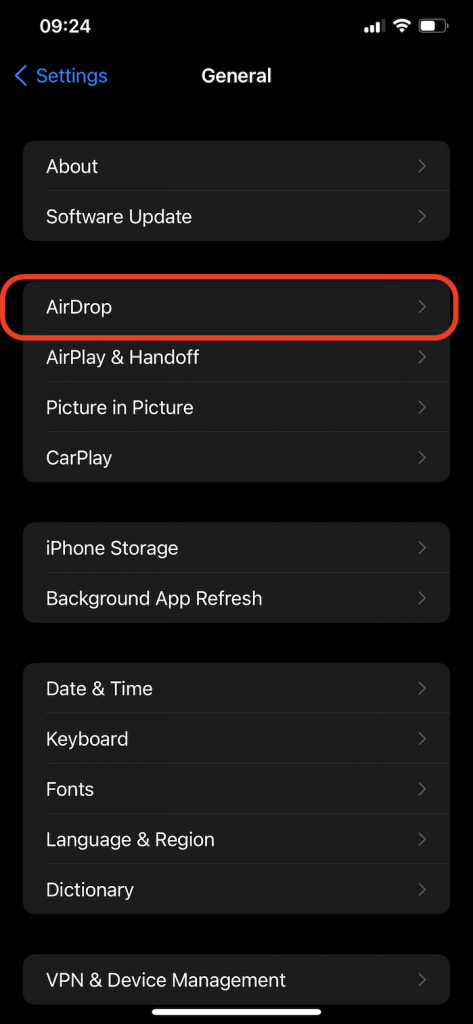
Step 2: Under ‘General’ tap on Airdrop to open the airdrop menu. This will open the page where you can select how you want to turn on Airdrop.

Receiving Off: This basically means Airdrop is off and no one can send you files nor see your device when they search for nearby Airdrop devices.
Contacts Only: This means Airdrop is on but only devices in your contacts list can find you and send you files via Airdrop.
Everyone: Airdrop is fully turned on and any device within Airdrop proximity can find yours and send you files.
From Control Center
You can also turn on Airdrop from the control center of your iPhone. Open the control center by swiping down from the top right corner of your iPhone screen. For older iphones, you might need to swipe up from the bottom of the screen to access the control center.
On the control center, press and hold the tray that contains the Wifi, Bluetooth and mobile data icons. This will expand the tray and now you can see the Airdrop icon.
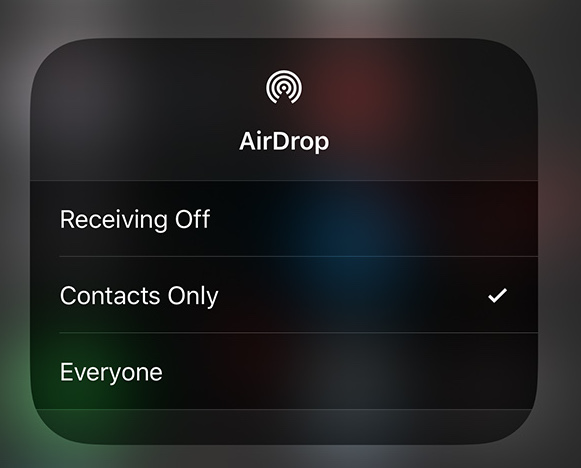
If Airdrop is off, then the icon is not Blue. Tap on it and choose either ‘Contacts Only’ or ‘Everyone’. This will turn on Airdrop and allow you to receive files from other Apple devices as explained above.
How To Turn On Airdrop On Mac / Macbook
Just like the mobile devices, your Mac will turn on Airdrop (if it was off) when you attempt to send files. After the transfer it will go back o the state it was in. But you need to have Airdrop on to receive files.
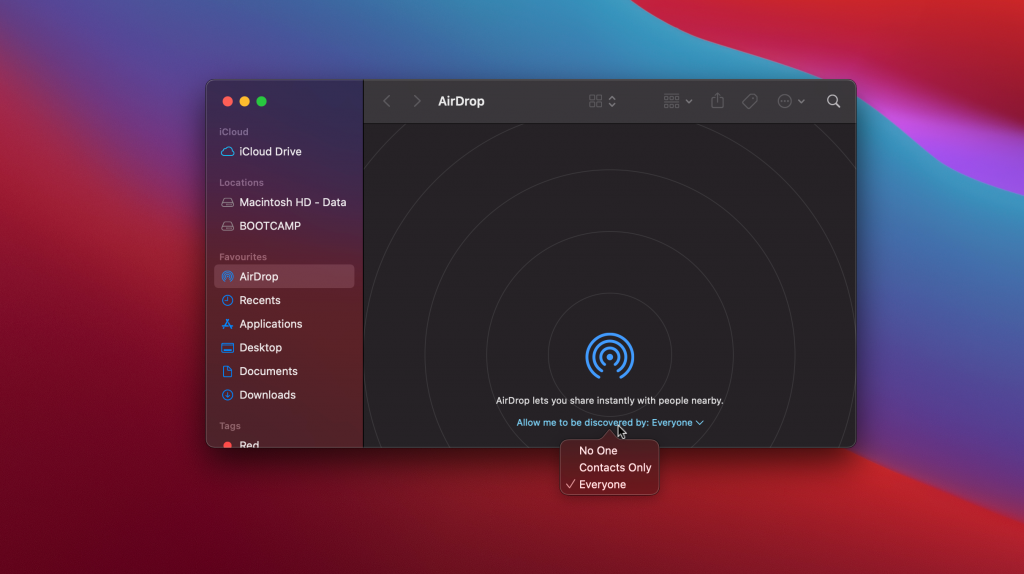
To turn on Airdrop on Mac, simply click on ‘Go’ in the menu on the upper right side of the home screen and select ‘Airdrop’. You can also press Shift + Command + R to open the Airdrop app.

With the Airdrop application open, you can now go ahead and use the drop down menu with the words ‘Allow me to be discovered by : …’ Choose to turn on Airdrop for everyone or for contacts. Those will work the same way as explained above.
From The Control Center:
If you’re using newer iterations of MacOS, then you should have a control center in the upper right side of your screen. Click on the control center icon and that will open some shortcuts one of which will be airdrop.
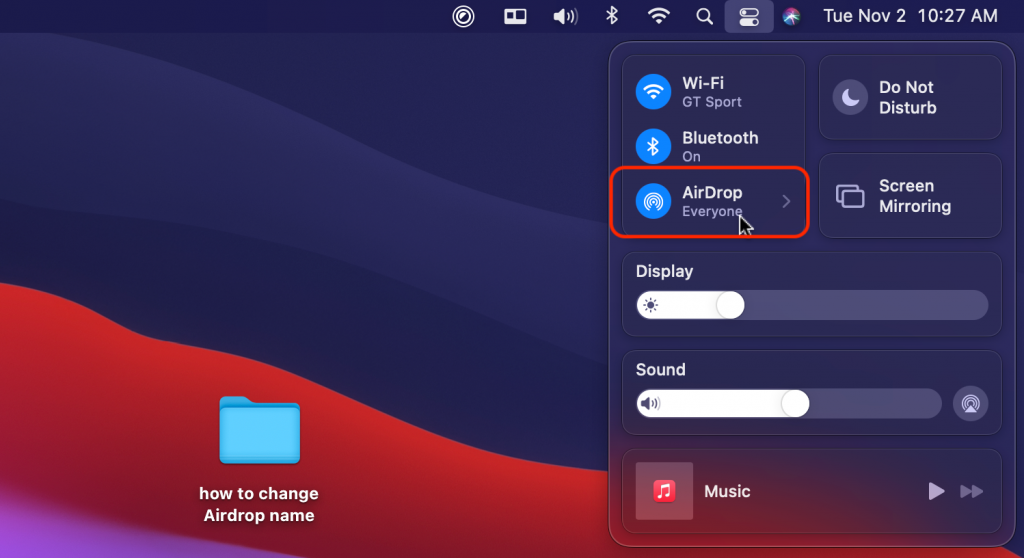
Click on Airdrop. If it’s off, you’ll see a toggle button to turn it on then you can select whether you want on for everyone or for contacts.
Note: If you have Airdrop turned on but still can’t receive files on. either the MAc or iPhone, you might have it set to ‘Contacts Only’. This means only devices on your contacts list can discover and send files. You might want to set it to ‘Everyone’ (video) to receive files from devices not on your contacts list. But remember to Turn it off or set it back to ‘Contacts Only’ afterwards.
Also Read: How To turn Off Airdrop
