Are you looking to install the GIMP image editor on your Mac or MacBook? GIMP, short for GNU Image Manipulation Program, is a popular open-source software that offers a wide array of powerful tools for editing and manipulating images.
Whether you’re a professional graphic designer or simply someone who enjoys enhancing their photos, GIMP is a fantastic option.
In this guide, we will walk you through the step-by-step process of installing GIMP on your Mac or MacBook, enabling you to take full advantage of its features and capabilities.
Also watch: How To Fix ‘Invite Link Was Reset’ Error On WhatsApp
How To Install GIMP Image Editor On MacBook
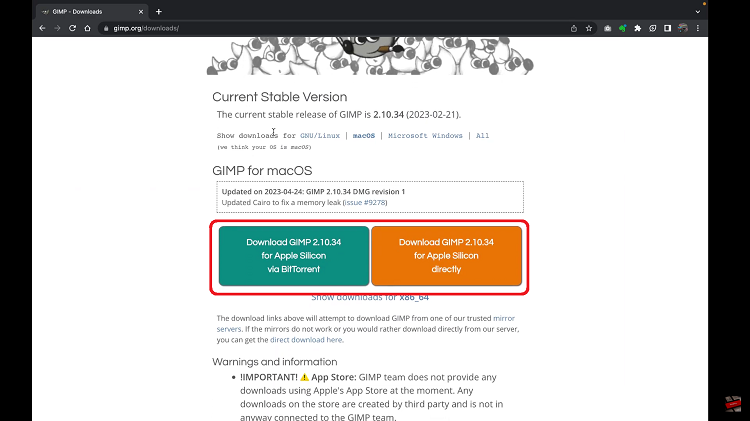
Firstly, visit the official GIMP website at www.gimp.org and navigate to the “Downloads” tab in the top navigation menu. Locate the version specifically designed for macOS and click on the download link.

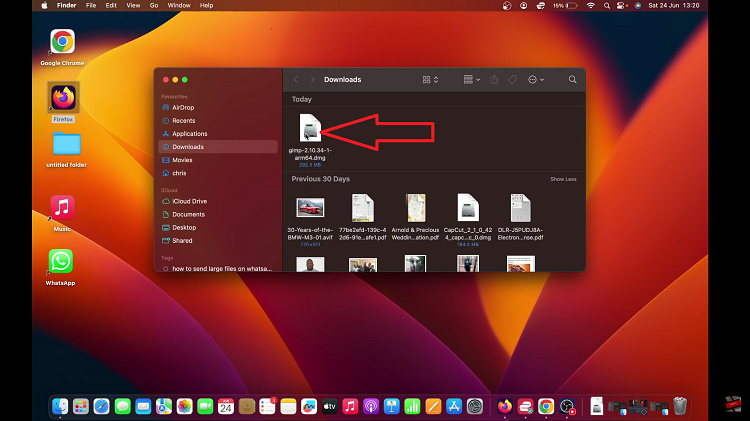
Next, wait for the file to complete downloading, which may take a few minutes depending on your internet connection speed. Then, locate the downloaded file with a “.dmg” extension in your default Downloads folder or the specified location.

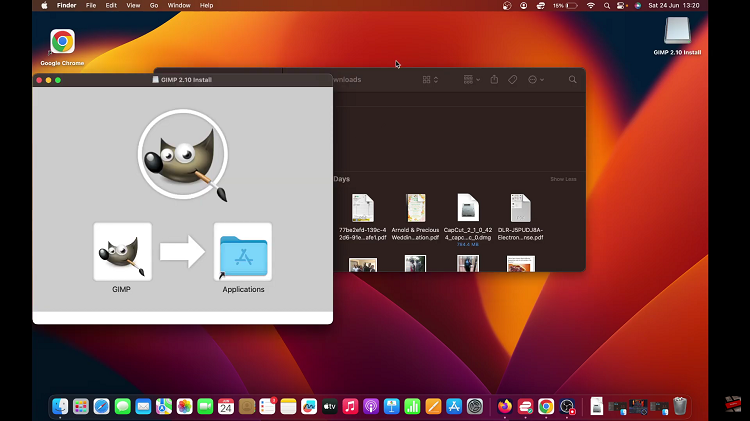
Double-click on the downloaded file to open it, then drag and drop the GIMP icon into your “Applications” folder. If prompted, provide your system password to authorize the installation.

After successfully copying GIMP to your preferred location, navigate to the “Applications” folder or the location where you installed GIMP. Locate the GIMP application icon and double-click on it to launch the software.
By following these steps, you have now successfully installed GIMP on your Mac or MacBook. You can now explore the vast range of features and tools GIMP offers to enhance and manipulate your images.
Also read: How To Screen Mirror Apple Watch To iPhone

